Once you've created your product, the next step is to customize it to make it appealing and informative for your customers. How you personalize it depends on the type of product (digital file, course, or service).
Explore and turn on the core features you want to include. These let you create a limited offer, redirect customers after purchase, add an automatic discount, hide the product in your store, and more.

 For downloadable products For services For courses
Write a clear and detailed description that puts the spotlight on your product’s benefits. A good description answers potential customers’ questions and encourages them to buy.
Upload high-quality images that catch the eye. These visuals are essential for showing your product in a professional way.
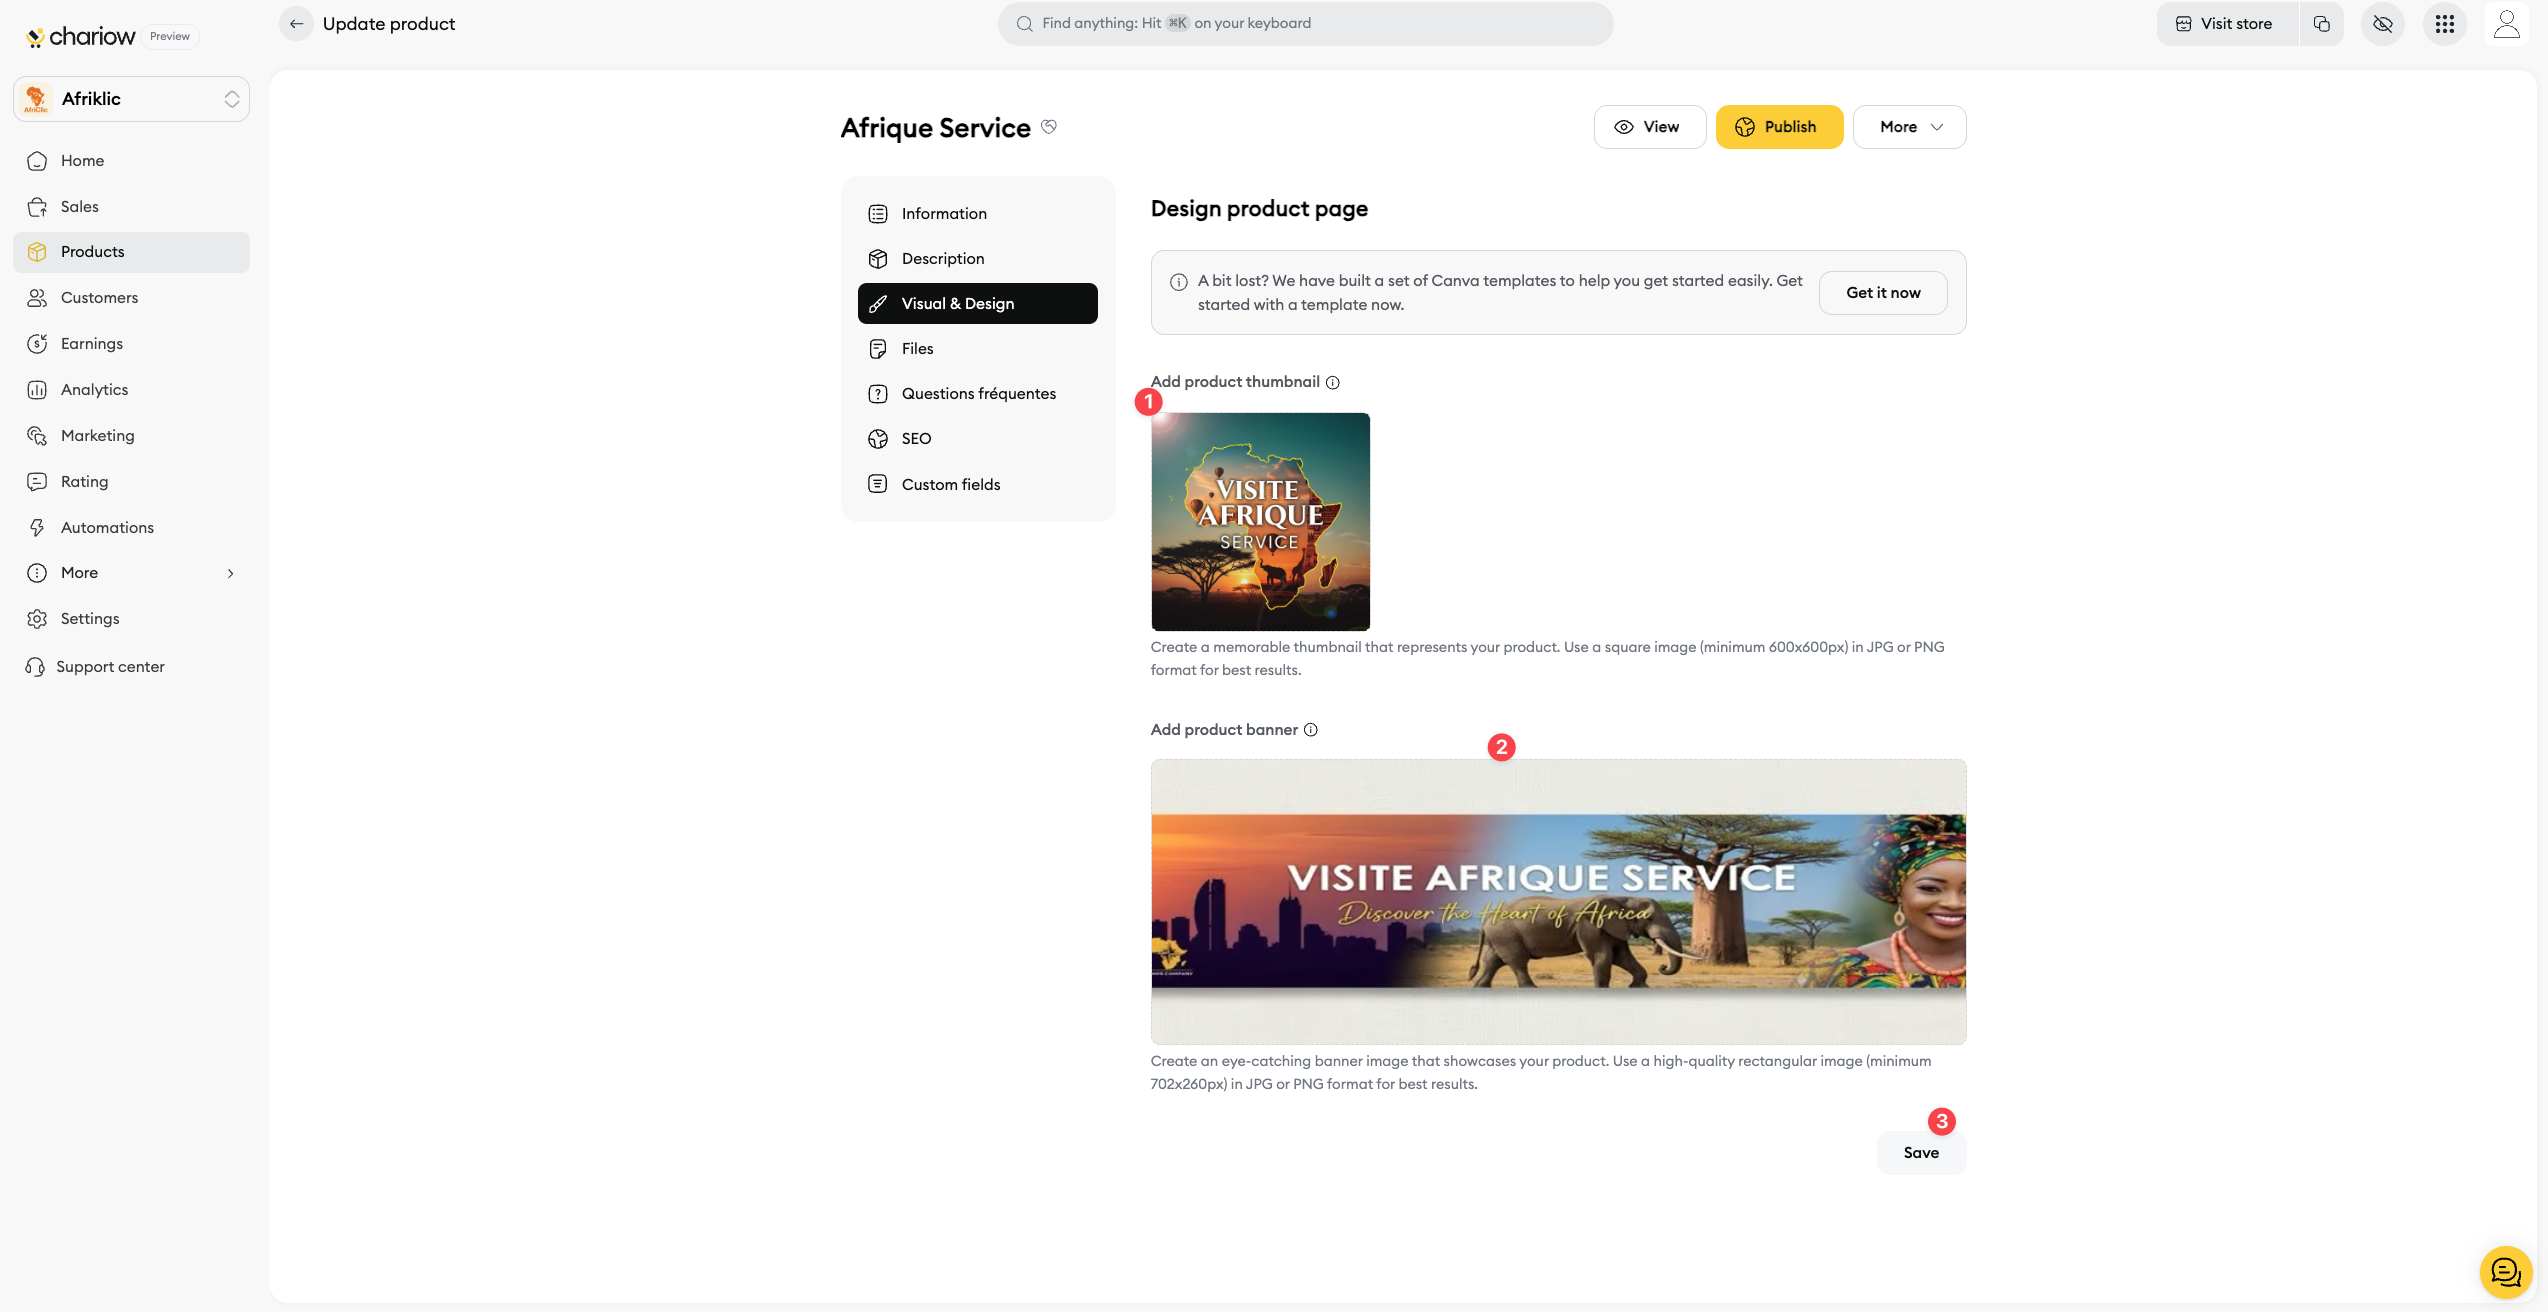
Thumbnail: Add a square image (minimum 600x600px) in JPG or PNG format. This is the main image that shows up in product lists.
Banner: Add a high-quality rectangular image (minimum 702x260px) in JPG or PNG format. The banner shows at the top of your product page for a more visual experience.
What are the dimensions for a product's thumbnail and banner?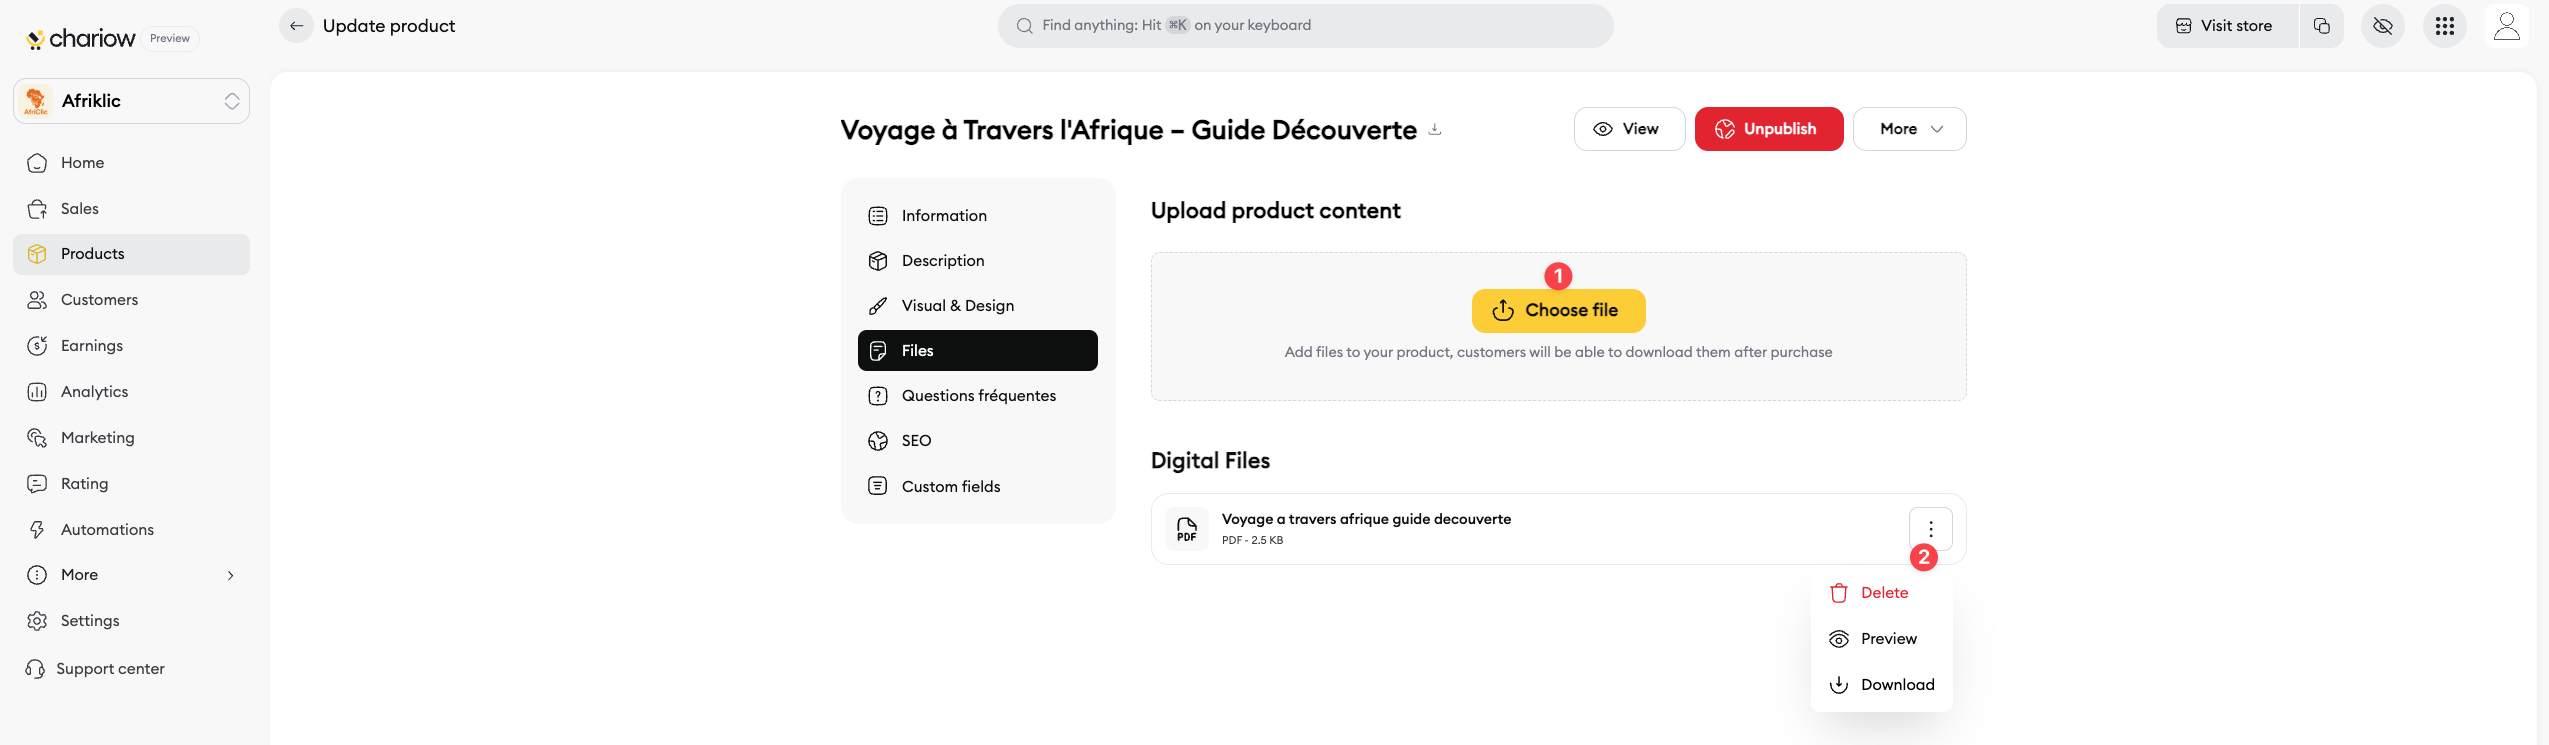
Upload the file(s) the customer will get after purchase by clicking the button. Make sure they fit the allowed types and max size.
You can delete them by clicking the quick actions button.
 What's the maximum file size for a product on Chariow? Which types of digital products to sell on Chariow?
For course-type products only. Organize your training in chapters and lessons. You can add text or video content (YouTube, Vimeo, or a custom iFrame).
managing course contentAs with your shop, each product can have its own SEO optimisation to improve its visibility in search engines.
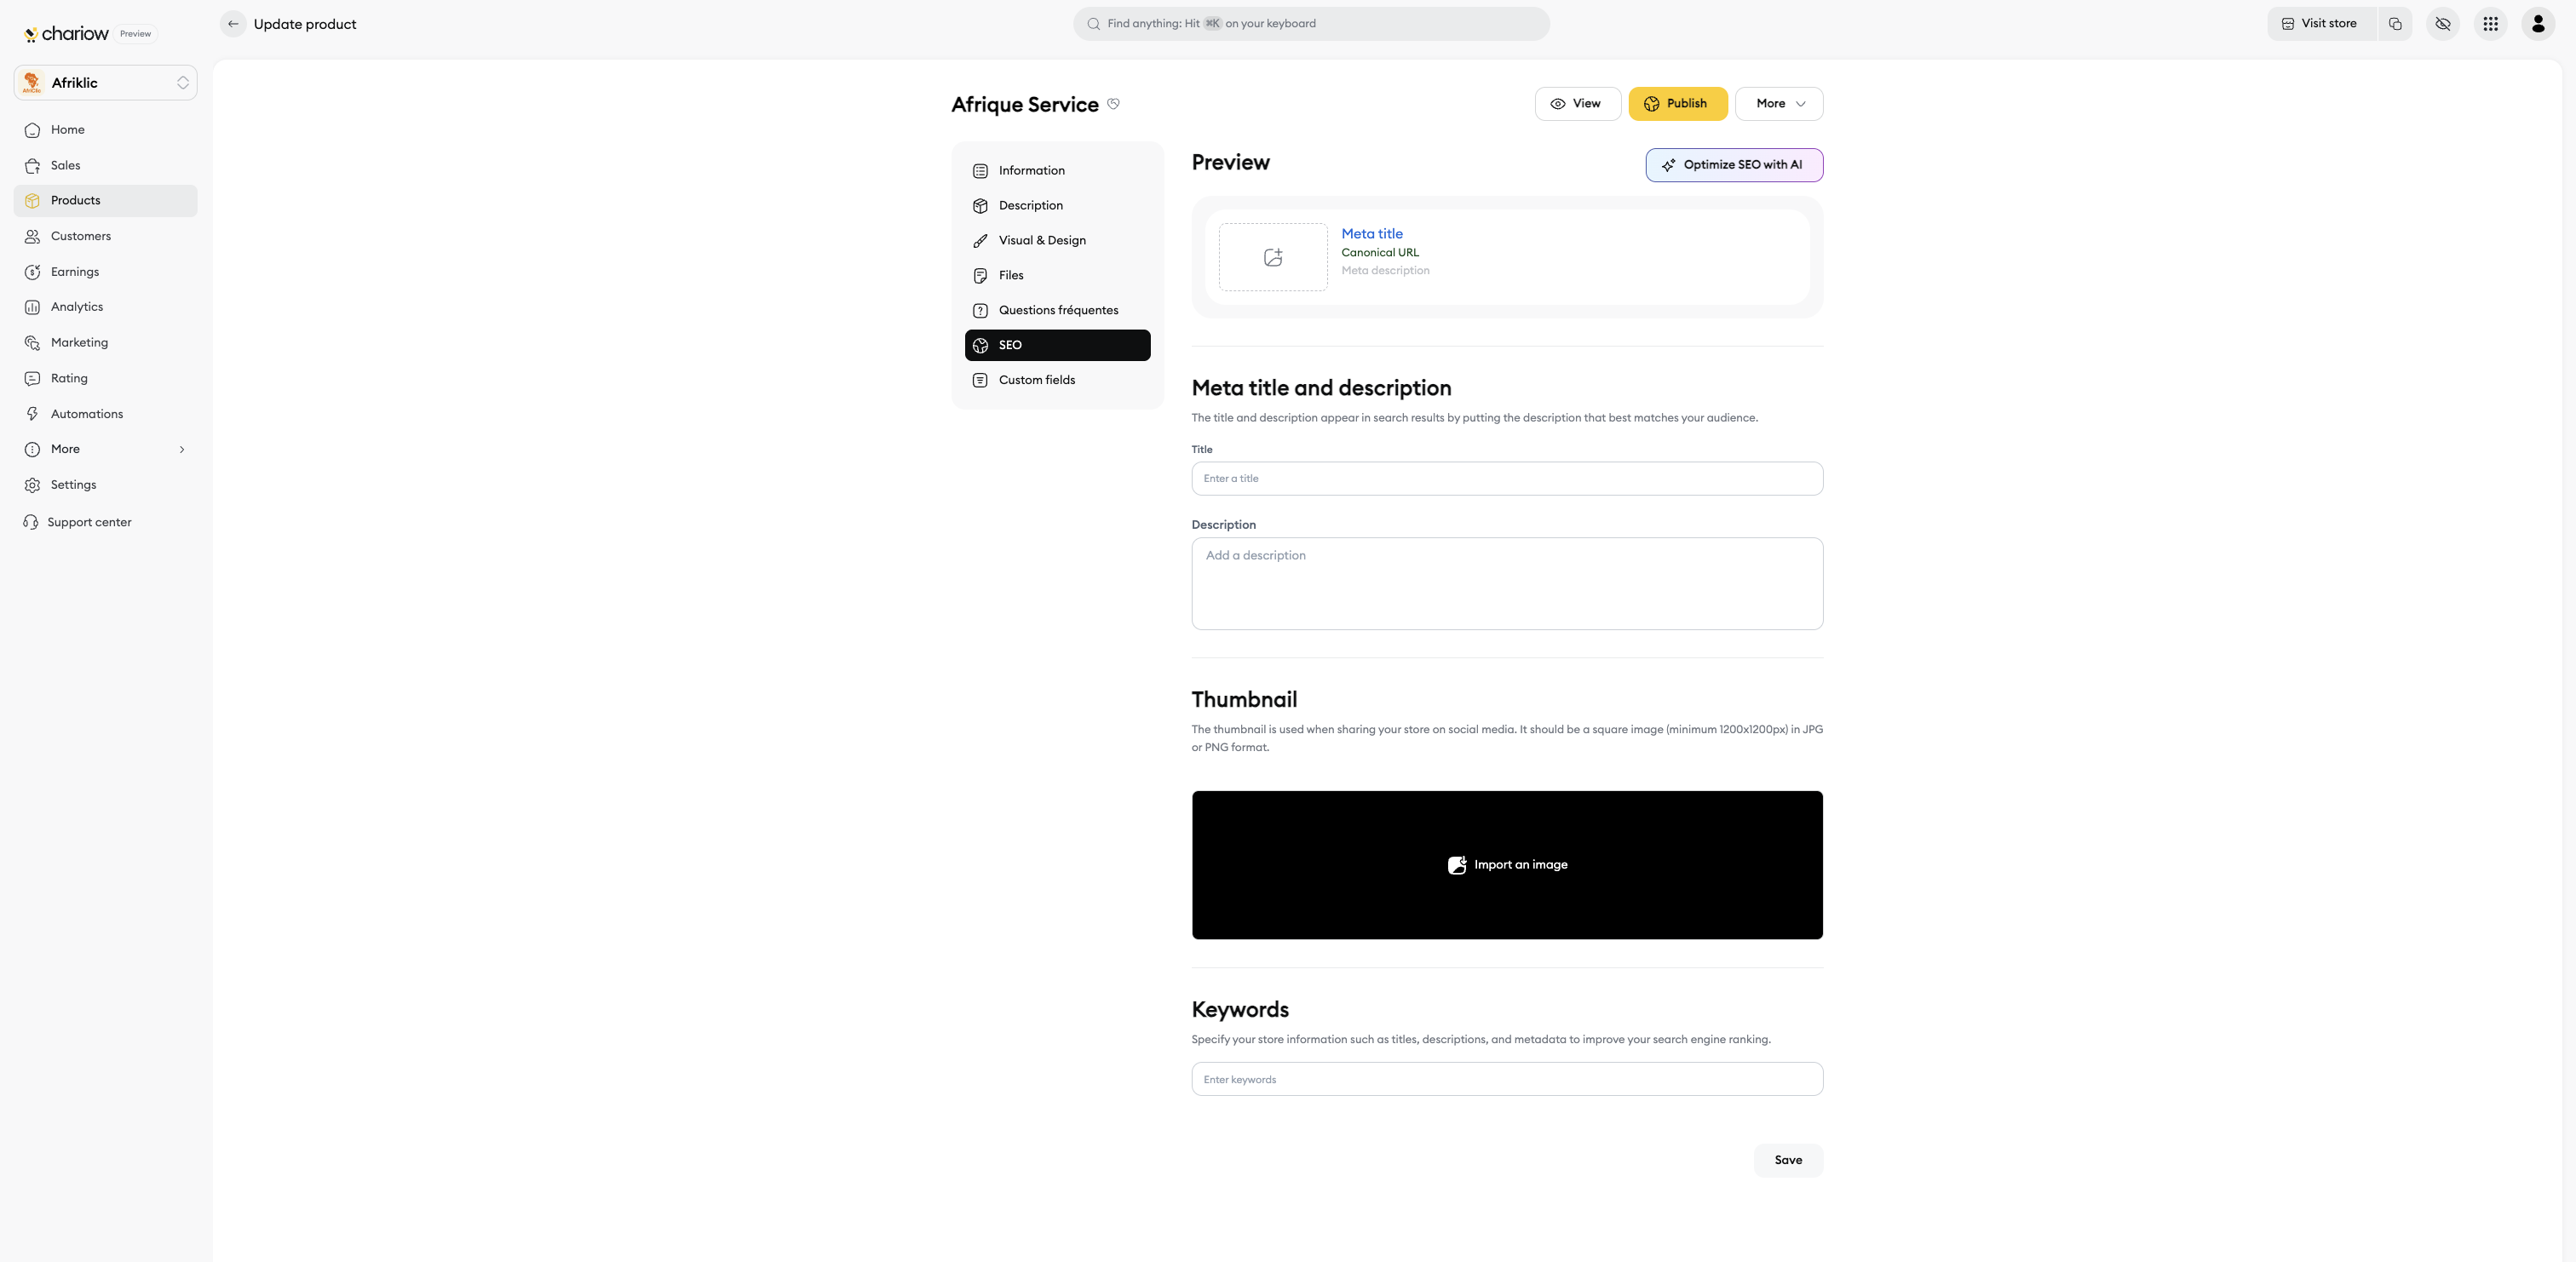
What you can optimise:
SEO title: A specific title for search engines, often richer in keywords than the title displayed on your shop.
Meta description: A concise and appealing description for search results, encouraging clicks.
Keywords: Relevant terms to help search engines understand and rank your product.
Optimise your Chariow shop's search engine optimisation (SEO)You can create custom fields to collect extra info from your customers (Telegram ID, WhatsApp number, etc.).
Add a frequently asked questions section right on your product page to answer your shoppers' common questions. A good FAQ reassures your customers and can help boost conversions.
Need help? Contact our support via chat or at [email protected]