After creating your coaching, Chariow lets you refine its setup. Whether it’s to restrict access, automate post-purchase follow-up, or customize the calendar, these settings are key to making your work as a consultant or expert more professional.
To edit or customize an existing course:
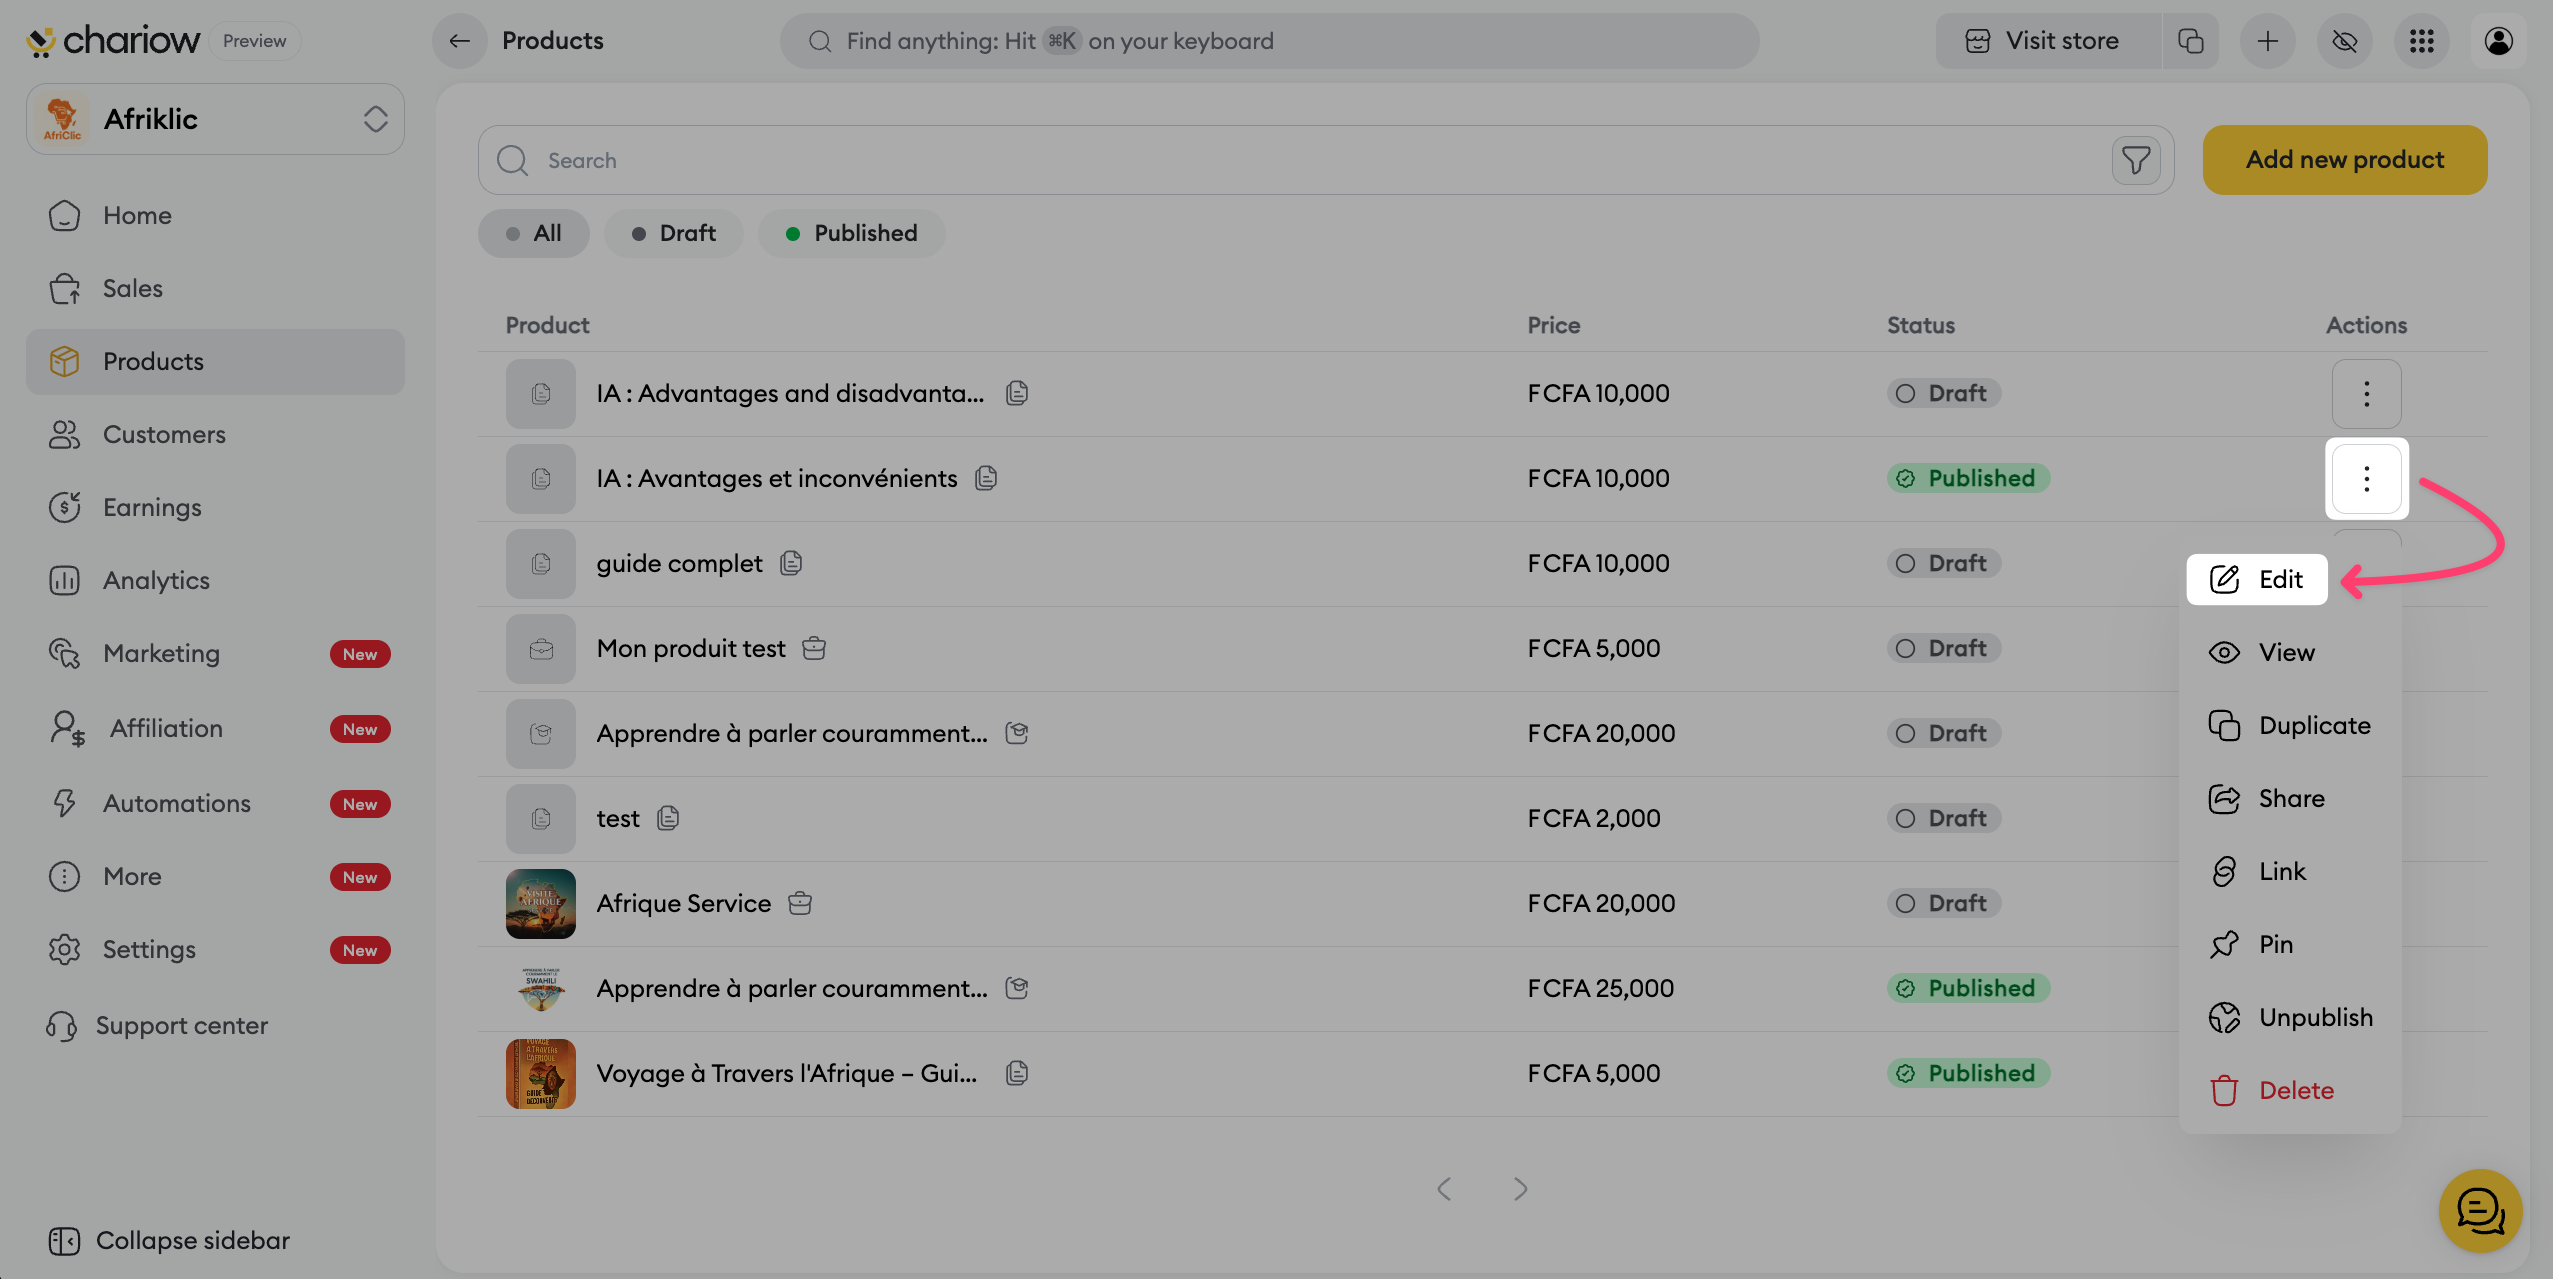
Go to the Products tab in the side menu.
Click on the three action dots (⋮) to the right of your course and select Edit.
In the "Information" tab, you can access the strategic settings of your offer:
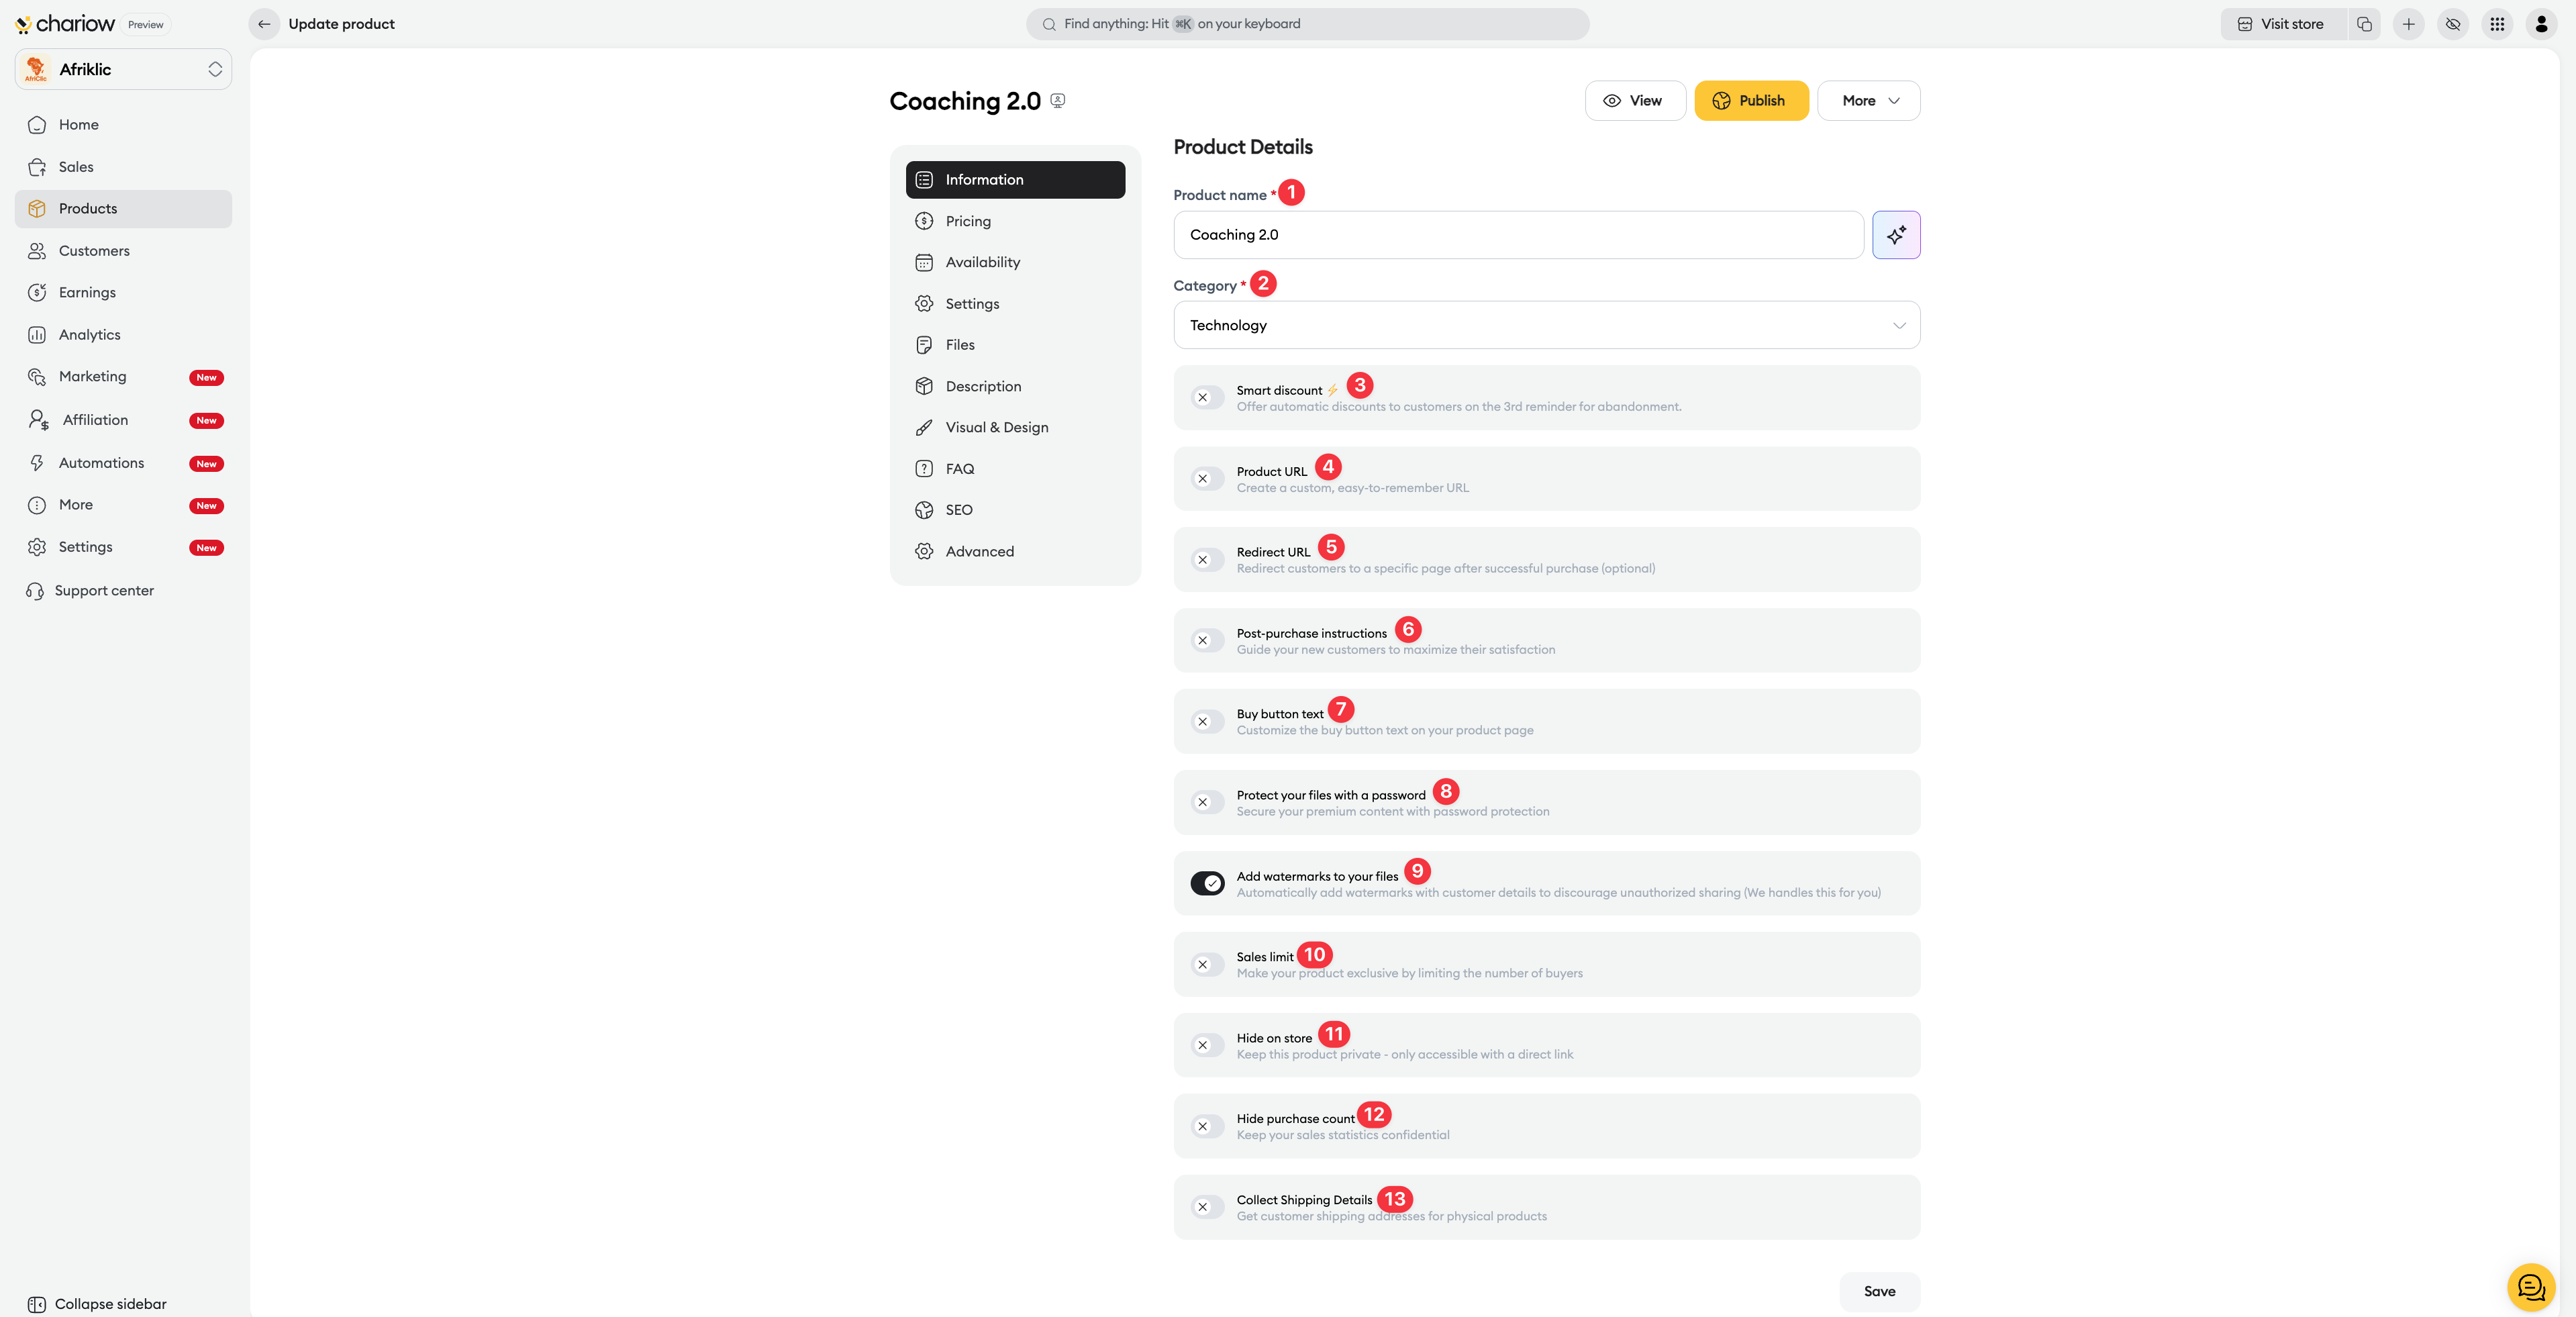
Basic details (1 and 2): Edit the product name and its category. Use the "AI Assistant" icon to generate a sales-optimized title.
Automatic discount (3): Turn on this option to offer dynamic discounts (e.g. during cart abandonment) to boost your conversions.
Custom URL (4): Edit the link of your sales page so it’s short and memorable (e.g. chariow.com/your-store/premium-coaching).
Redirect URL (5): Set a page where the customer will be automatically redirected after payment (e.g. a Telegram group or a preparation form).
Post-purchase instructions (6): Write a custom message that will be displayed on the success page to guide the customer on the next steps.
Purchase button text (7): Customize the call to action on your sales page (e.g. "Get the license").
Security (8 & 9): Protect access with a password or turn on automatic watermarks on your documents to discourage unauthorized sharing.
Limits and Visibility (10, 11 & 12): Set a registration limit, hide the course from your public store, or hide the number of enrolled students.
Shipping (13): Turn on collection of shipping addresses if you want to collect your customers’ postal details.
Edit or update your coaching offer at any time:
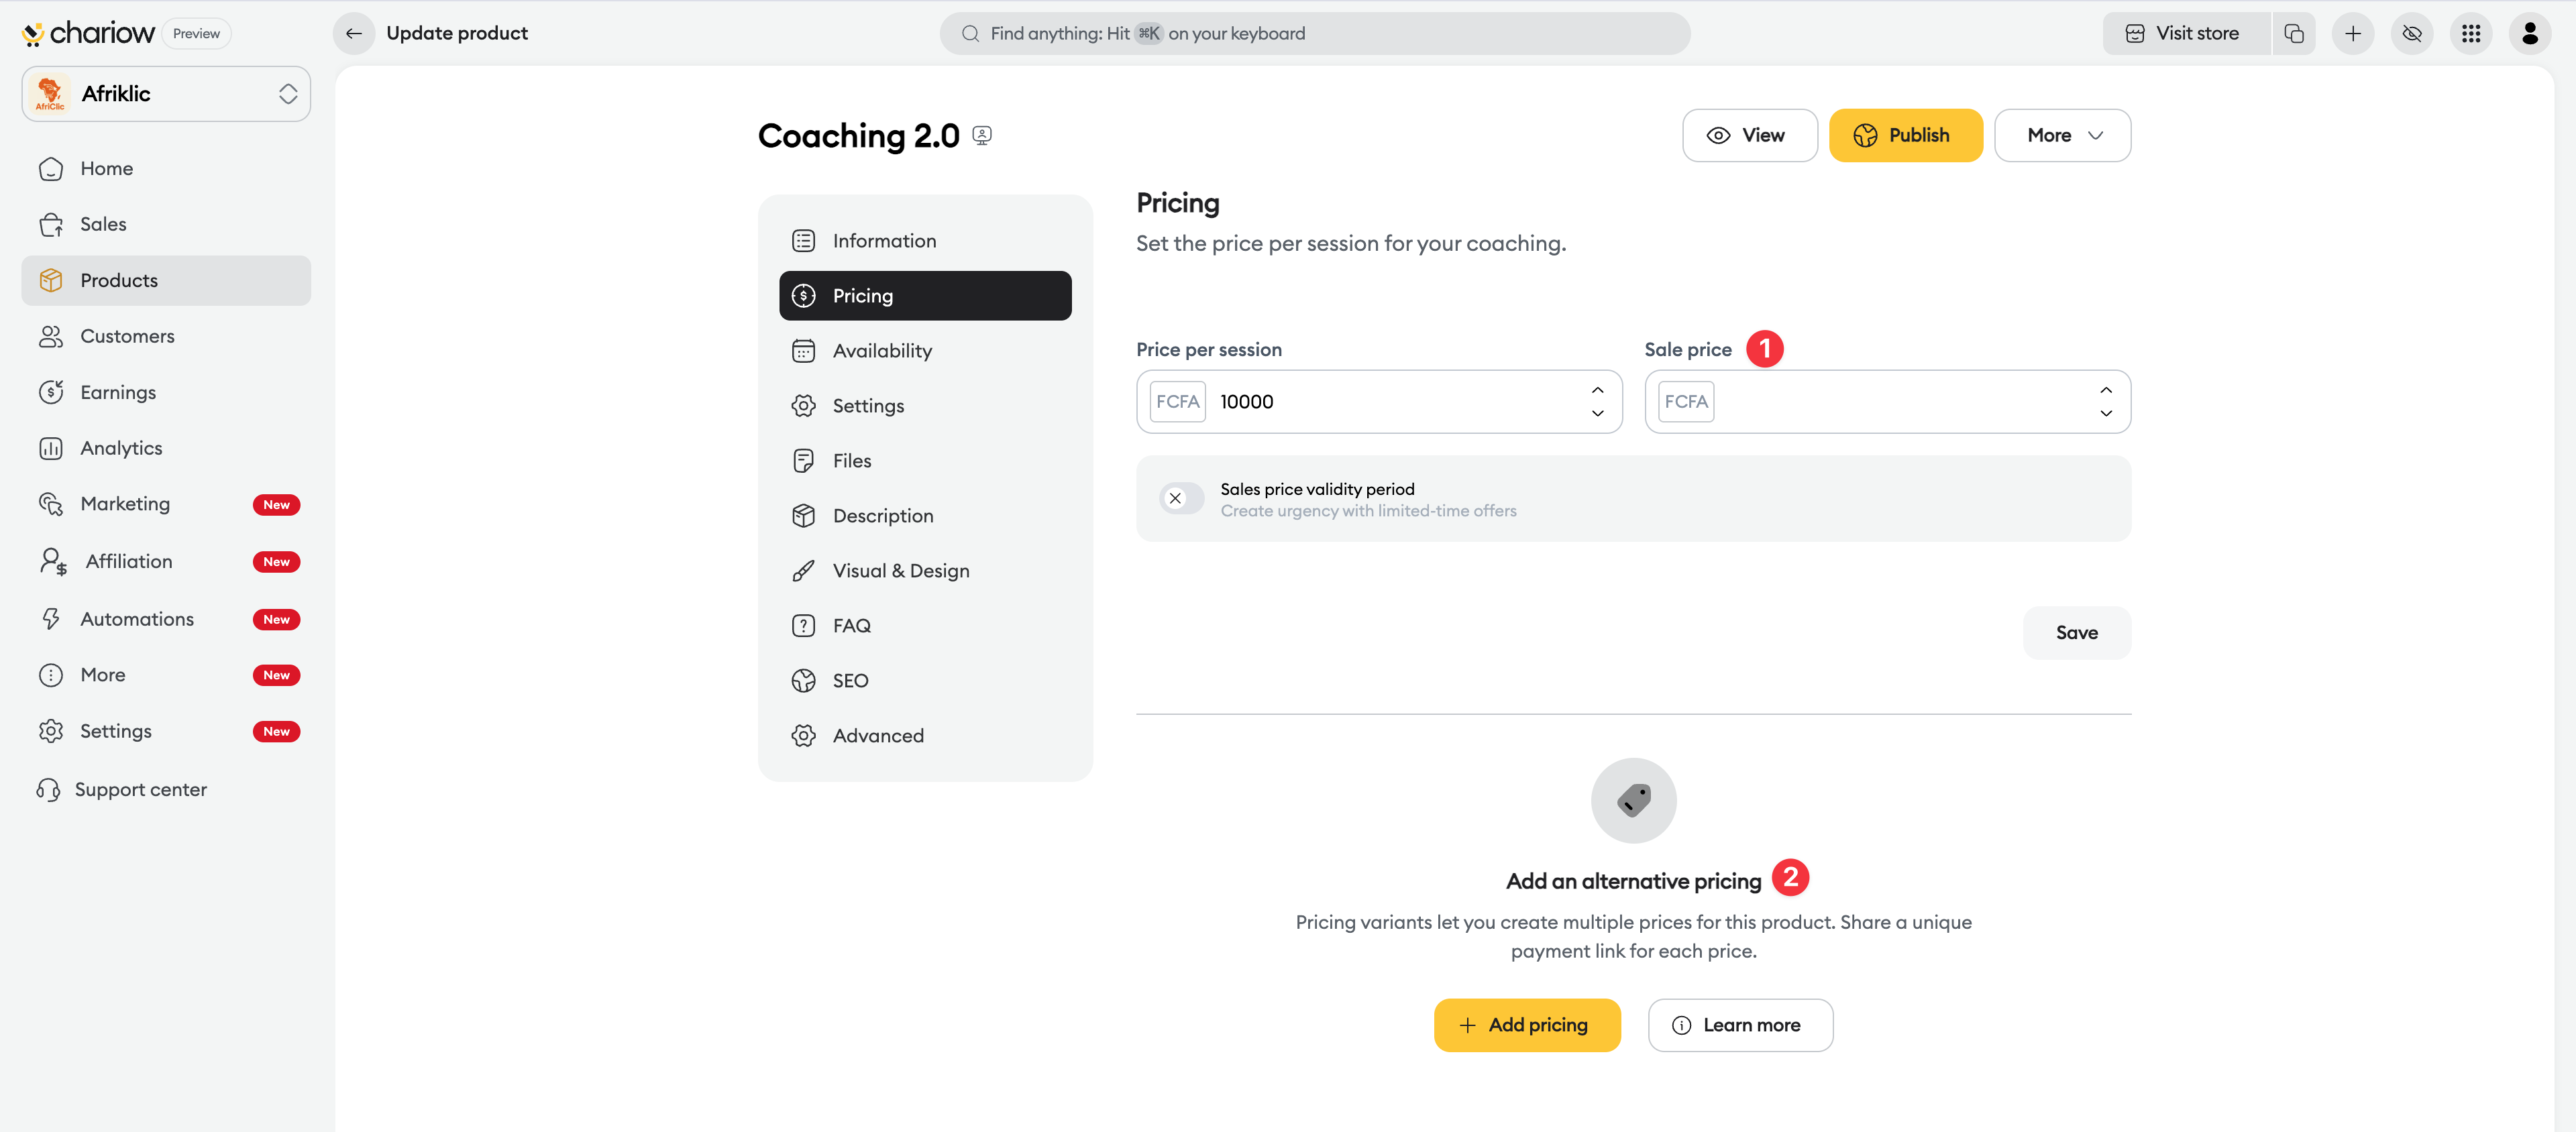
Promotional price: Show a crossed-out price to create a sense of opportunity in your store.
Price variants: You can offer several price options for the same product.
This is the engine of your dynamic calendar. Chariow makes sure you’re only booked when you want to be:
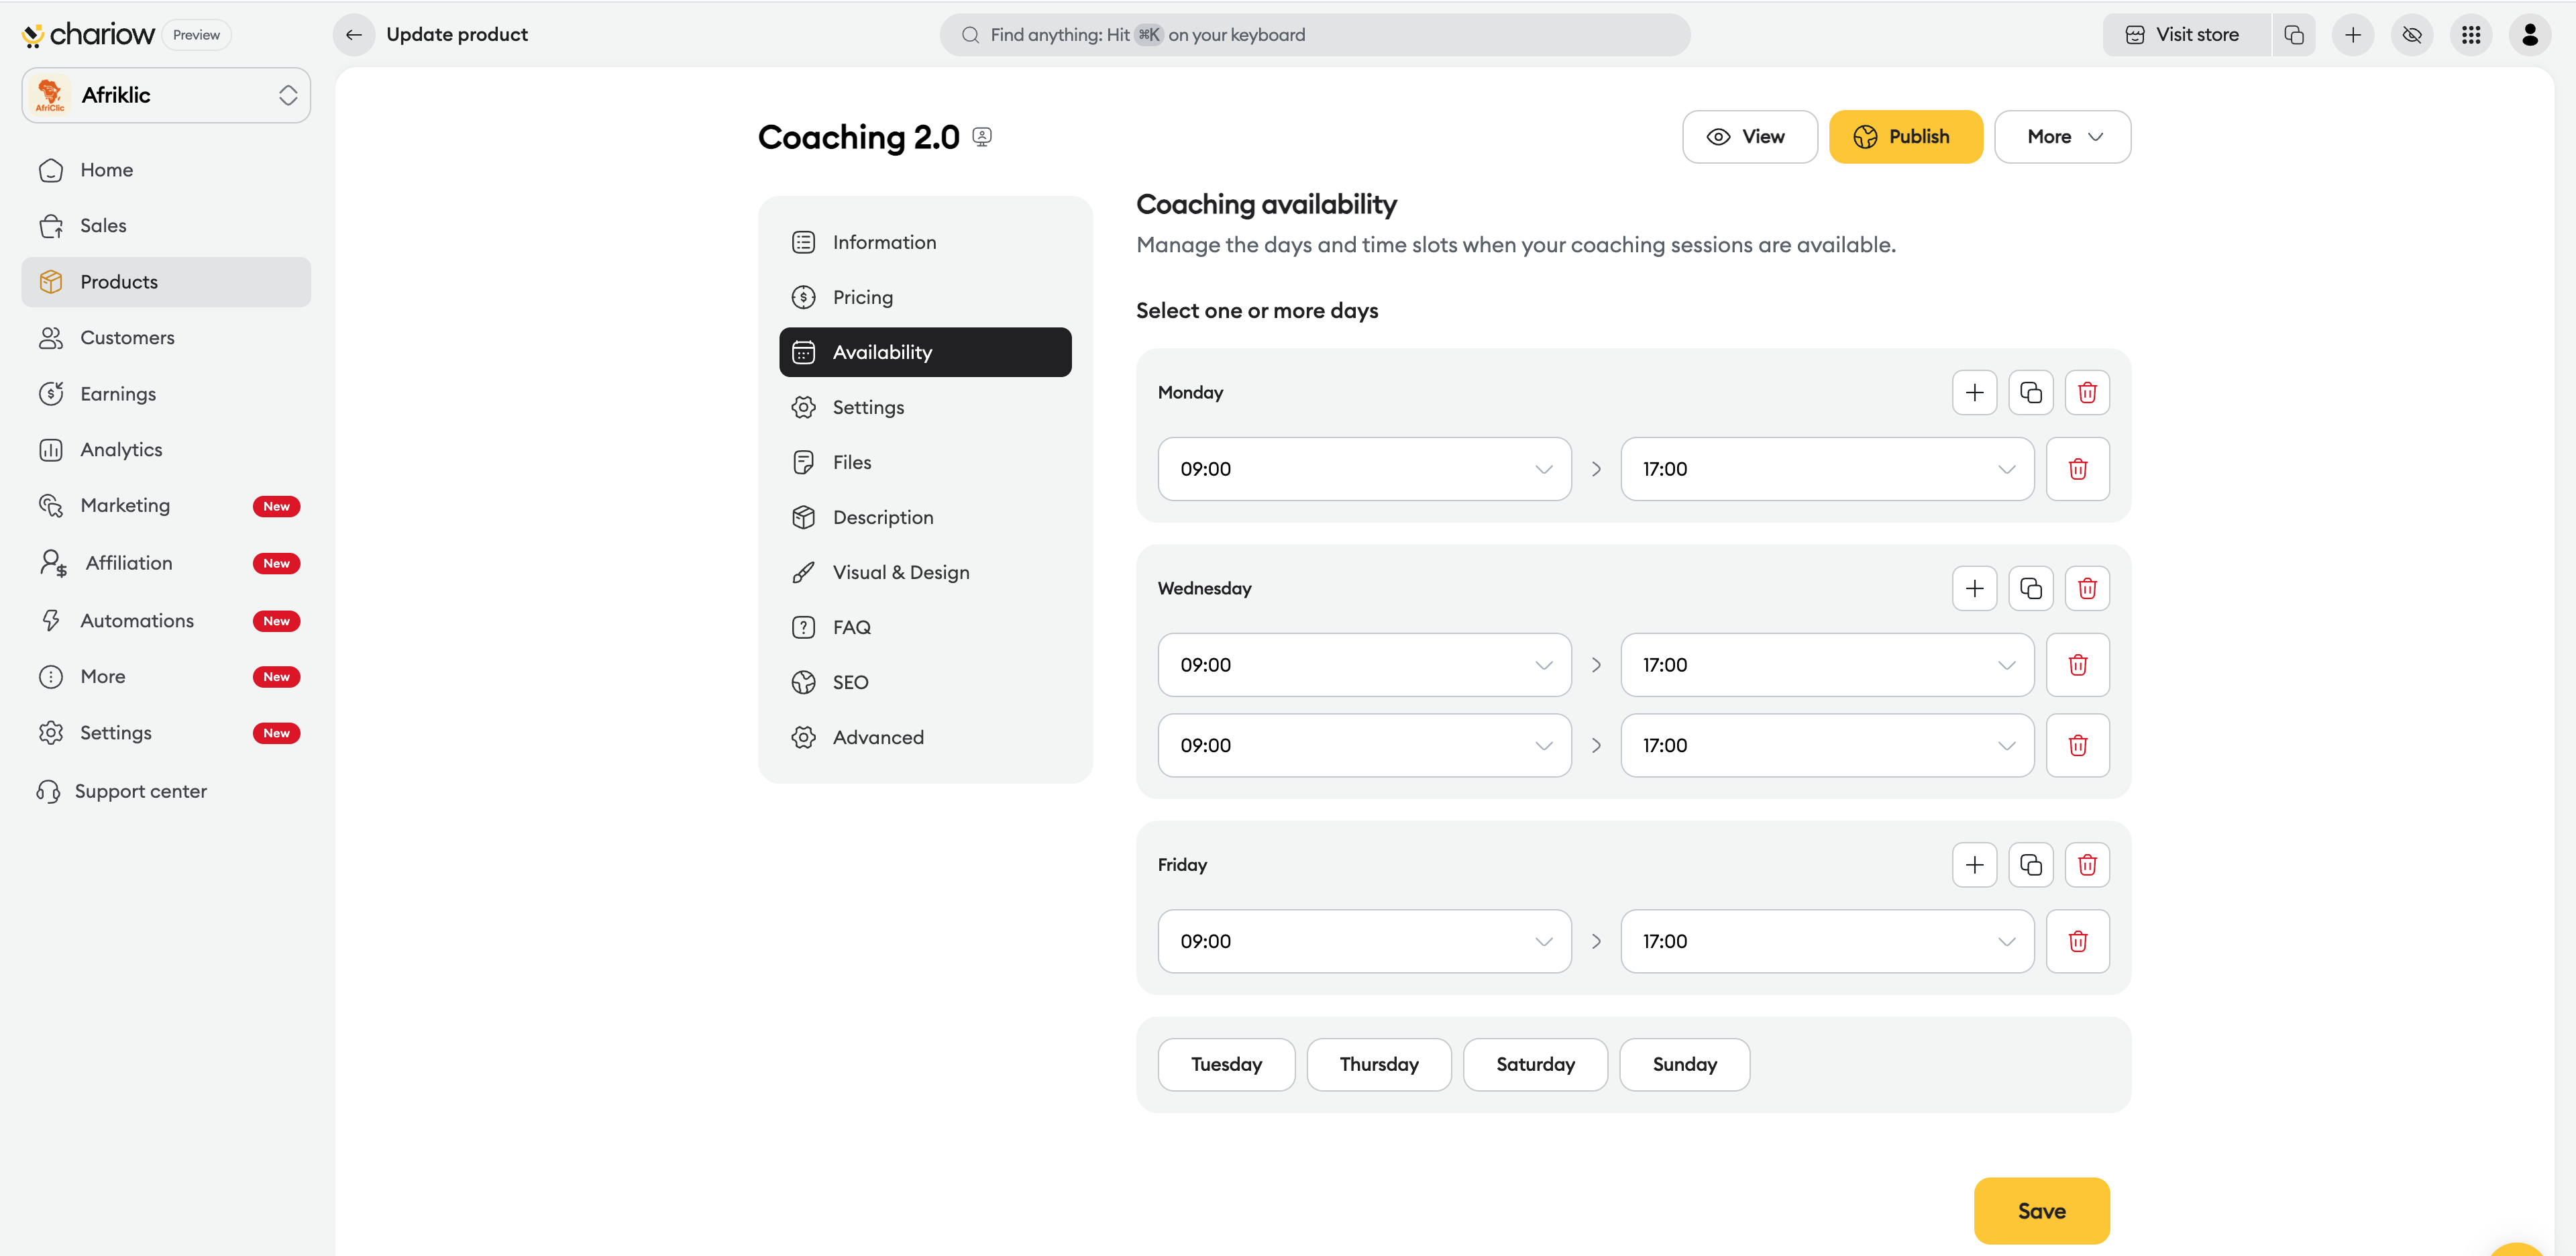
Slot management: Add or remove time ranges for each day of the week.
Quick duplication: Use the "Copy" icon to apply Monday's hours to all other working days in one click.
Real-time sync: If an external calendar is connected, the slots already taken by your personal appointments will automatically be hidden from your clients.
The "Settings" tab lets you define how your sessions work and automate the management of your schedule.
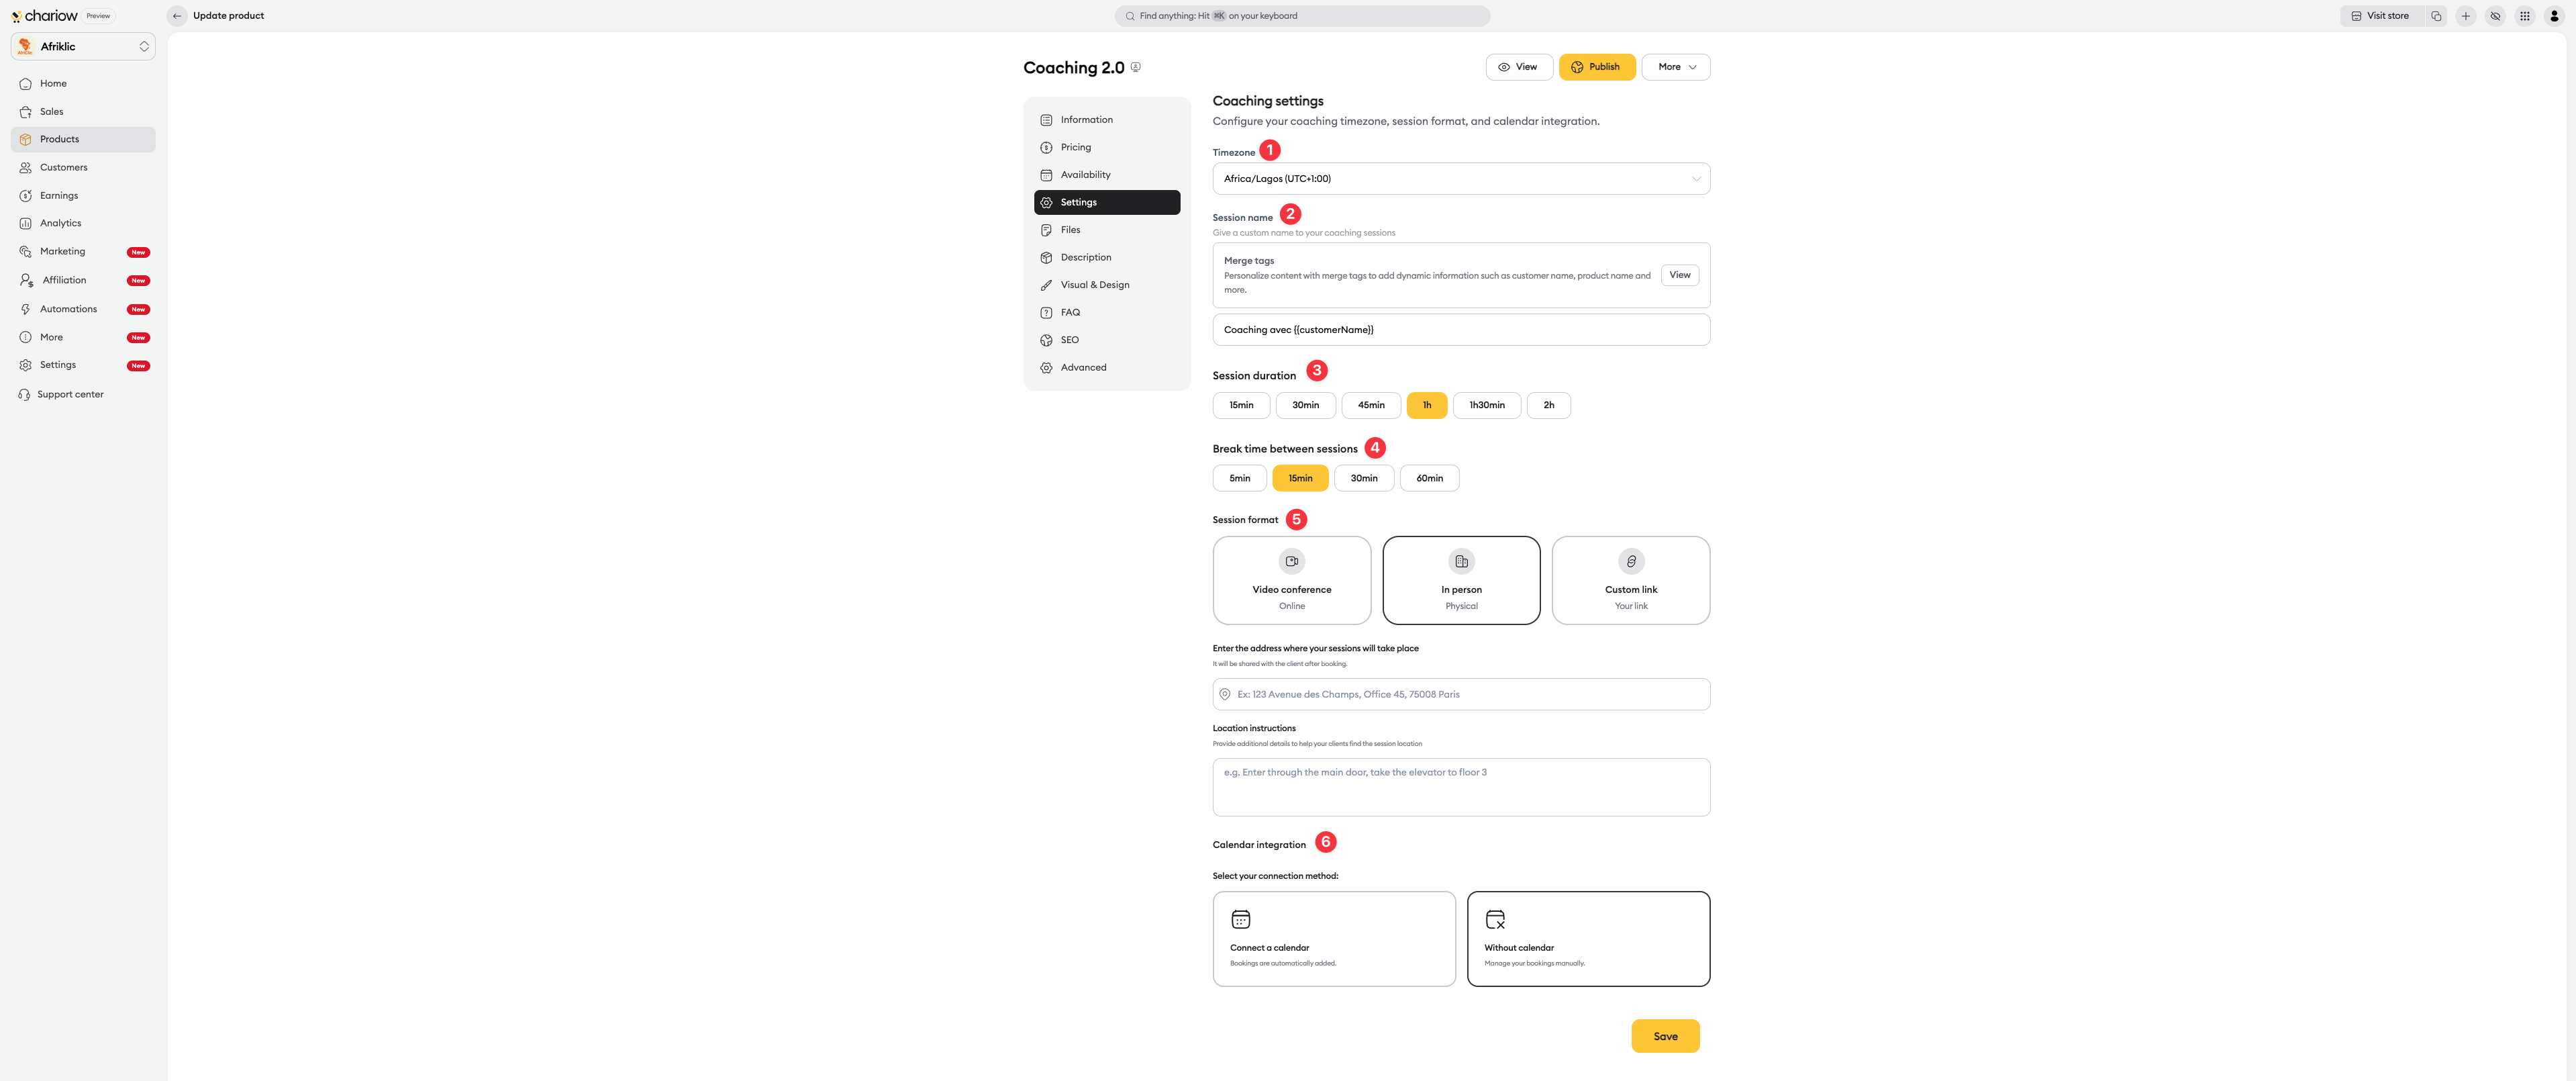
Time zone (1): A critical part of your setup. Make sure it matches your geographical location. Chariow will automatically convert your times for clients in other time zones.
Session name & merge tags (2): Customize the appointment title that will appear in calendars.
Tip: Click on "View" next to the merge tags to use dynamic variables like {{ customerName }}.
Example: Strategic coaching with {{ customerName }}.
Session duration (3): Select the time allocated to each appointment (15min, 30min, 45min, 1h, 1h30, 2h).
Break between sessions (4): Set an essential buffer time (from 5 to 60 min) to avoid back-to-back calls with no transition and to give yourself time to prepare your files.
Meeting format (5): Choose how you want to communicate with your client:
Video call: Connect a third-party service to automatically generate a unique meeting link for each session.
In person: Enter the physical address of the appointment. You also have an "Access instructions" field to specify the floor, door code, or office.
Custom link: If you use a permanent meeting link (e.g. personal Zoom, fixed Google Meet), insert it here.
Calendar integration (6): Set how Chariow should interact with your personal calendar:
Connect a calendar: Select your calendar (Apple Calendar, Zoho, etc.). Once connected, Chariow will automatically add new bookings to your calendar and hide your already busy slots to avoid overbooking.
Without calendar: Choose this option if you’d rather manage your appointments manually. You’ll receive a notification after each purchase to schedule the session.
Coaching doesn’t stop at the conversation. You can provide additional resources:

Adding documents: Upload PDF guides, workbooks, or audio/video resources that the client will automatically receive after their purchase.
Anti-piracy protection: Turn on the "Digital watermark" option in the basic information so the buyer’s email is printed on every page of the provided PDF documents.
Instant access: Files can be downloaded immediately and are available in the buyer’s secure client area as soon as the payment is confirmed.
Get ahead of your customers’ doubts by adding an FAQ section directly on your sales page. You can create your own questions or import them from other products to save time.
➜ Read the guide: Set up your product FAQ
Optimize the title, meta description, and sharing thumbnail (Open Graph) so your product appears attractively on search engines and social media.
➜ Read the guide: Optimize your products’ SEO
Need specific information when an order is placed (e.g. an ID, a date of birth, a preference)? Add required or optional form fields that the customer has to fill in before confirming their purchase.
➜ Read the guide: Use custom fields
Need help? Contact our support via chat or at [email protected]