

Metadata lets you add custom label/value pairs to your products. Unlike custom fields, this information isn’t meant to be filled in by the customer, but is used to structure your data for third-party tools or for your own admin management.
Steps to add metadata
The setup is done directly from your product’s edit interface:
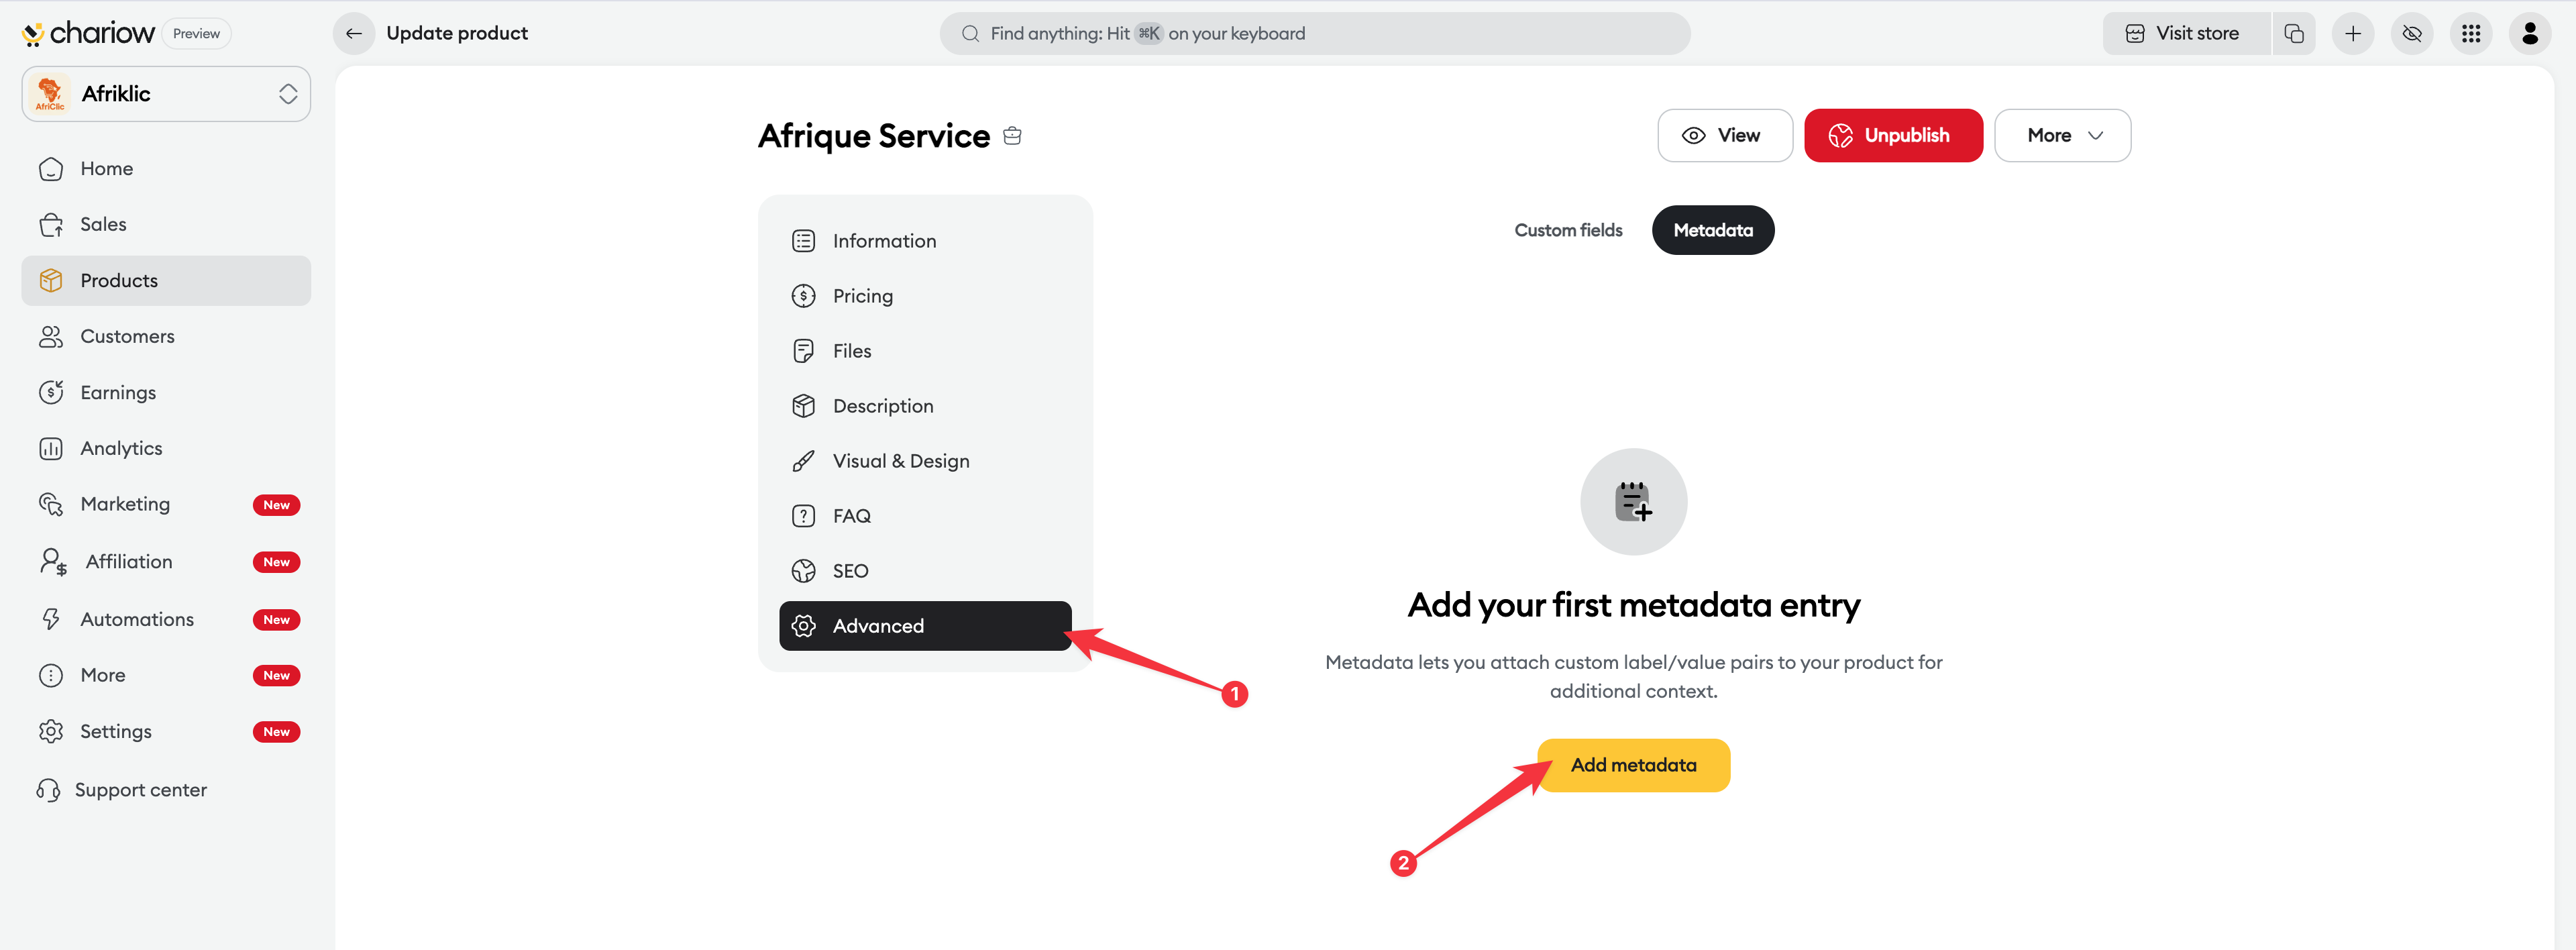
Access to settings : On the product edit page, click on the Advanced tab in the left sidebar menu.
Mode selection : At the top of the central area, switch to the Metadata tab (located next to "Custom fields").
Creation : Click on the Add a metadata button.
Configuration : A pop-up window asks you for two pieces of information:
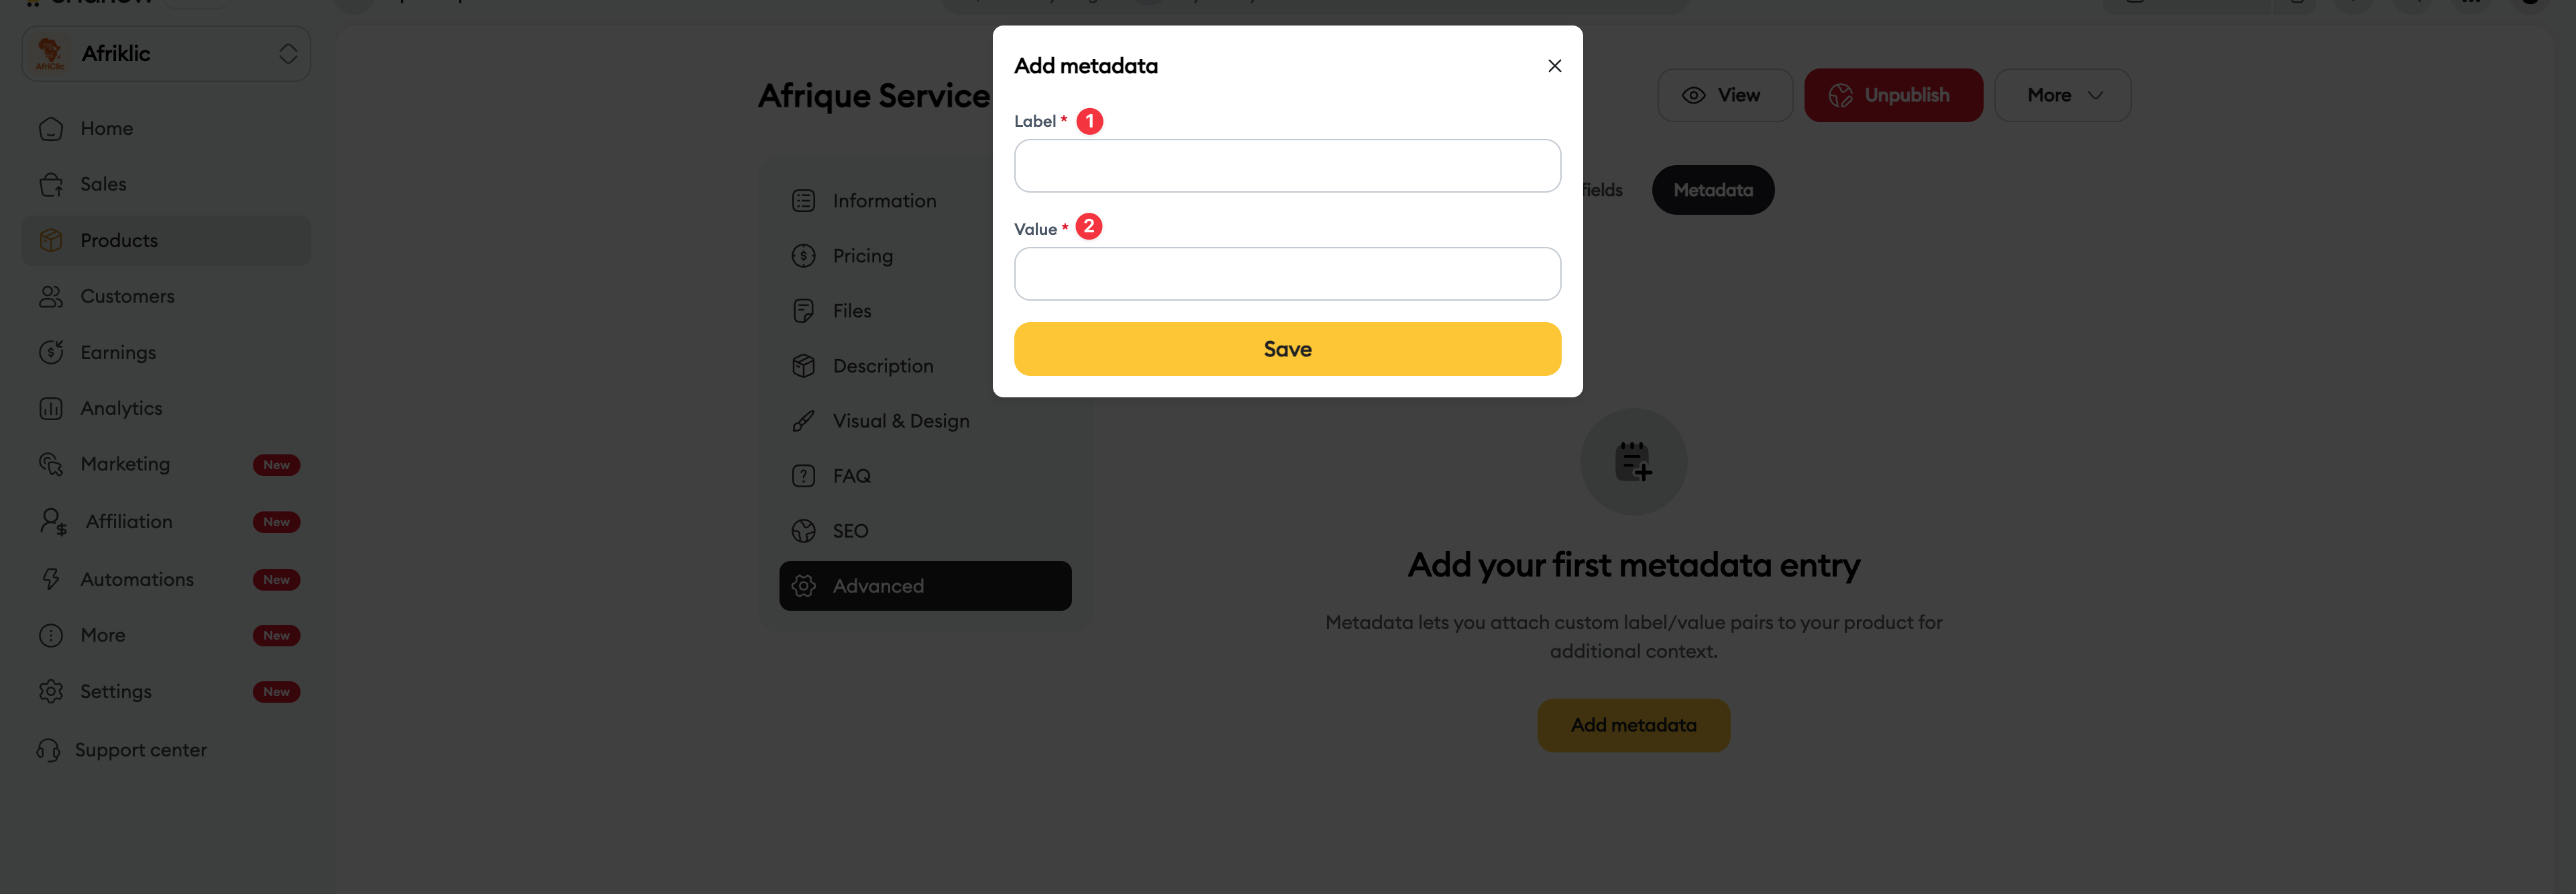
Label (1) : The name of your technical data (e.g. ID_Fournisseur, Référence_Interne).
Value (2) : The specific content linked to this label for this product.
Save : Click on Save to confirm the addition.
Why use metadata?
Metadata is especially useful for:
Internal organization : Sort your products using reference codes specific to your own inventory.
Technical integrations : Send unique IDs to external apps via automations (Zapier, Webhooks, etc.).
Segmentation : Filter your products in your analytics reports based on criteria that don’t need to appear publicly on your store.
Need help? Contact our support via chat or at [email protected]