The product type Courses on Chariow is designed for creators who want to structure their knowledge into chapters and lessons. This path is optimized to offer your students a smooth and professional learning experience.
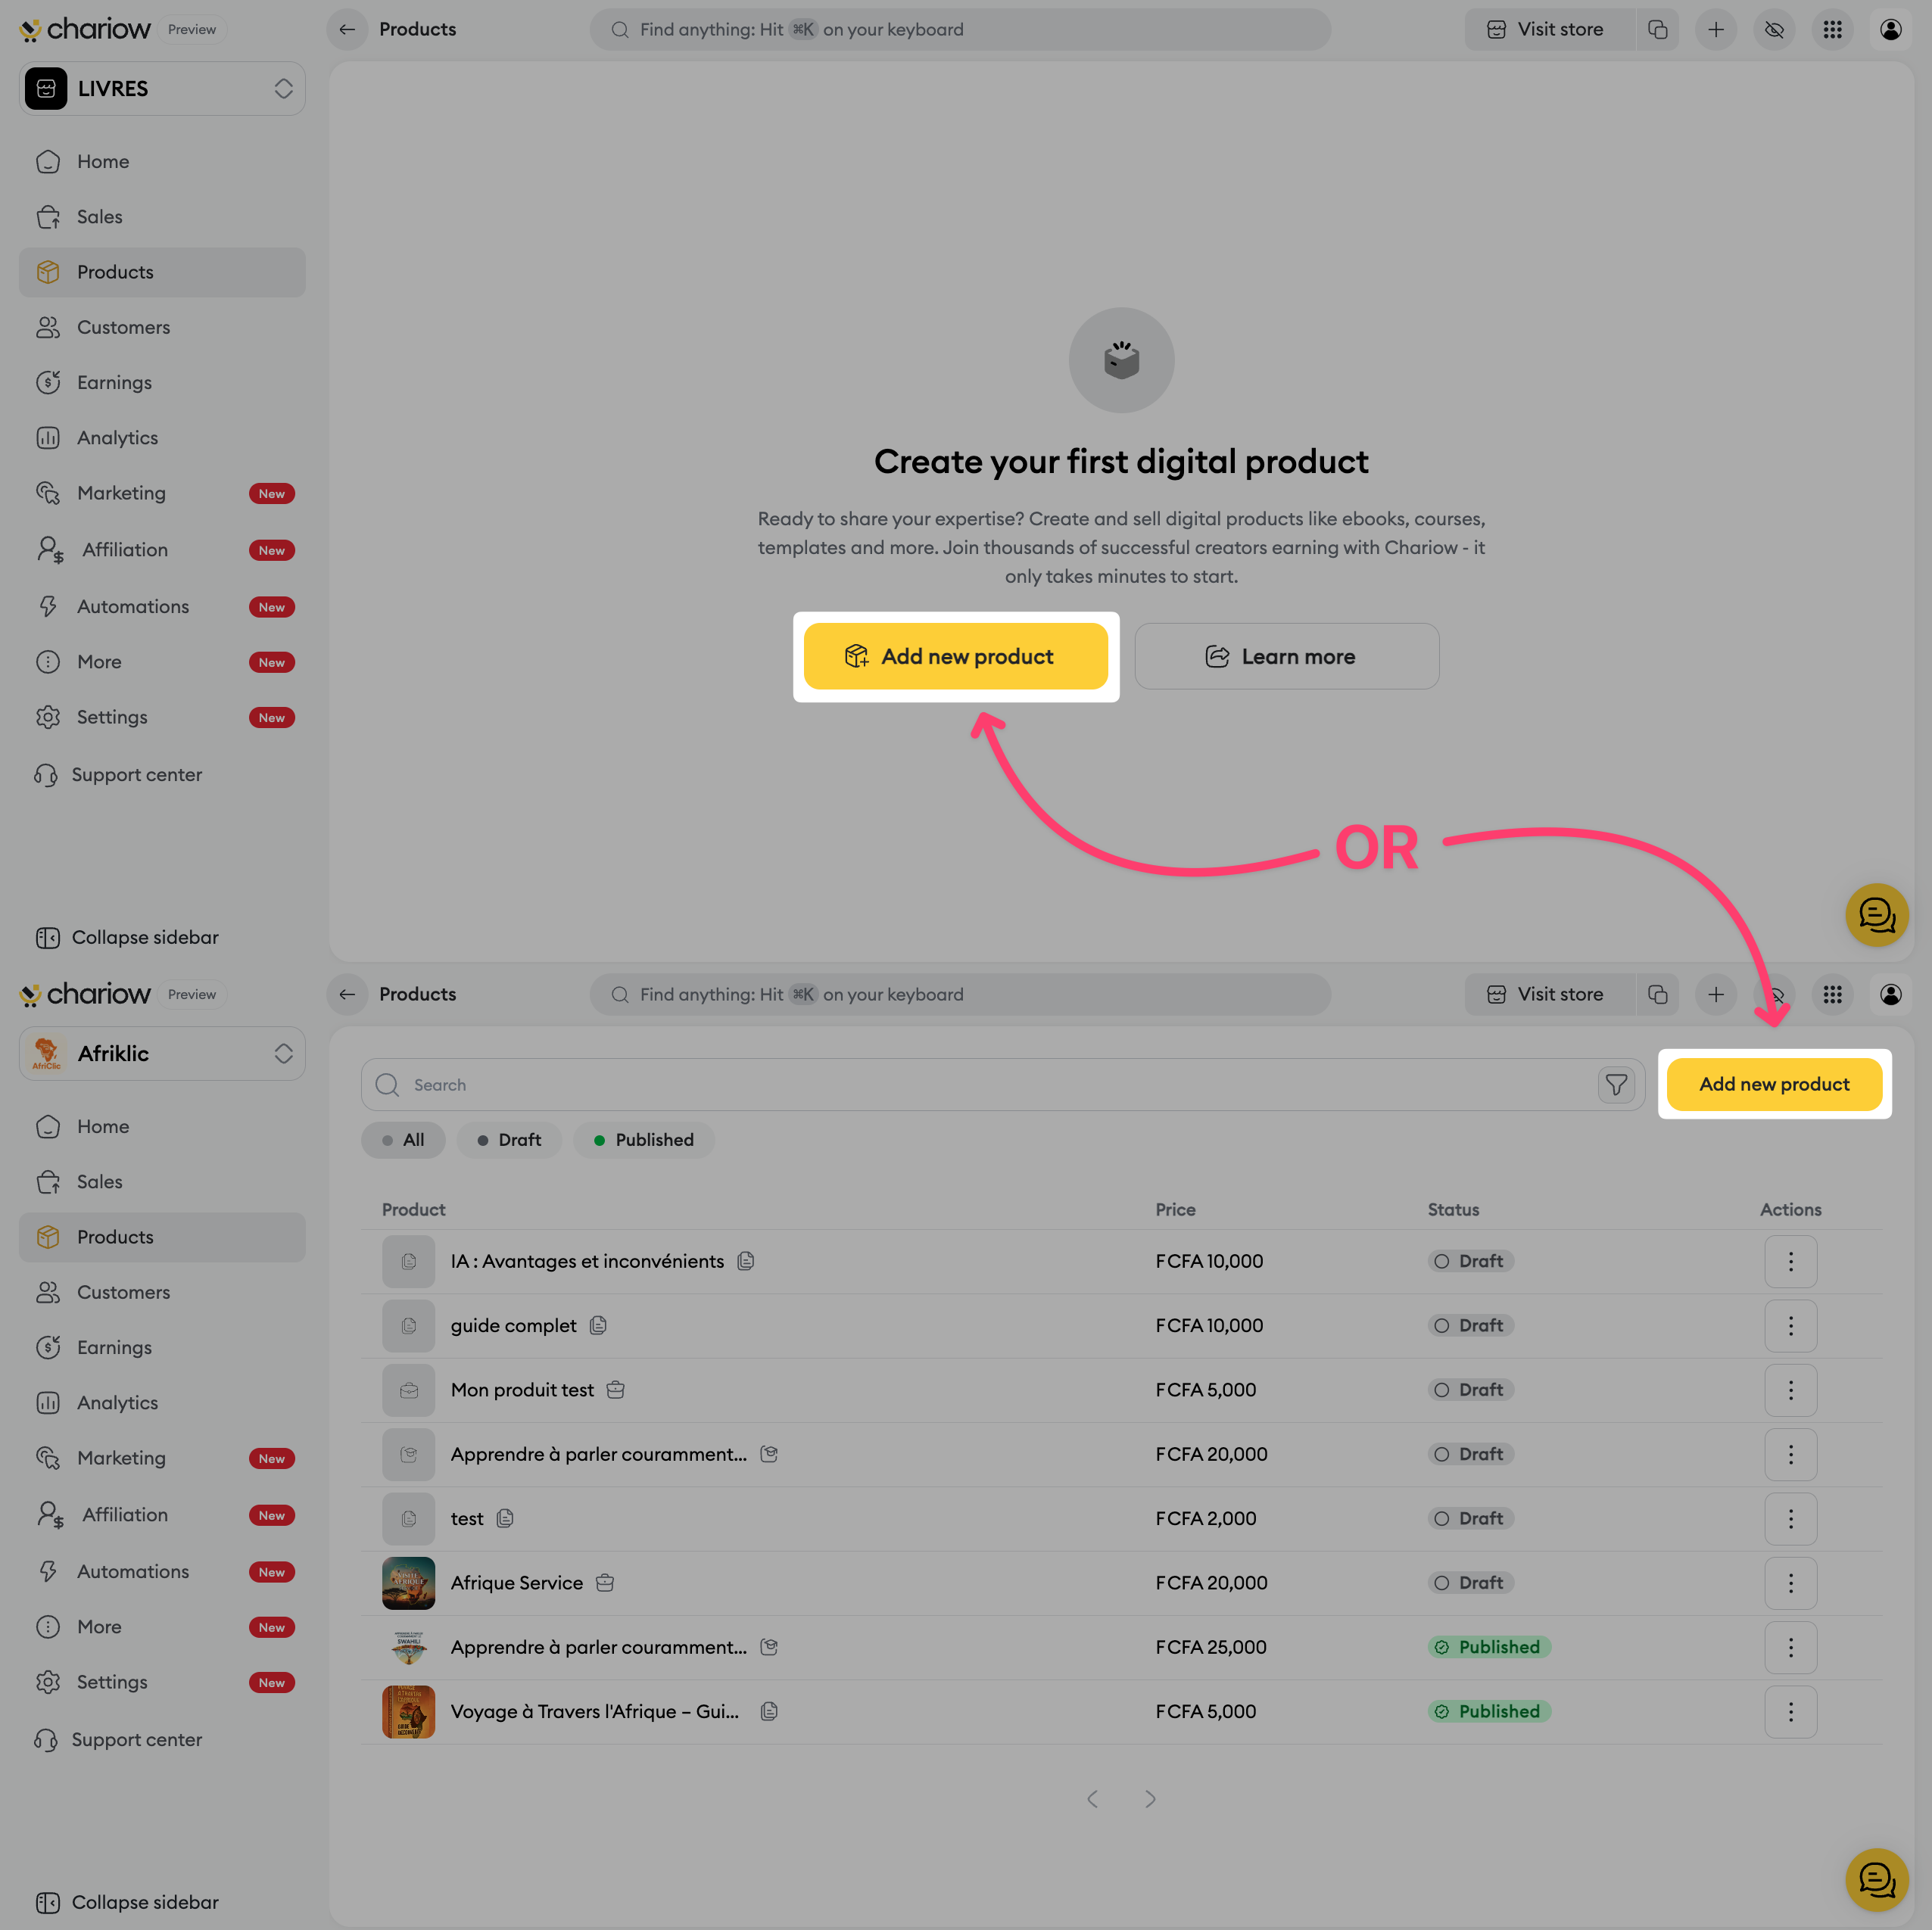
Go to the Products tab in your left sidebar menu.
Click the button to create a new product.
On the selection page, choose the courses card.
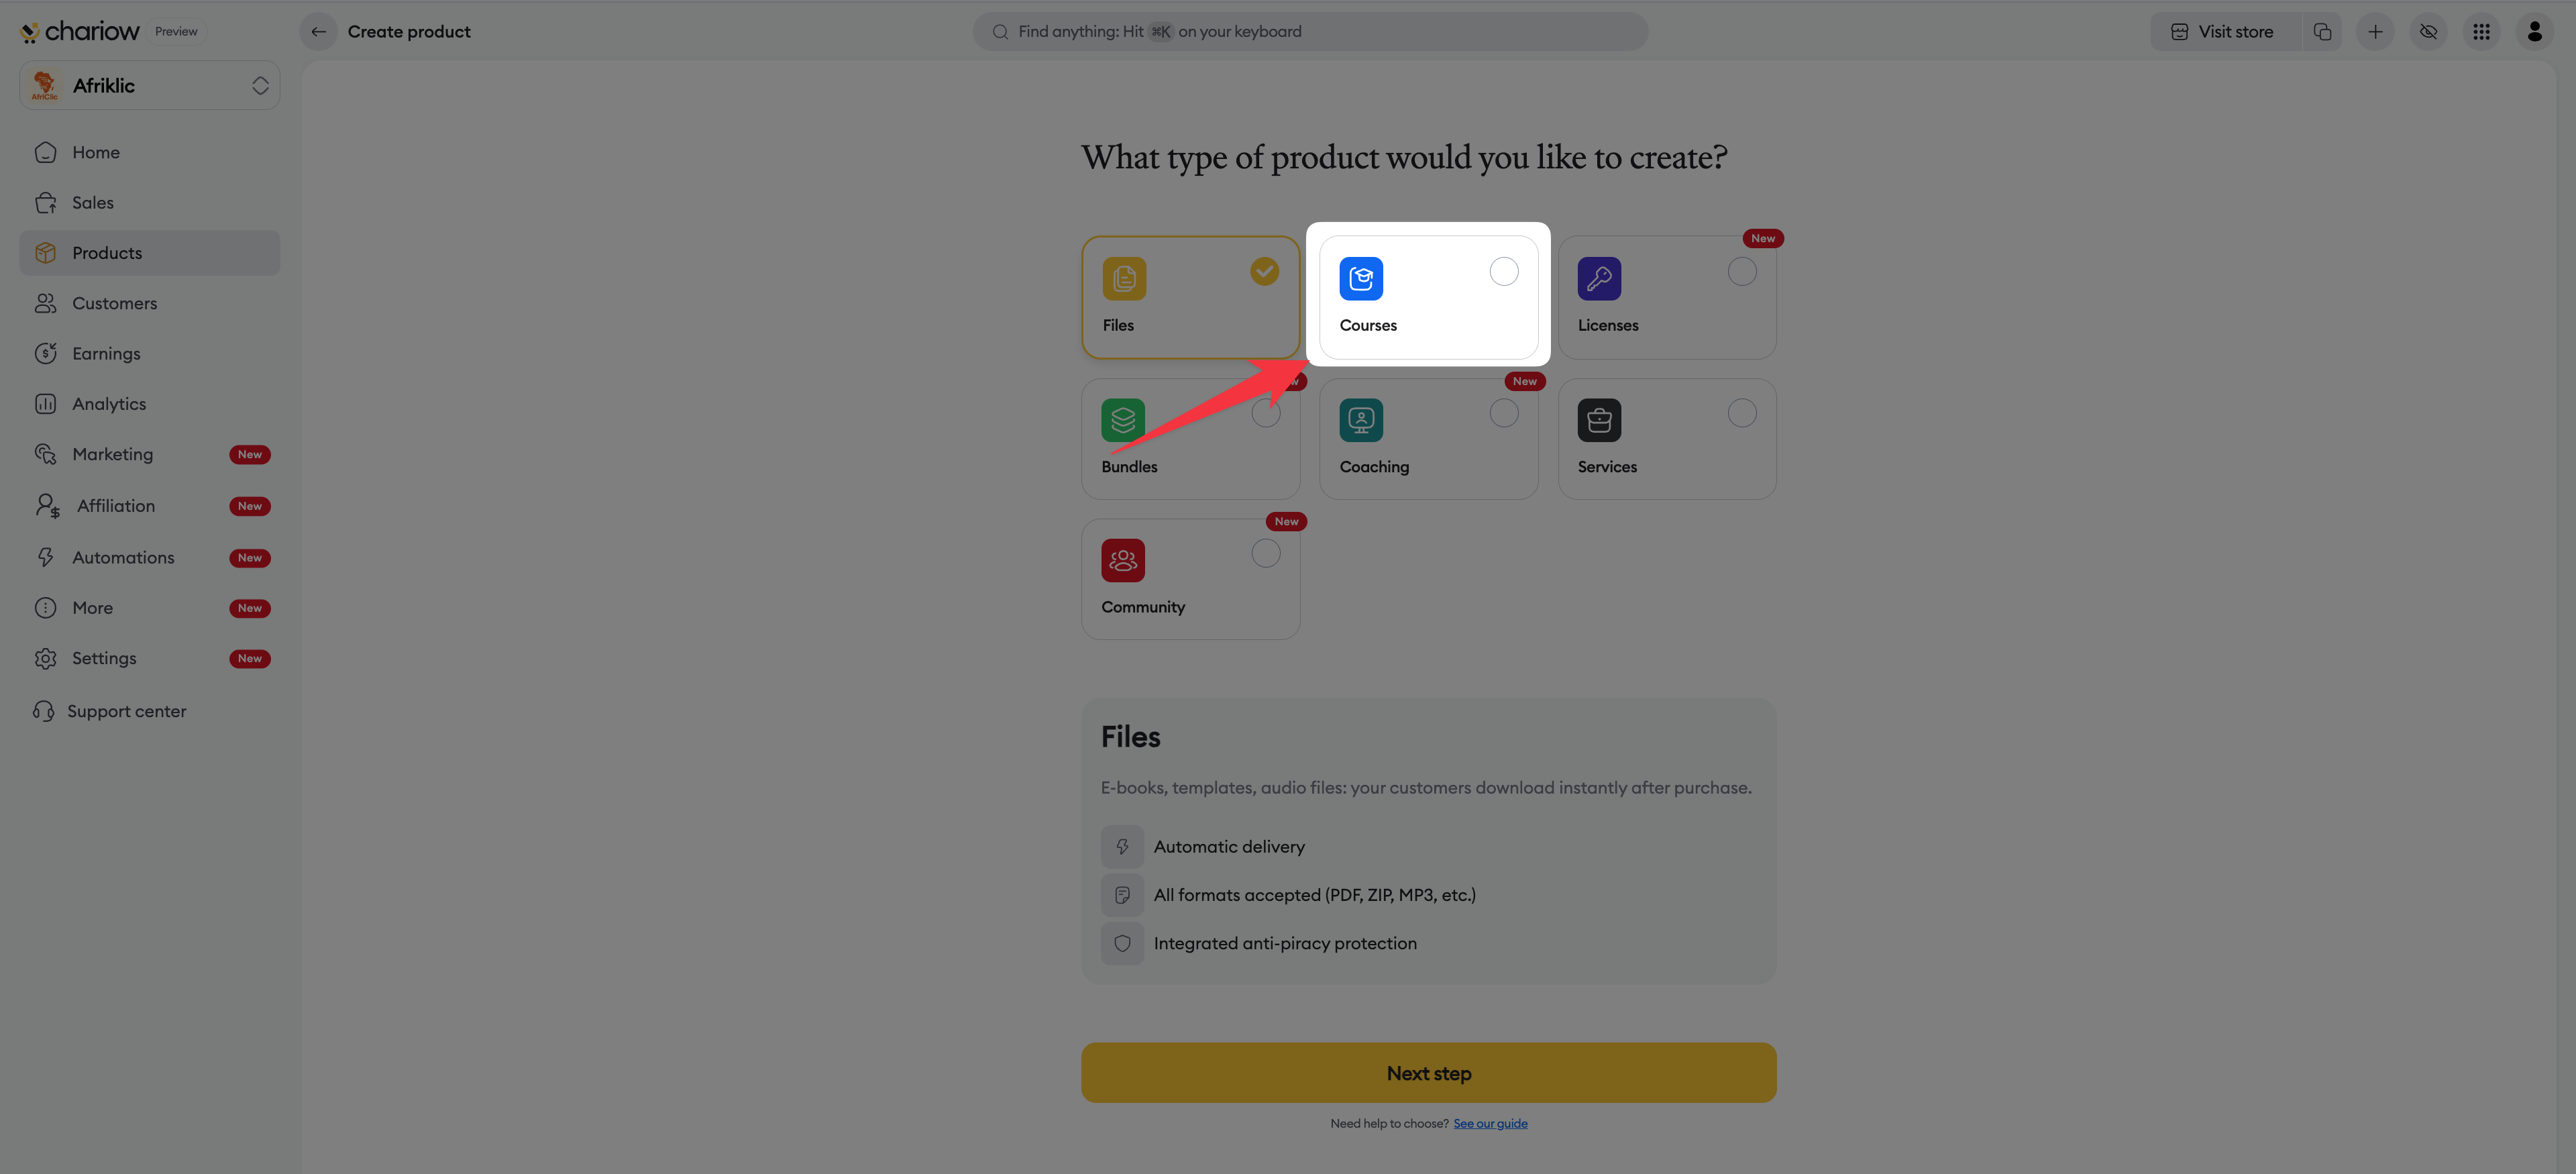
Click the Continue button.
This screen lets you define the commercial identity of your course:
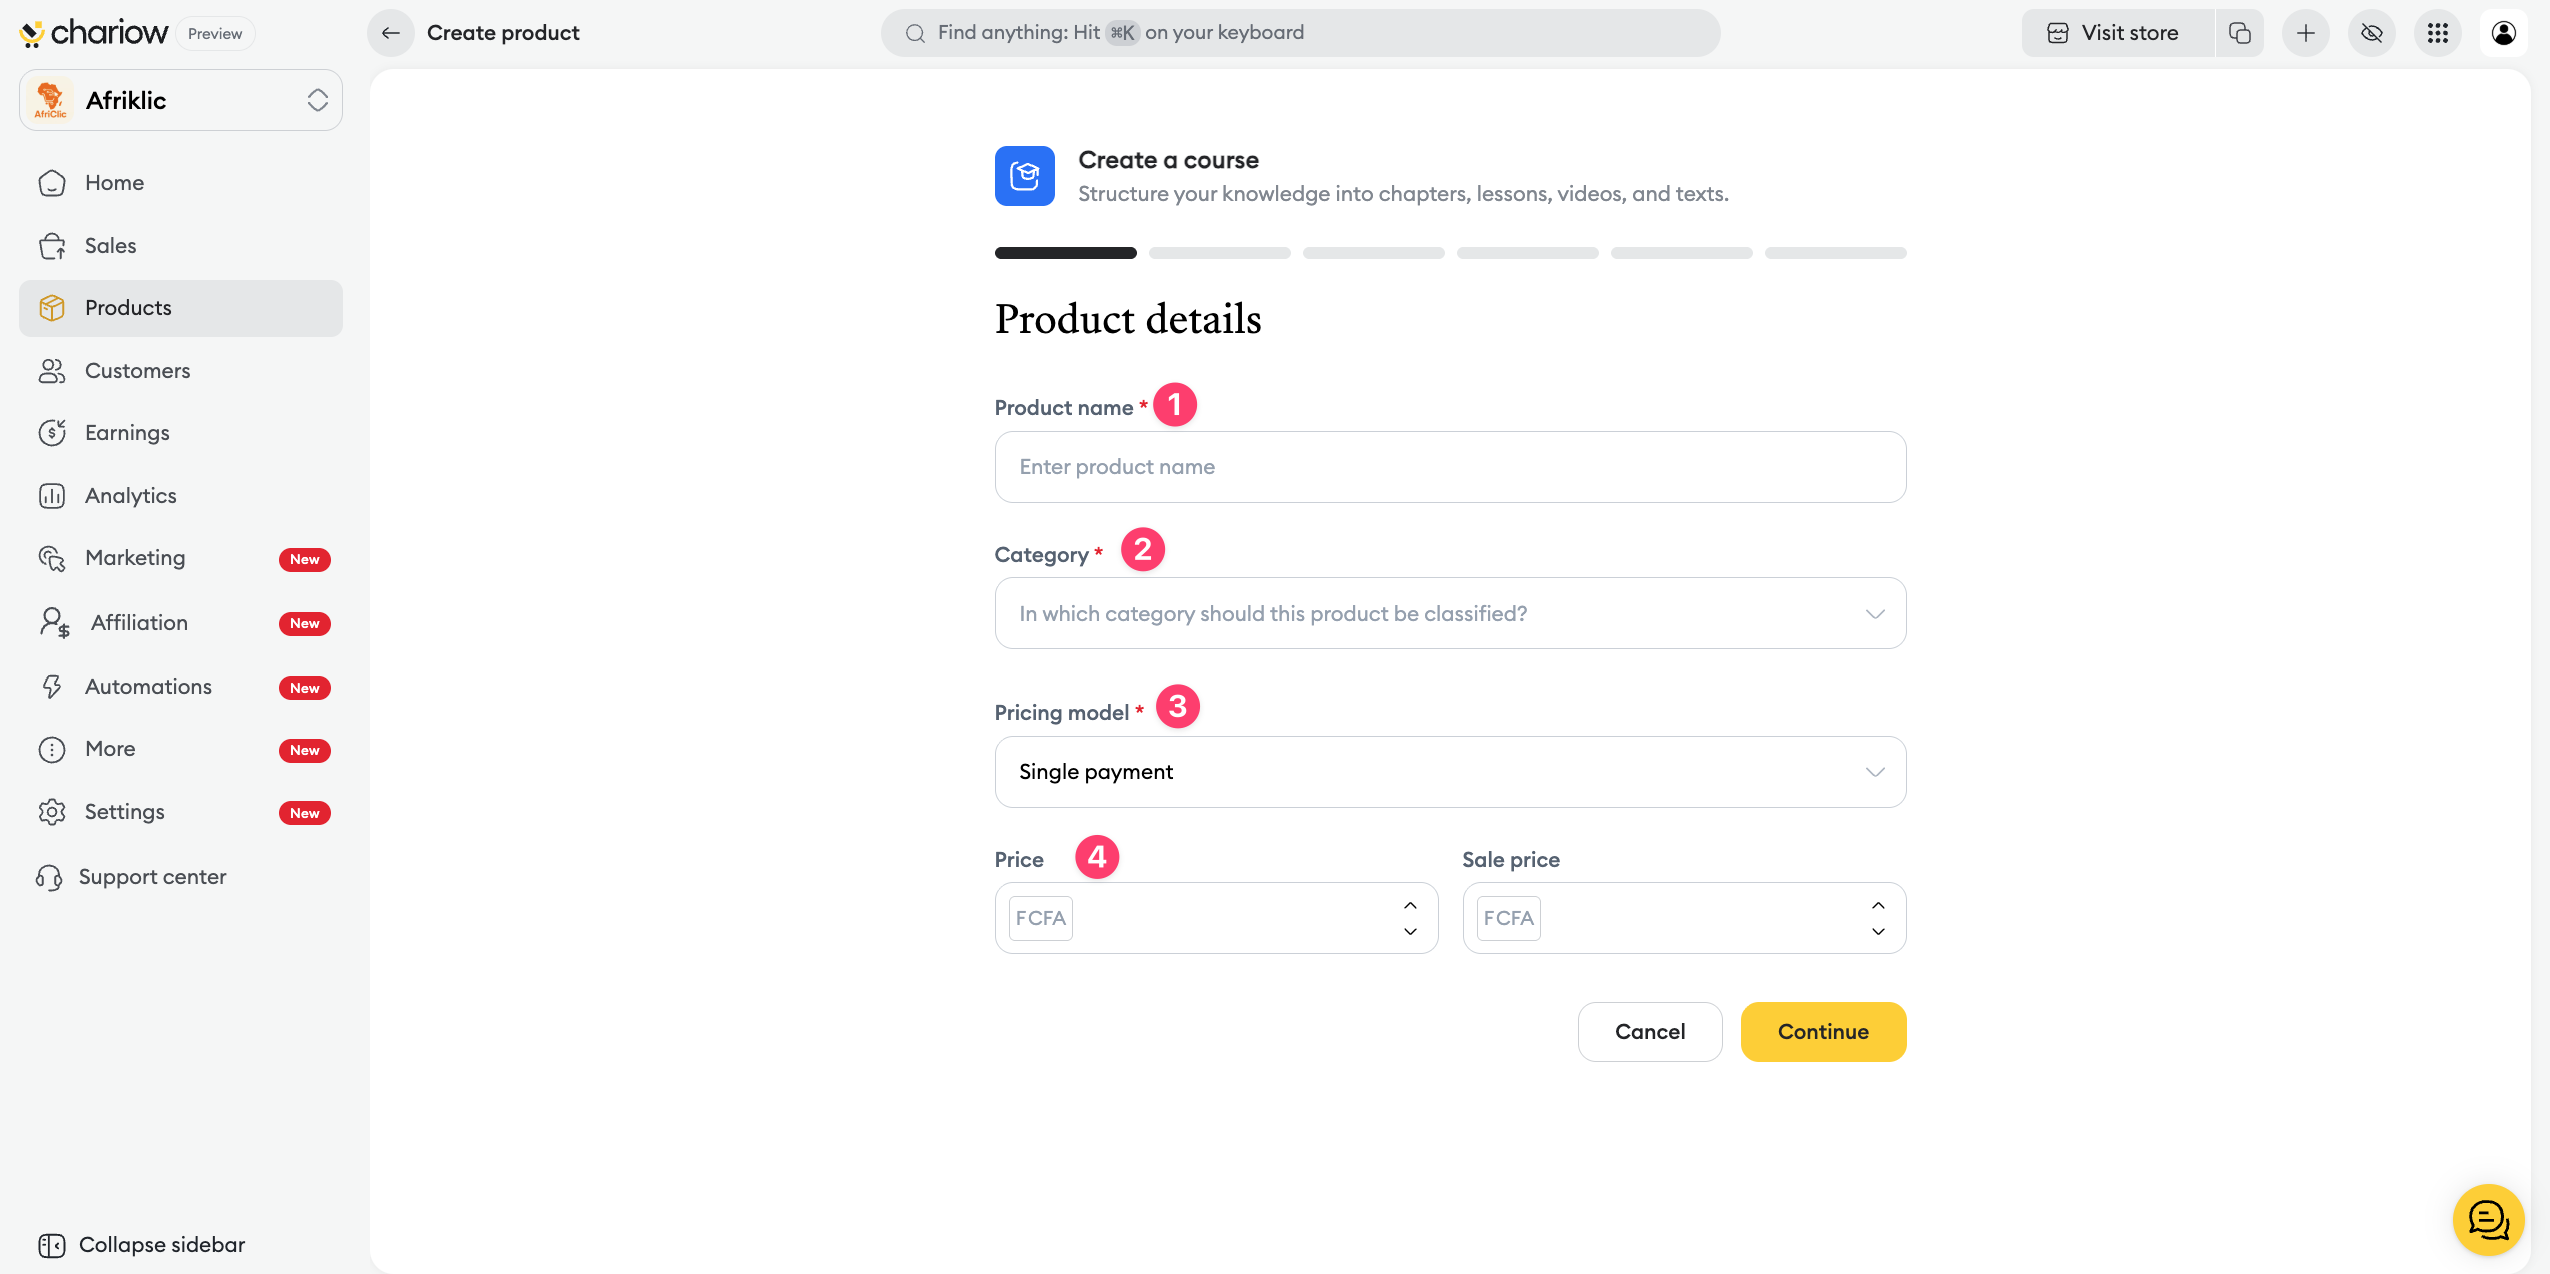
Product name : enter a clear title (e.g.: Complete Digital Art Course).
Category : place your course in the right topic to make browsing your store easier.
Pricing model : choose your selling method (one-time payment, free, or pay-what-you-want).
Price : enter the sale amount and use the Promotional price field if you want to show a discount.
Use this section to explain the value of your learning content:
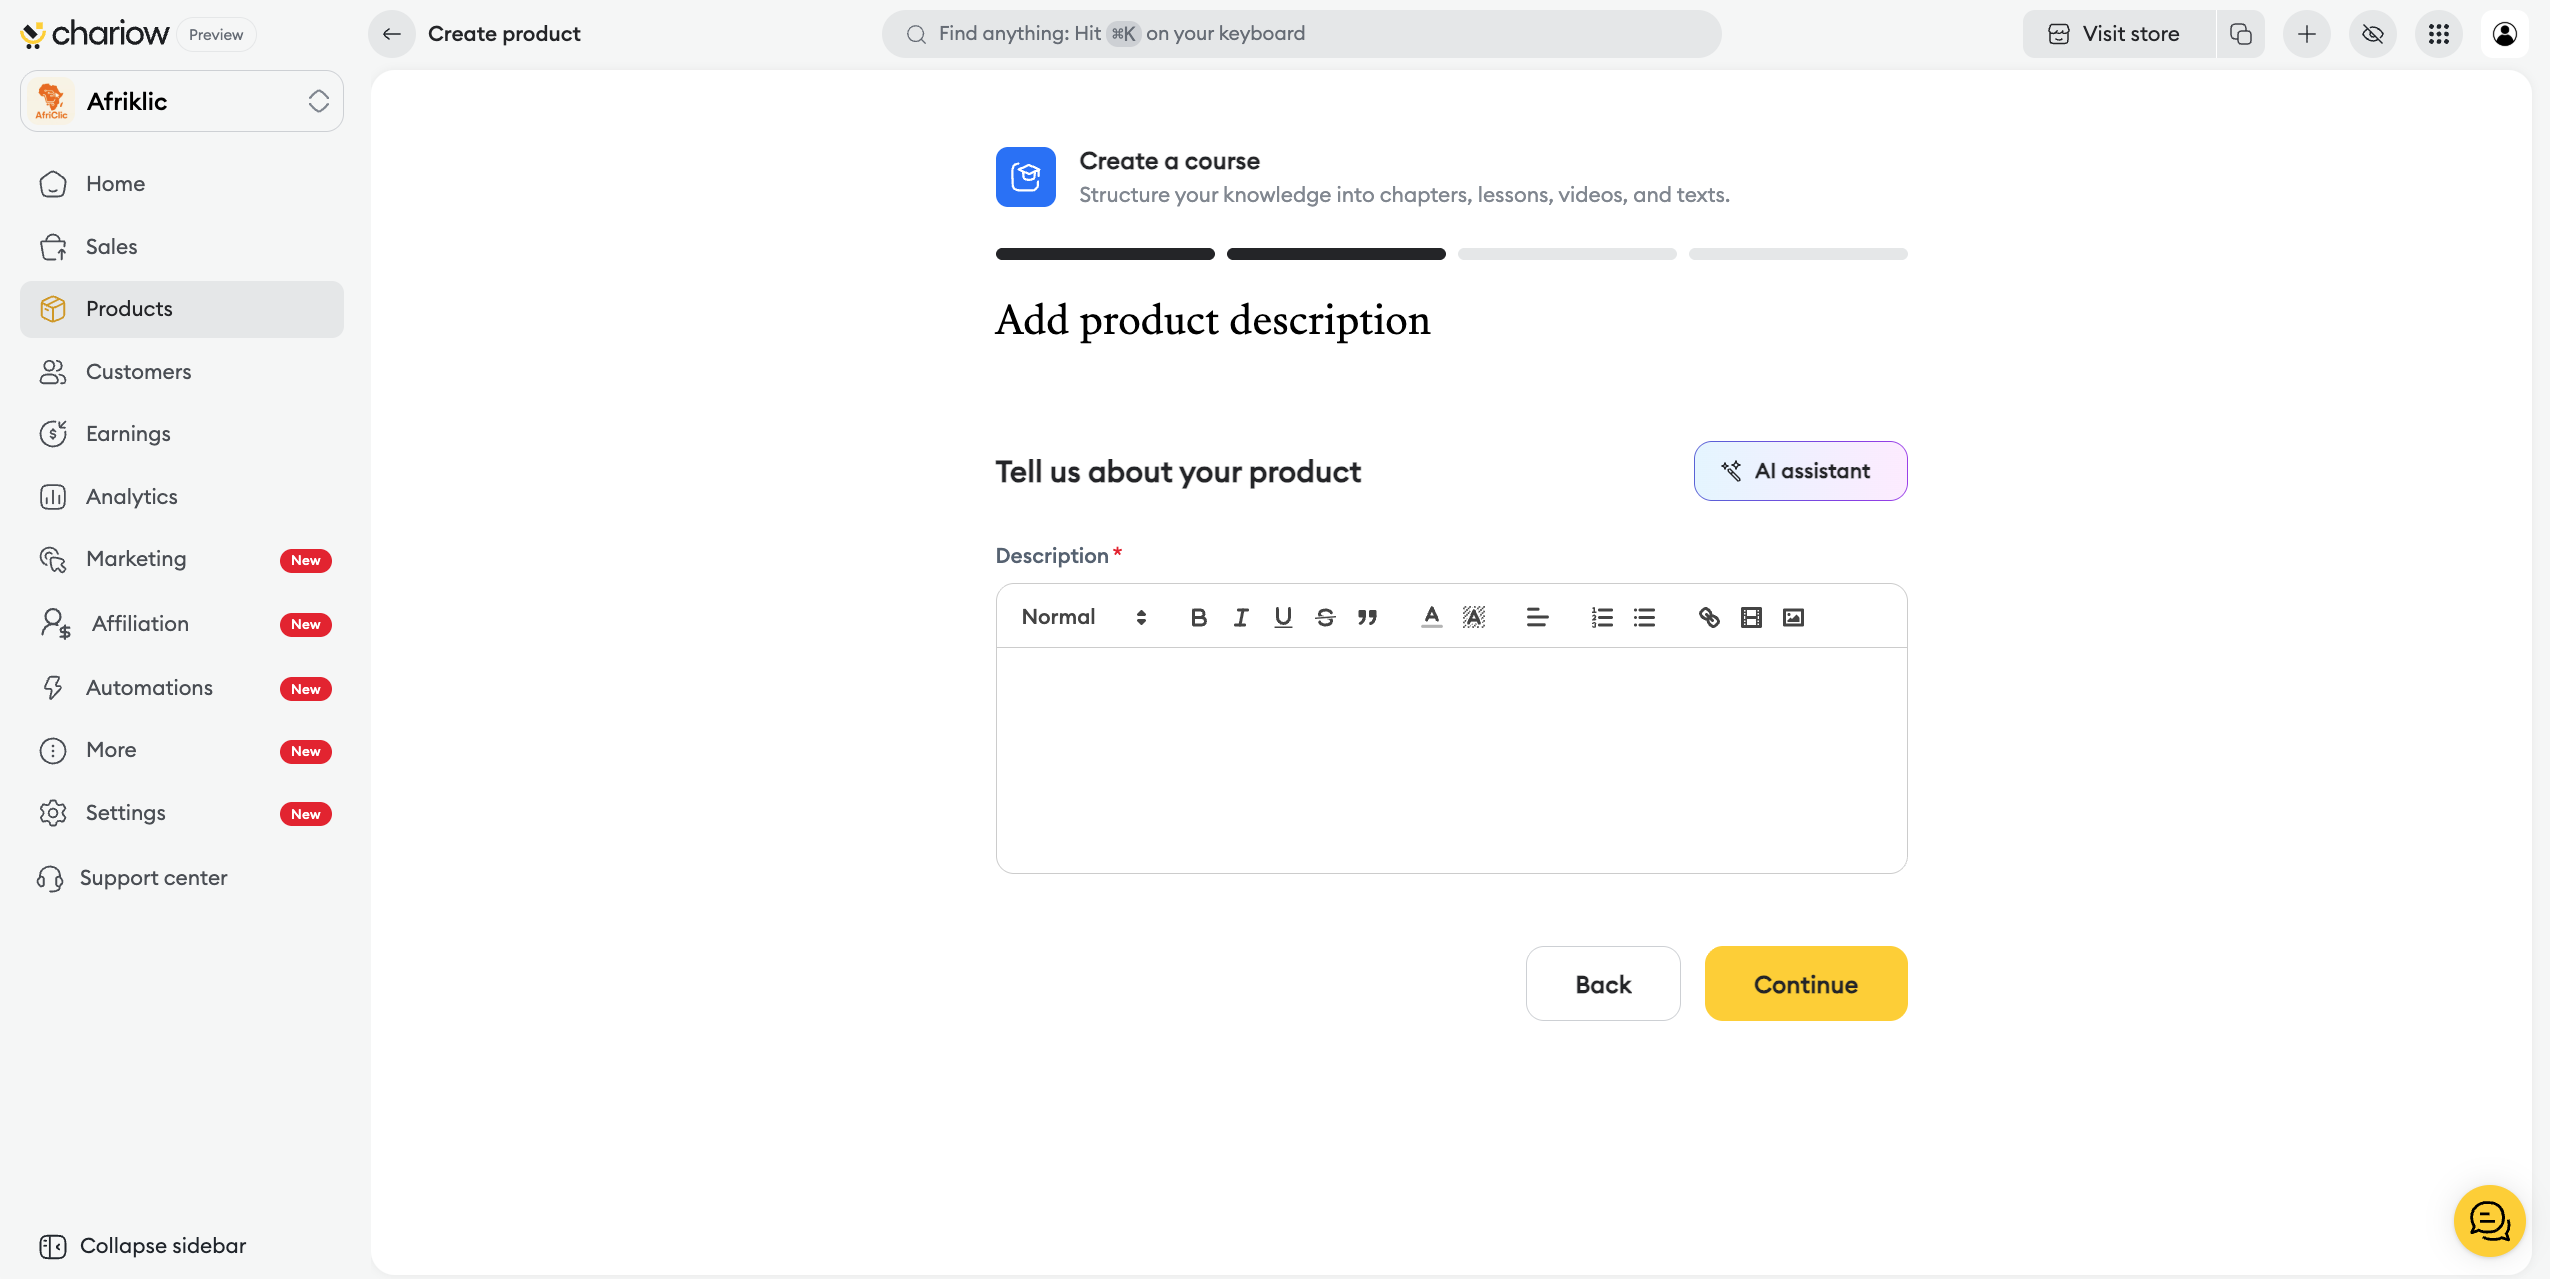
Writing : describe the benefits and the outline of your course in the editor.
AI assistant : you can ask the artificial intelligence for help to generate an effective sales text.
This is where you build the skeleton of your program:
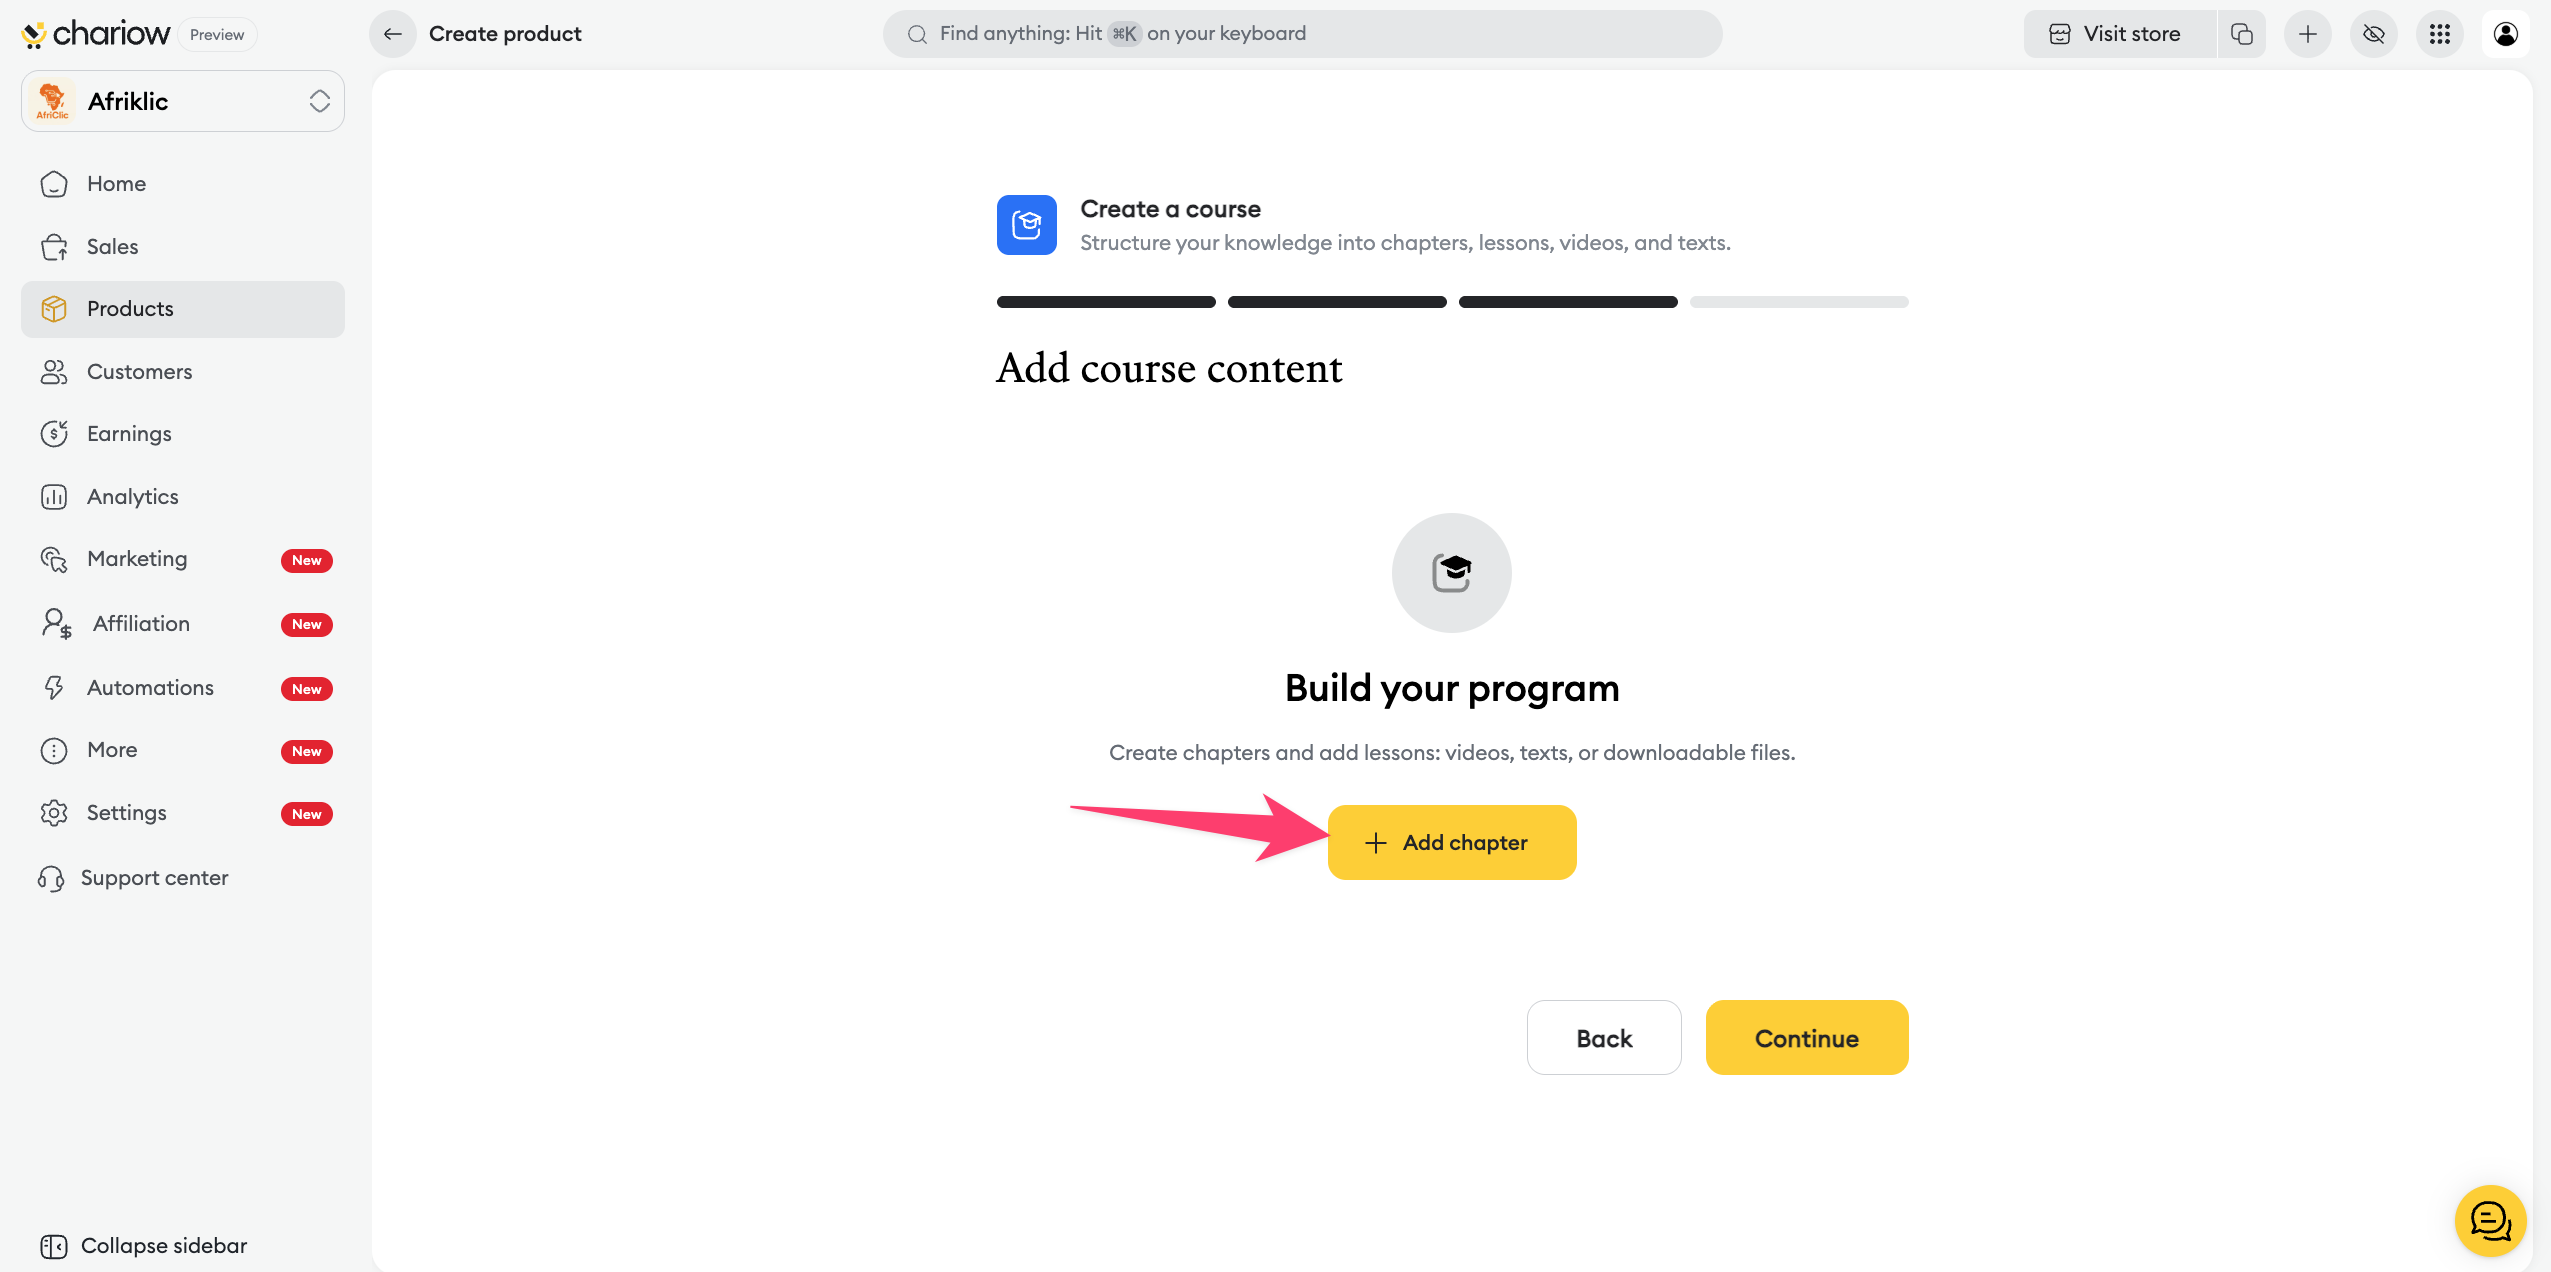
Add a chapter: click this button to start structuring your course by main themes.
Organization: give your chapters a title and confirm to move on to the next step.
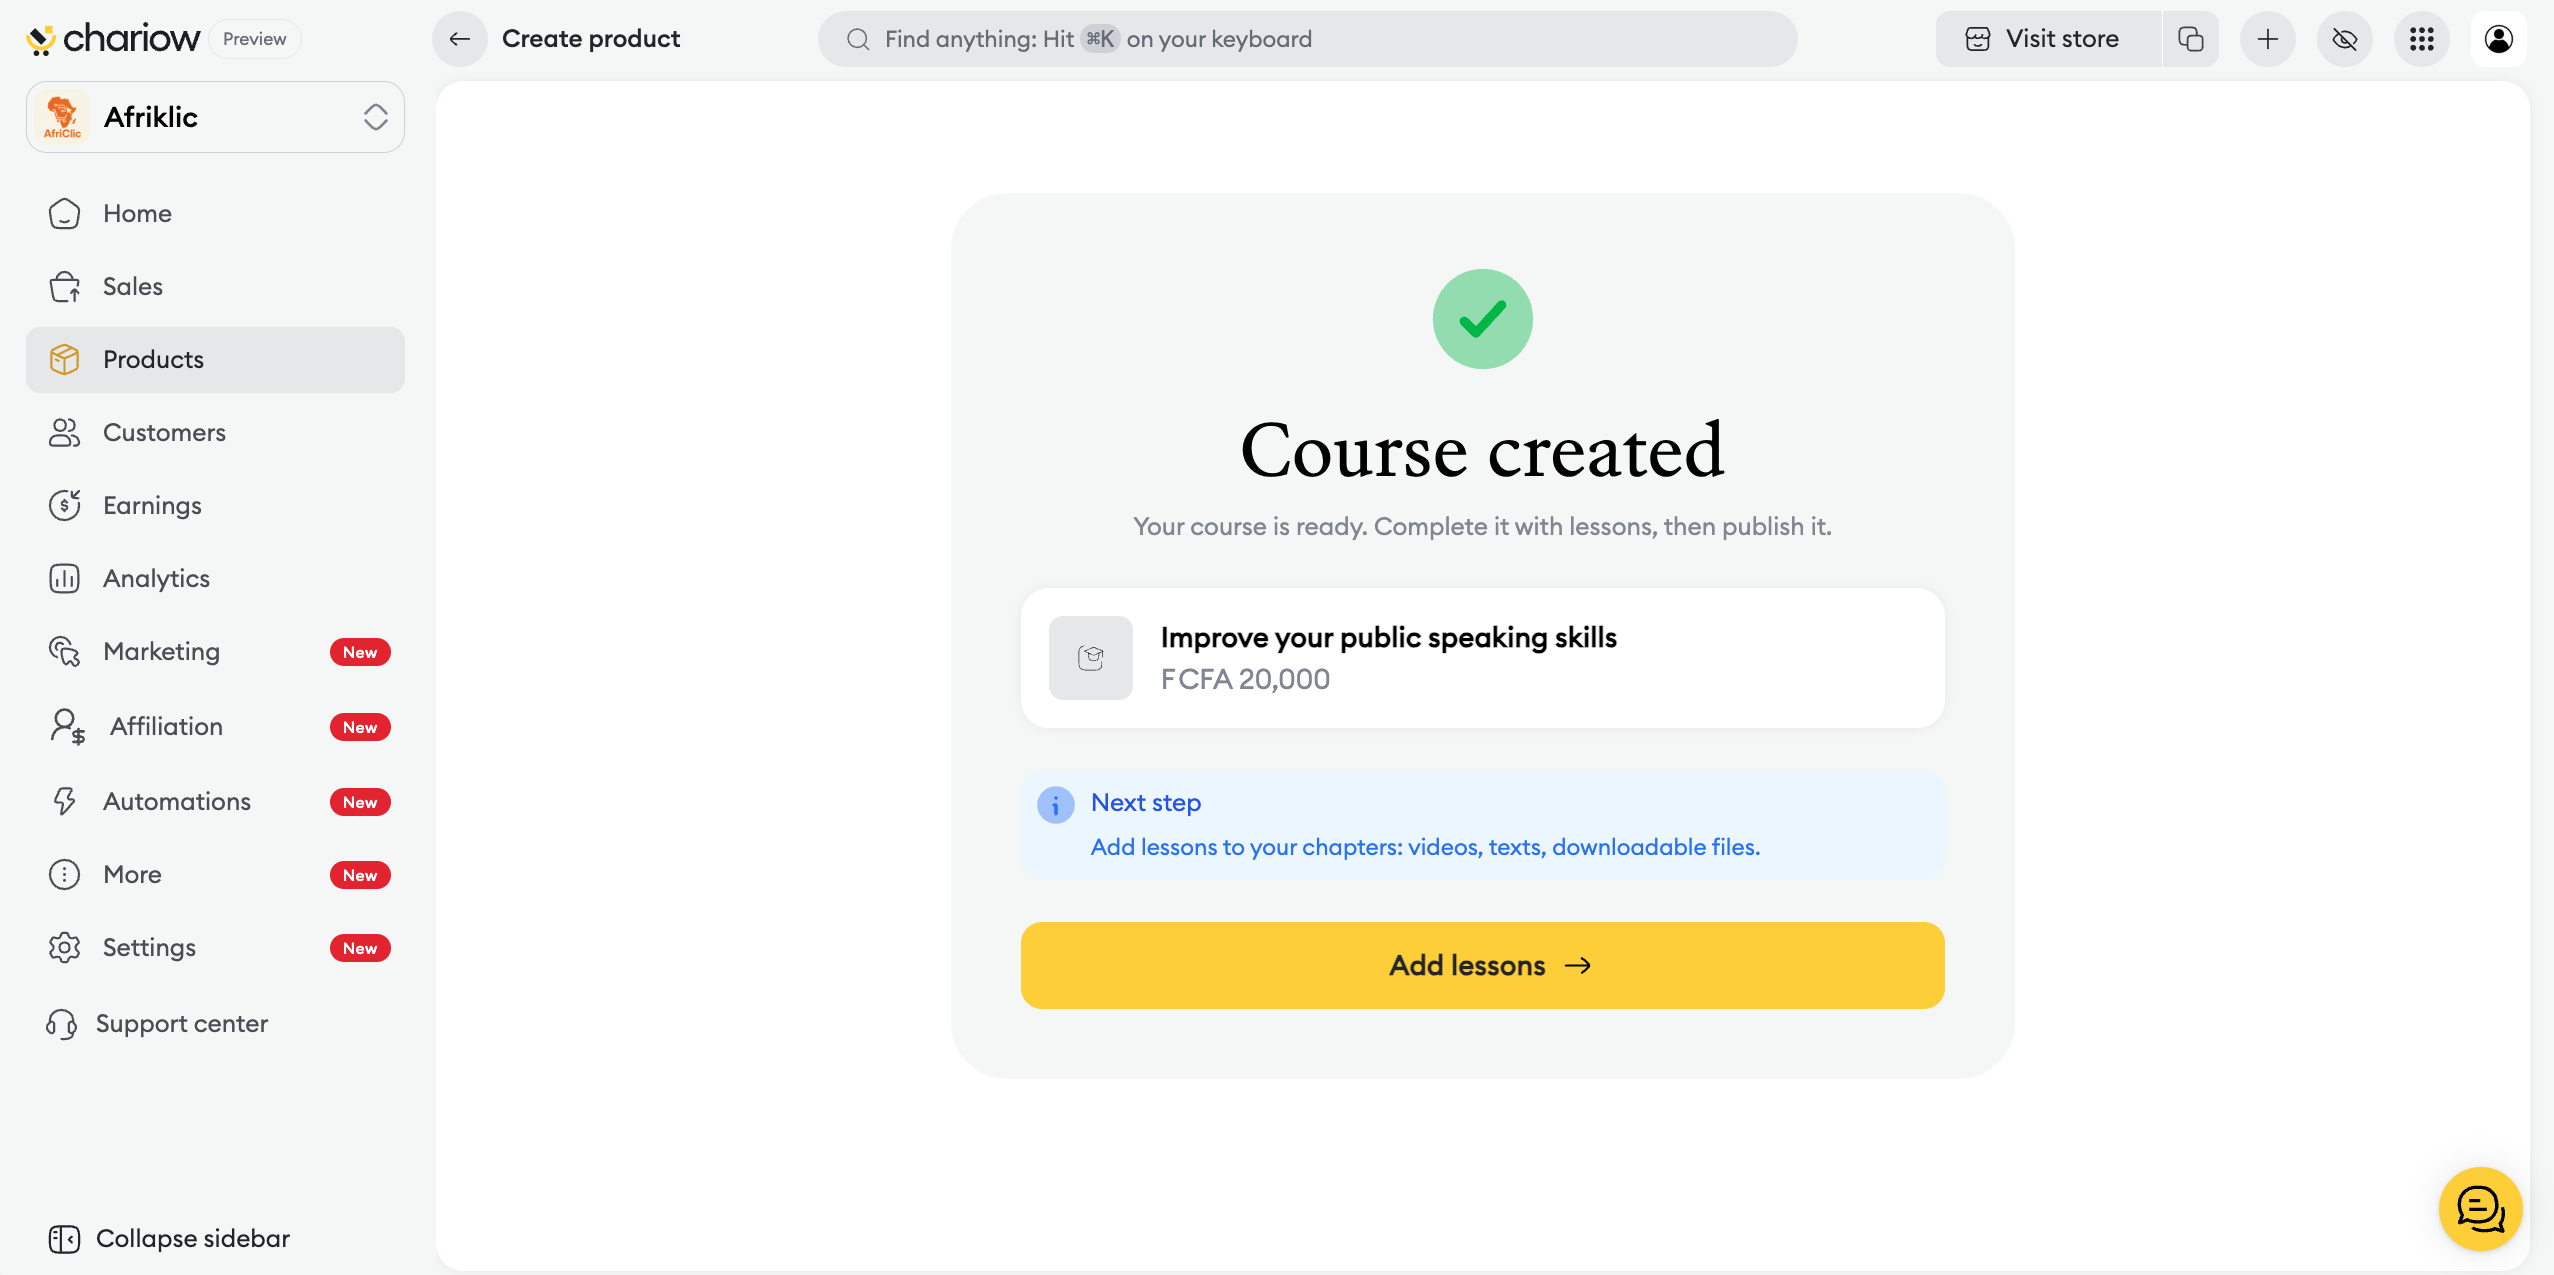
Once the initial structure is confirmed, your training is officially created on the platform. Before you can publish, you absolutely have to add at least one lesson to your chapters.
How to create a lesson:
Click on the Add lessons button.
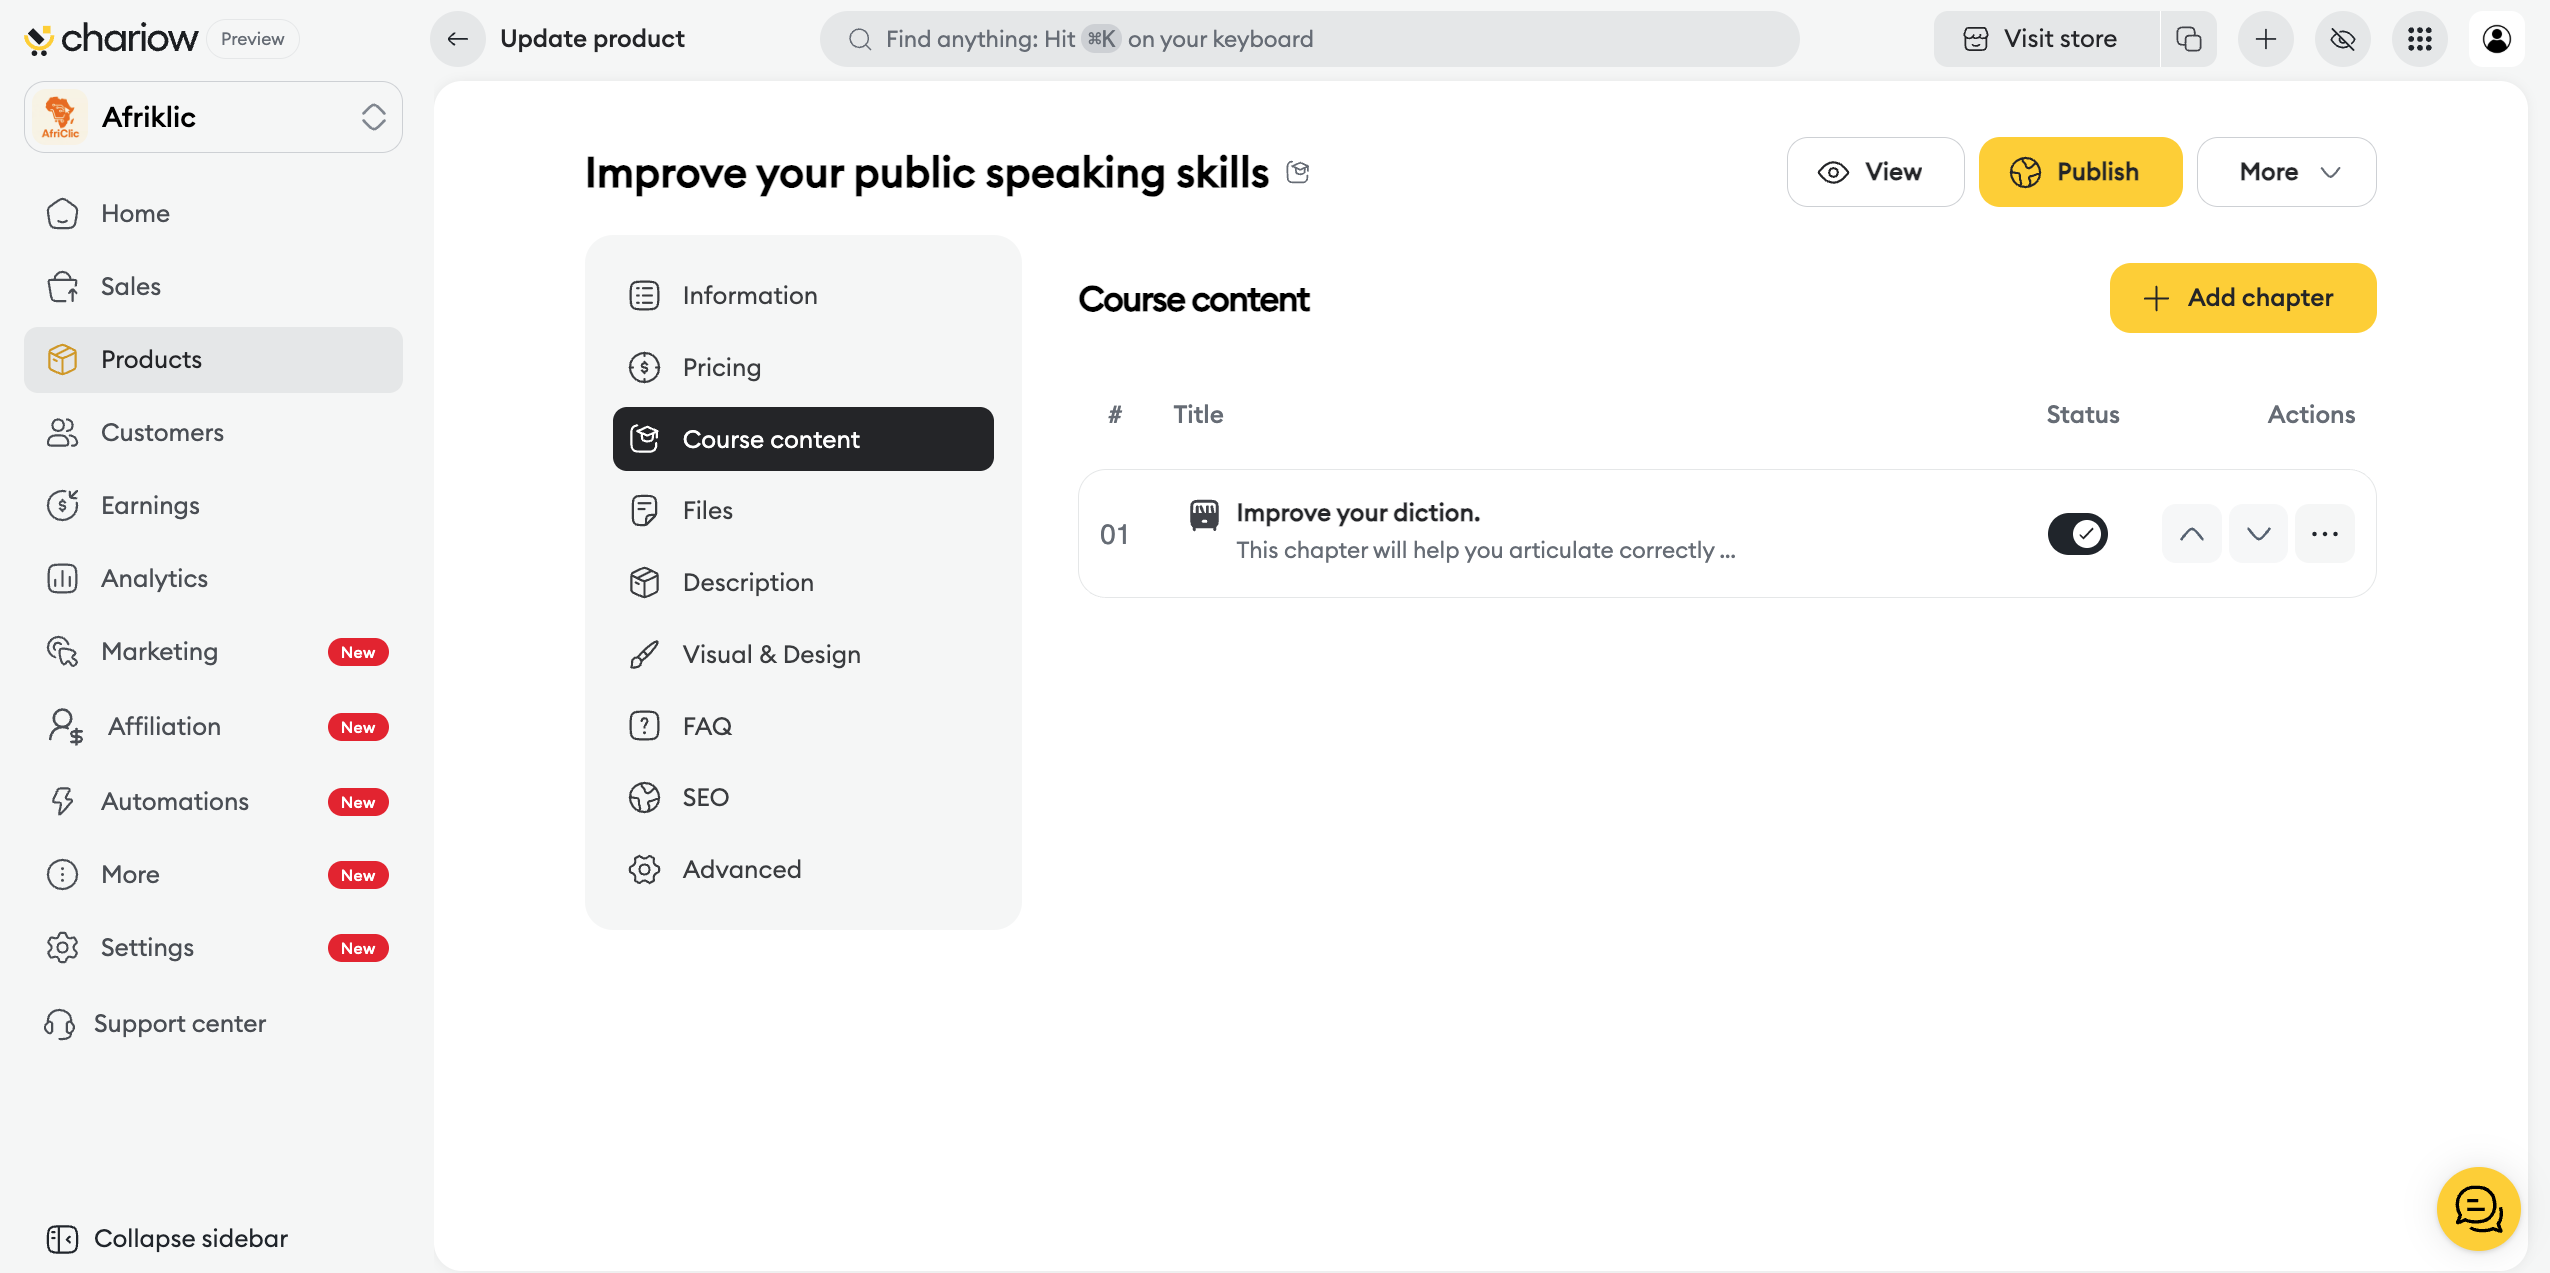
In the "Course content" interface, click on the row of the relevant chapter to open it.
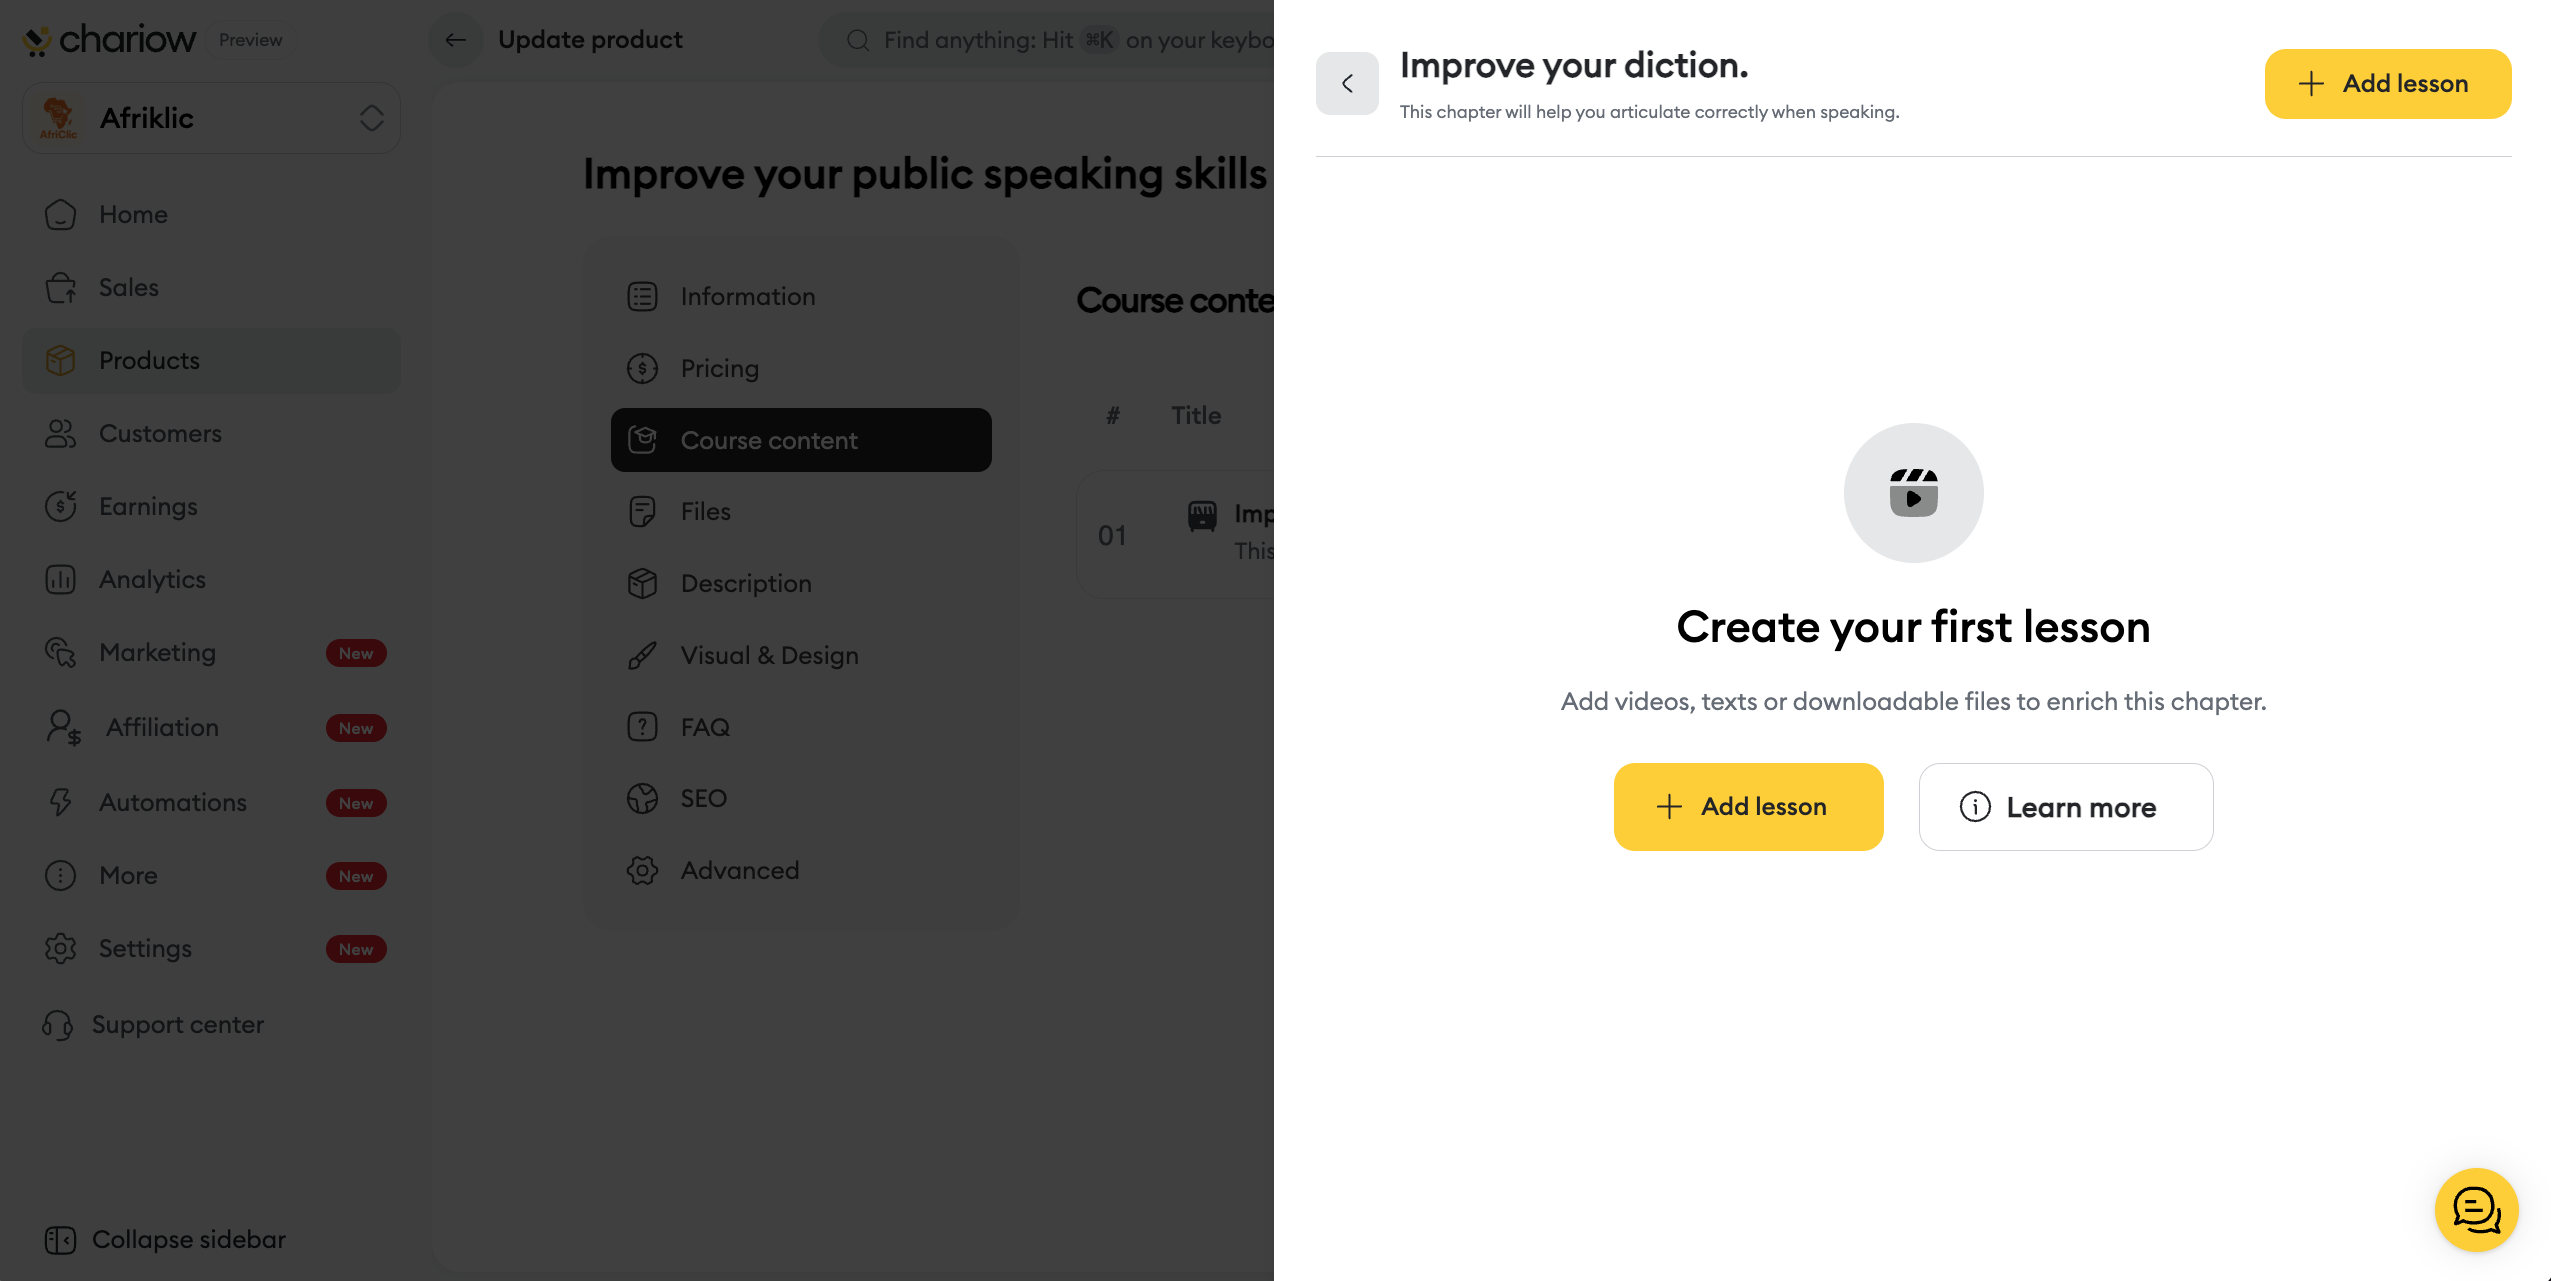
Click on the yellow Add a lesson button.
Fill in the required fields in the window that opens:
Title: Give your lesson a clear name.
Description: Summarize the content for your students (max 160 characters).
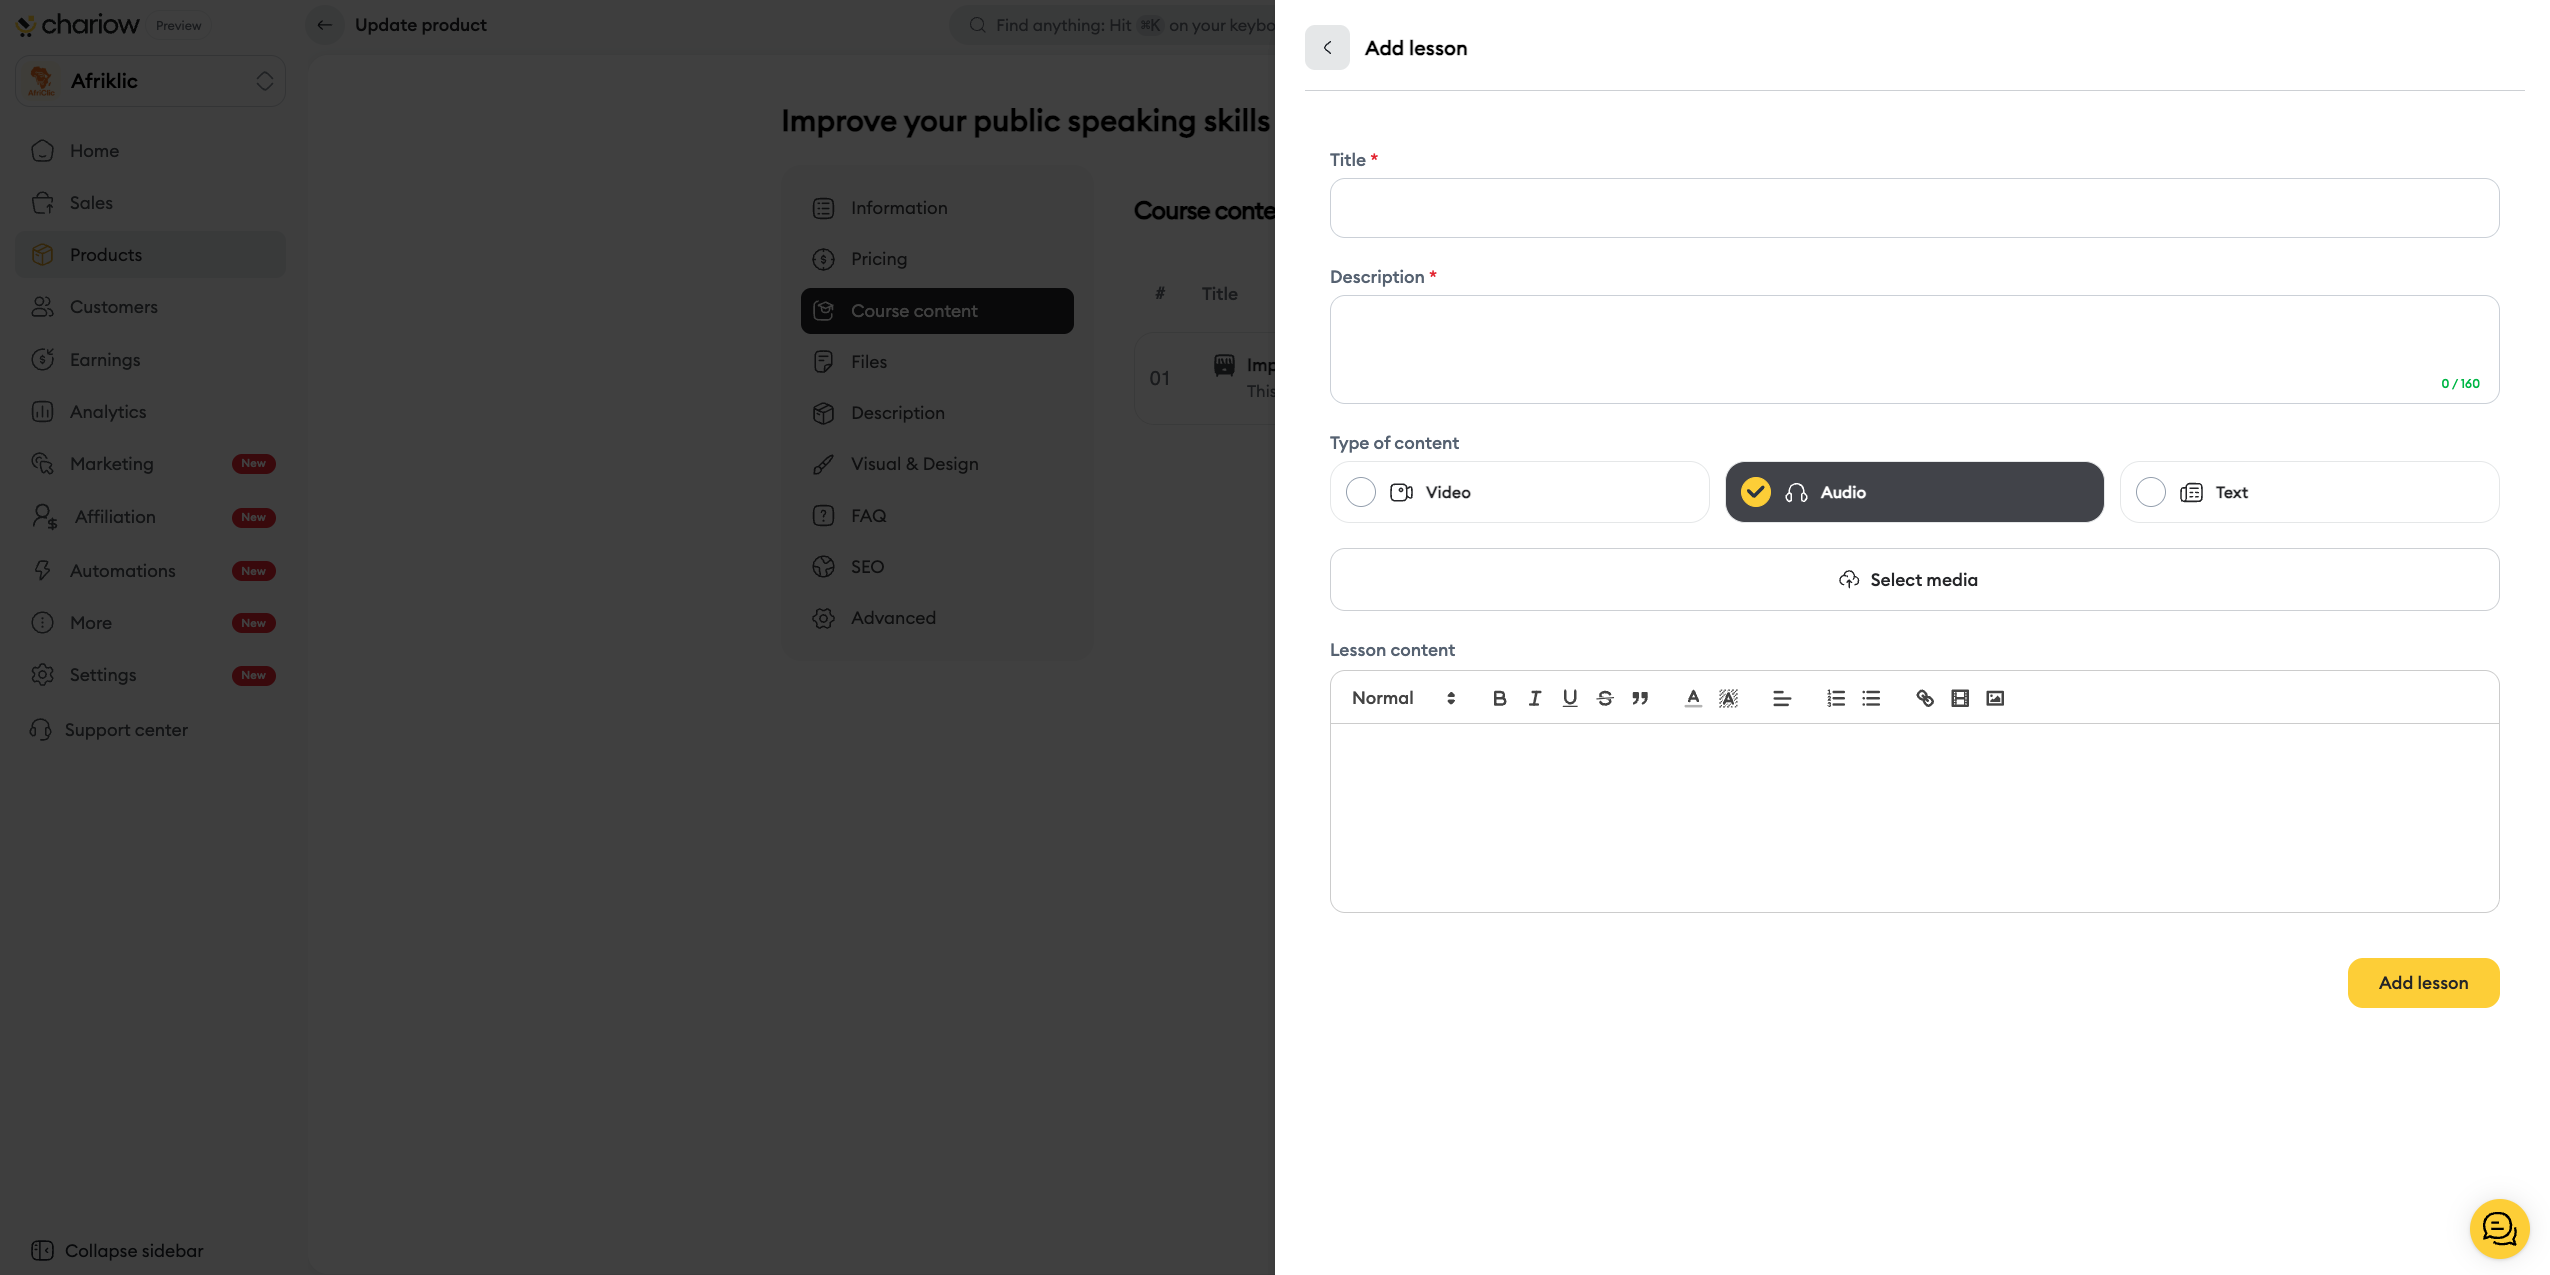
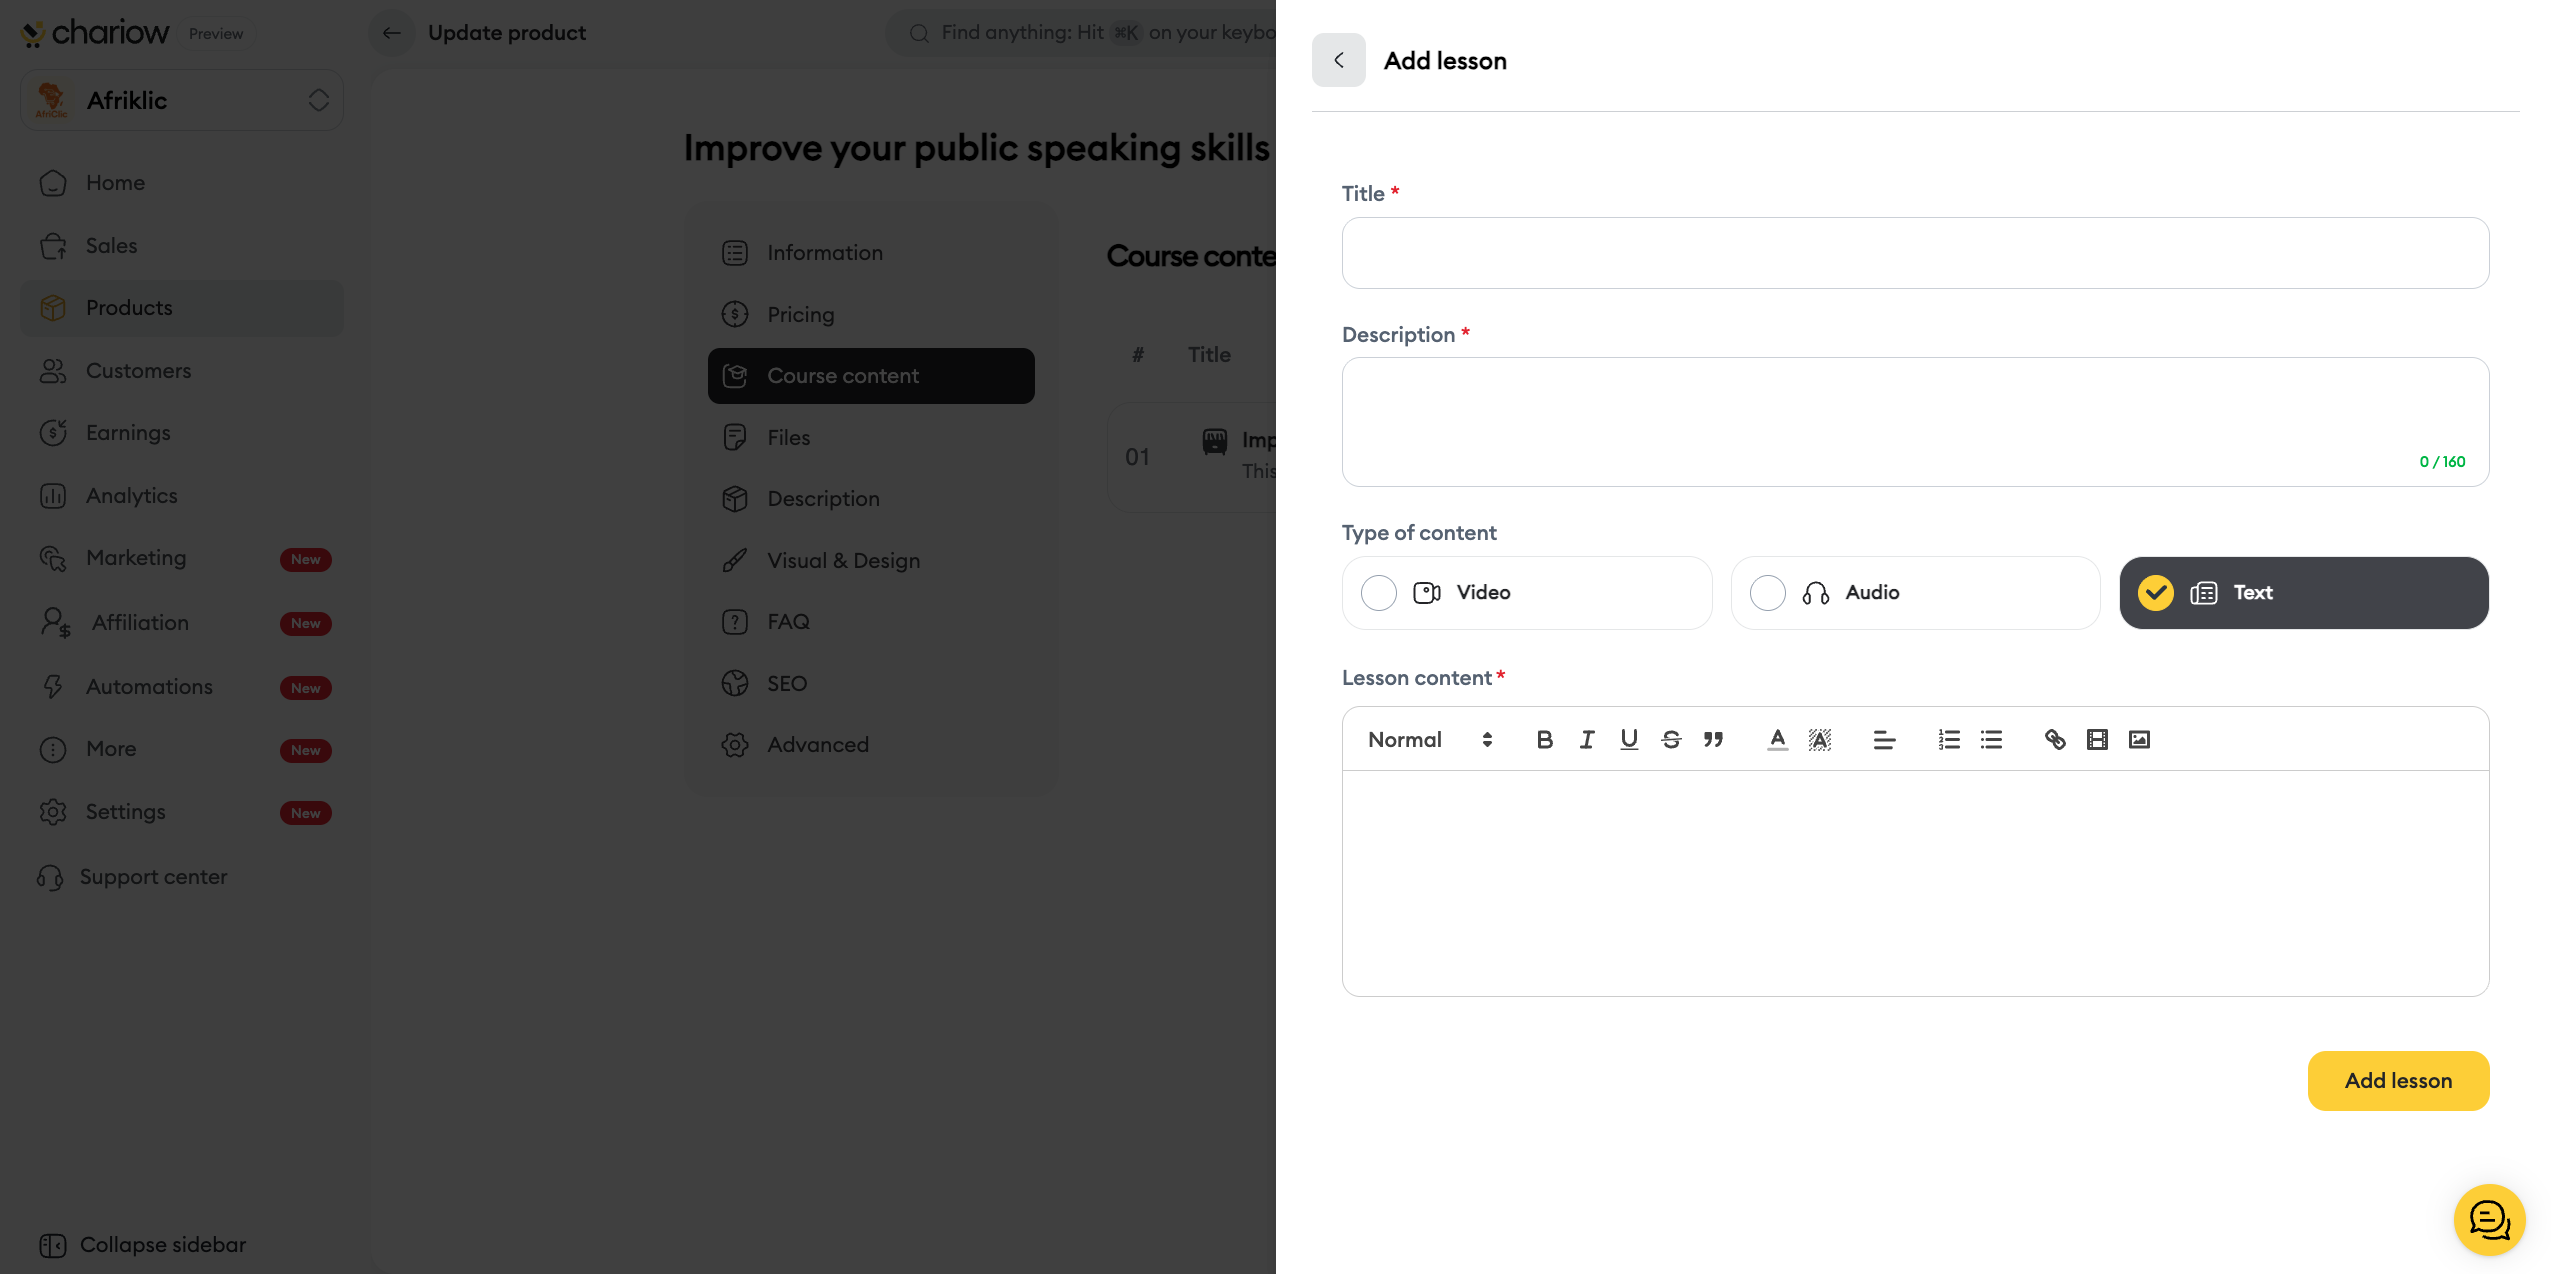
Content type: Select the desired format (Video, Audio or Text).
Chariow now offers three integration methods for your media:
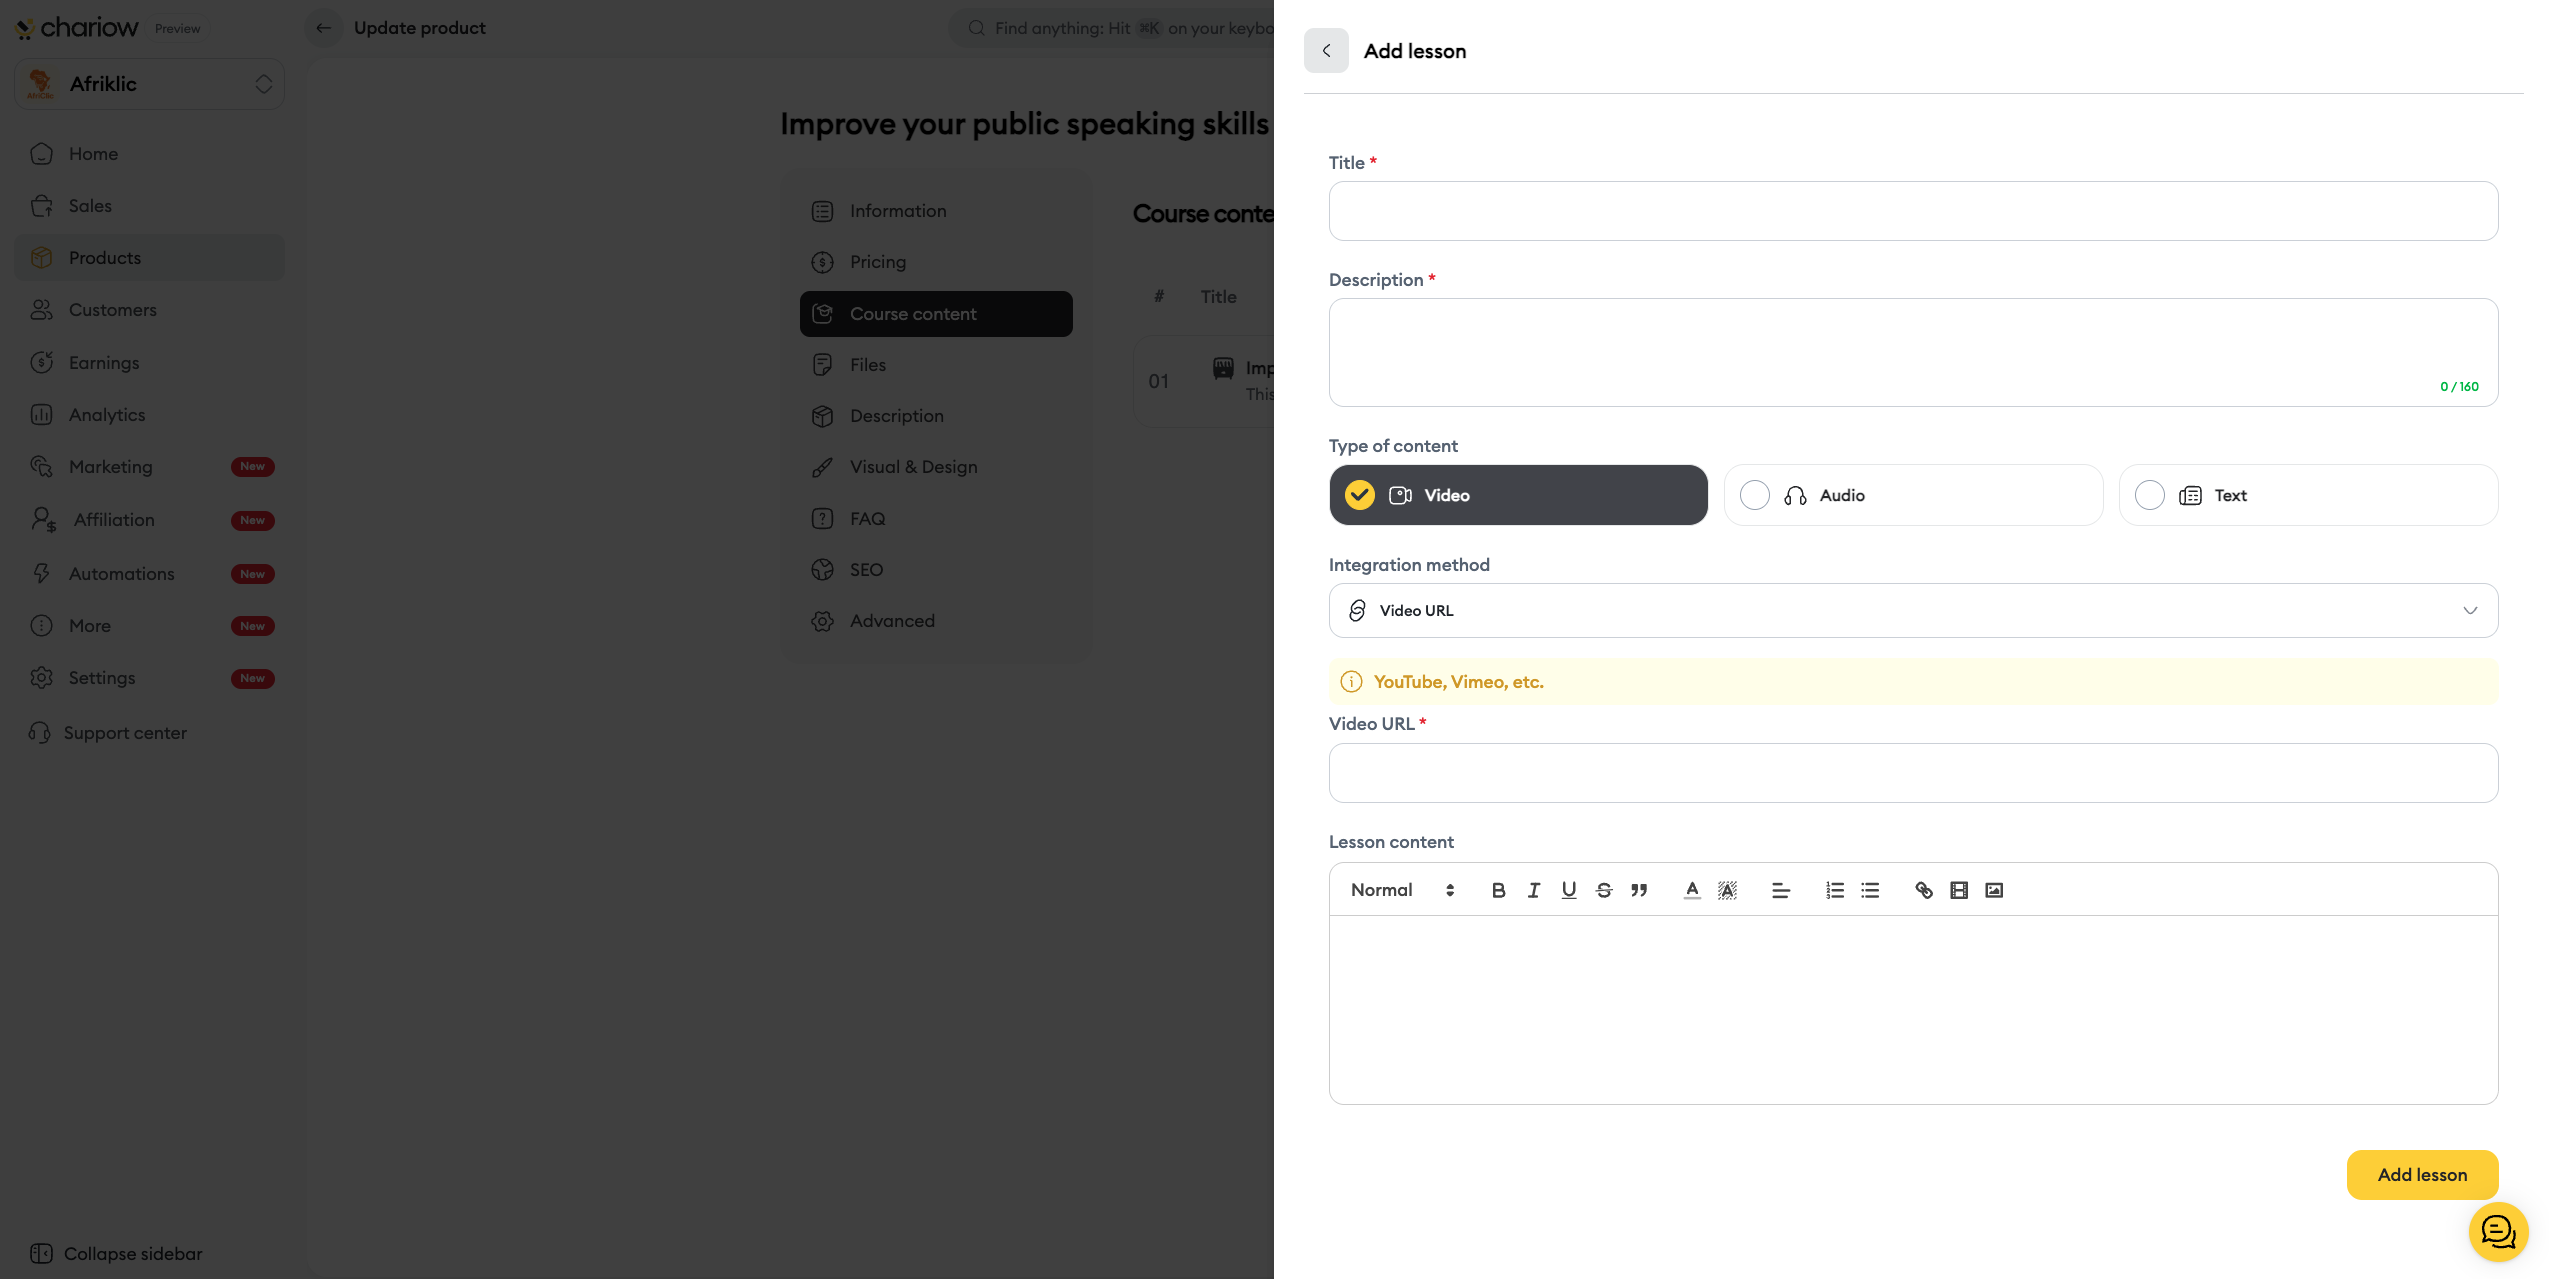
Upload (New): Directly upload your video or audio file from your device by clicking on Select media.
Video URL: Simply paste the link to your video hosted on YouTube or Vimeo.
Embed code: Use this option to insert an Iframe embed code from another host.
Upload : Click on Select media to upload your audio file directly from your device.
Write your content directly in the rich text editor.
Use the formatting tools (Bold, Lists, Links) to structure your lesson.
Click the Add a lesson button to confirm.
Activation (Important) : You absolutely need to activate the lessons and chapters using the dedicated switches to make them accessible to your future customers.

Once at least one lesson has been added, you can publish it. Before going live, Chariow analyzes your setup to maximize your chances of success:
AI analysis : the system displays personalized recommendations on your visuals, your SEO, your FAQ, or your pricing strategy.
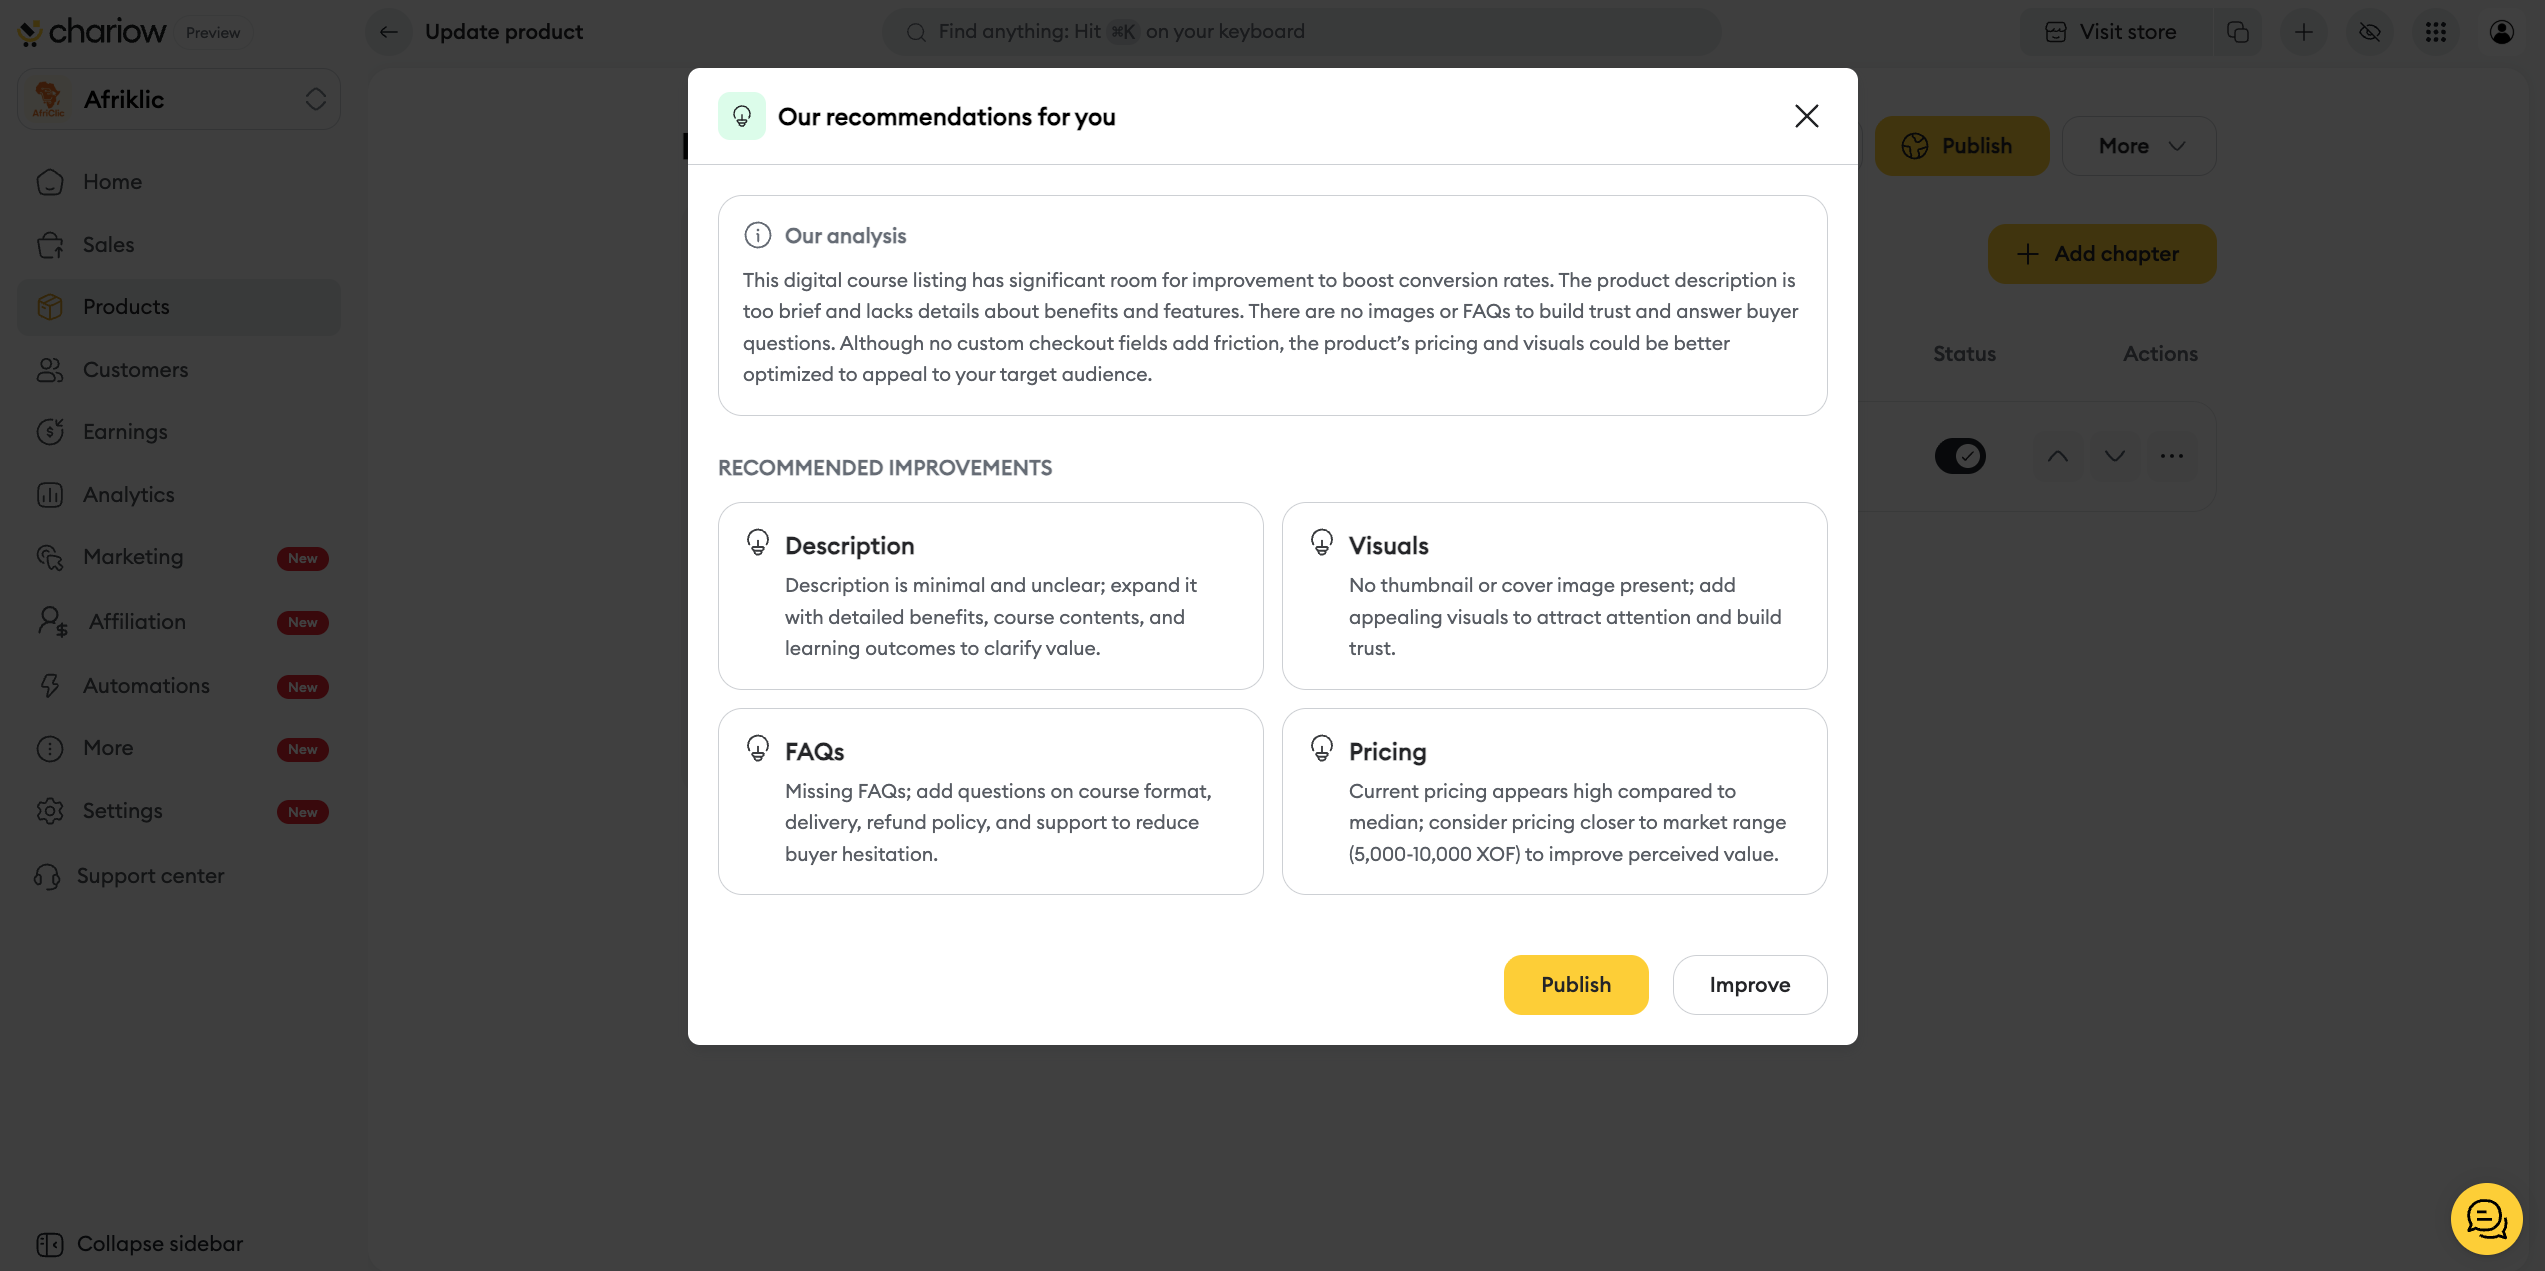
Final action : if you want to apply the AI feedback right away, click on Improve. Otherwise, click on Publish to put the course online.
Once your course is published, you can go back and edit the information entered, including the price, lessons, description, or even the category if needed.
To find out how to customize your offer even more (FAQ, SEO, etc.), check out our dedicated guide:
➜ Custom configuration options for courses
Need help? Contact our support via chat or at [email protected]