The “Appearance & Theme” section of your settings allows you to control the visual appearance, colors, and structure of your online store. You can intuitively customize the design to reflect your brand identity without any technical knowledge.
From your dashboard, go to Settings.
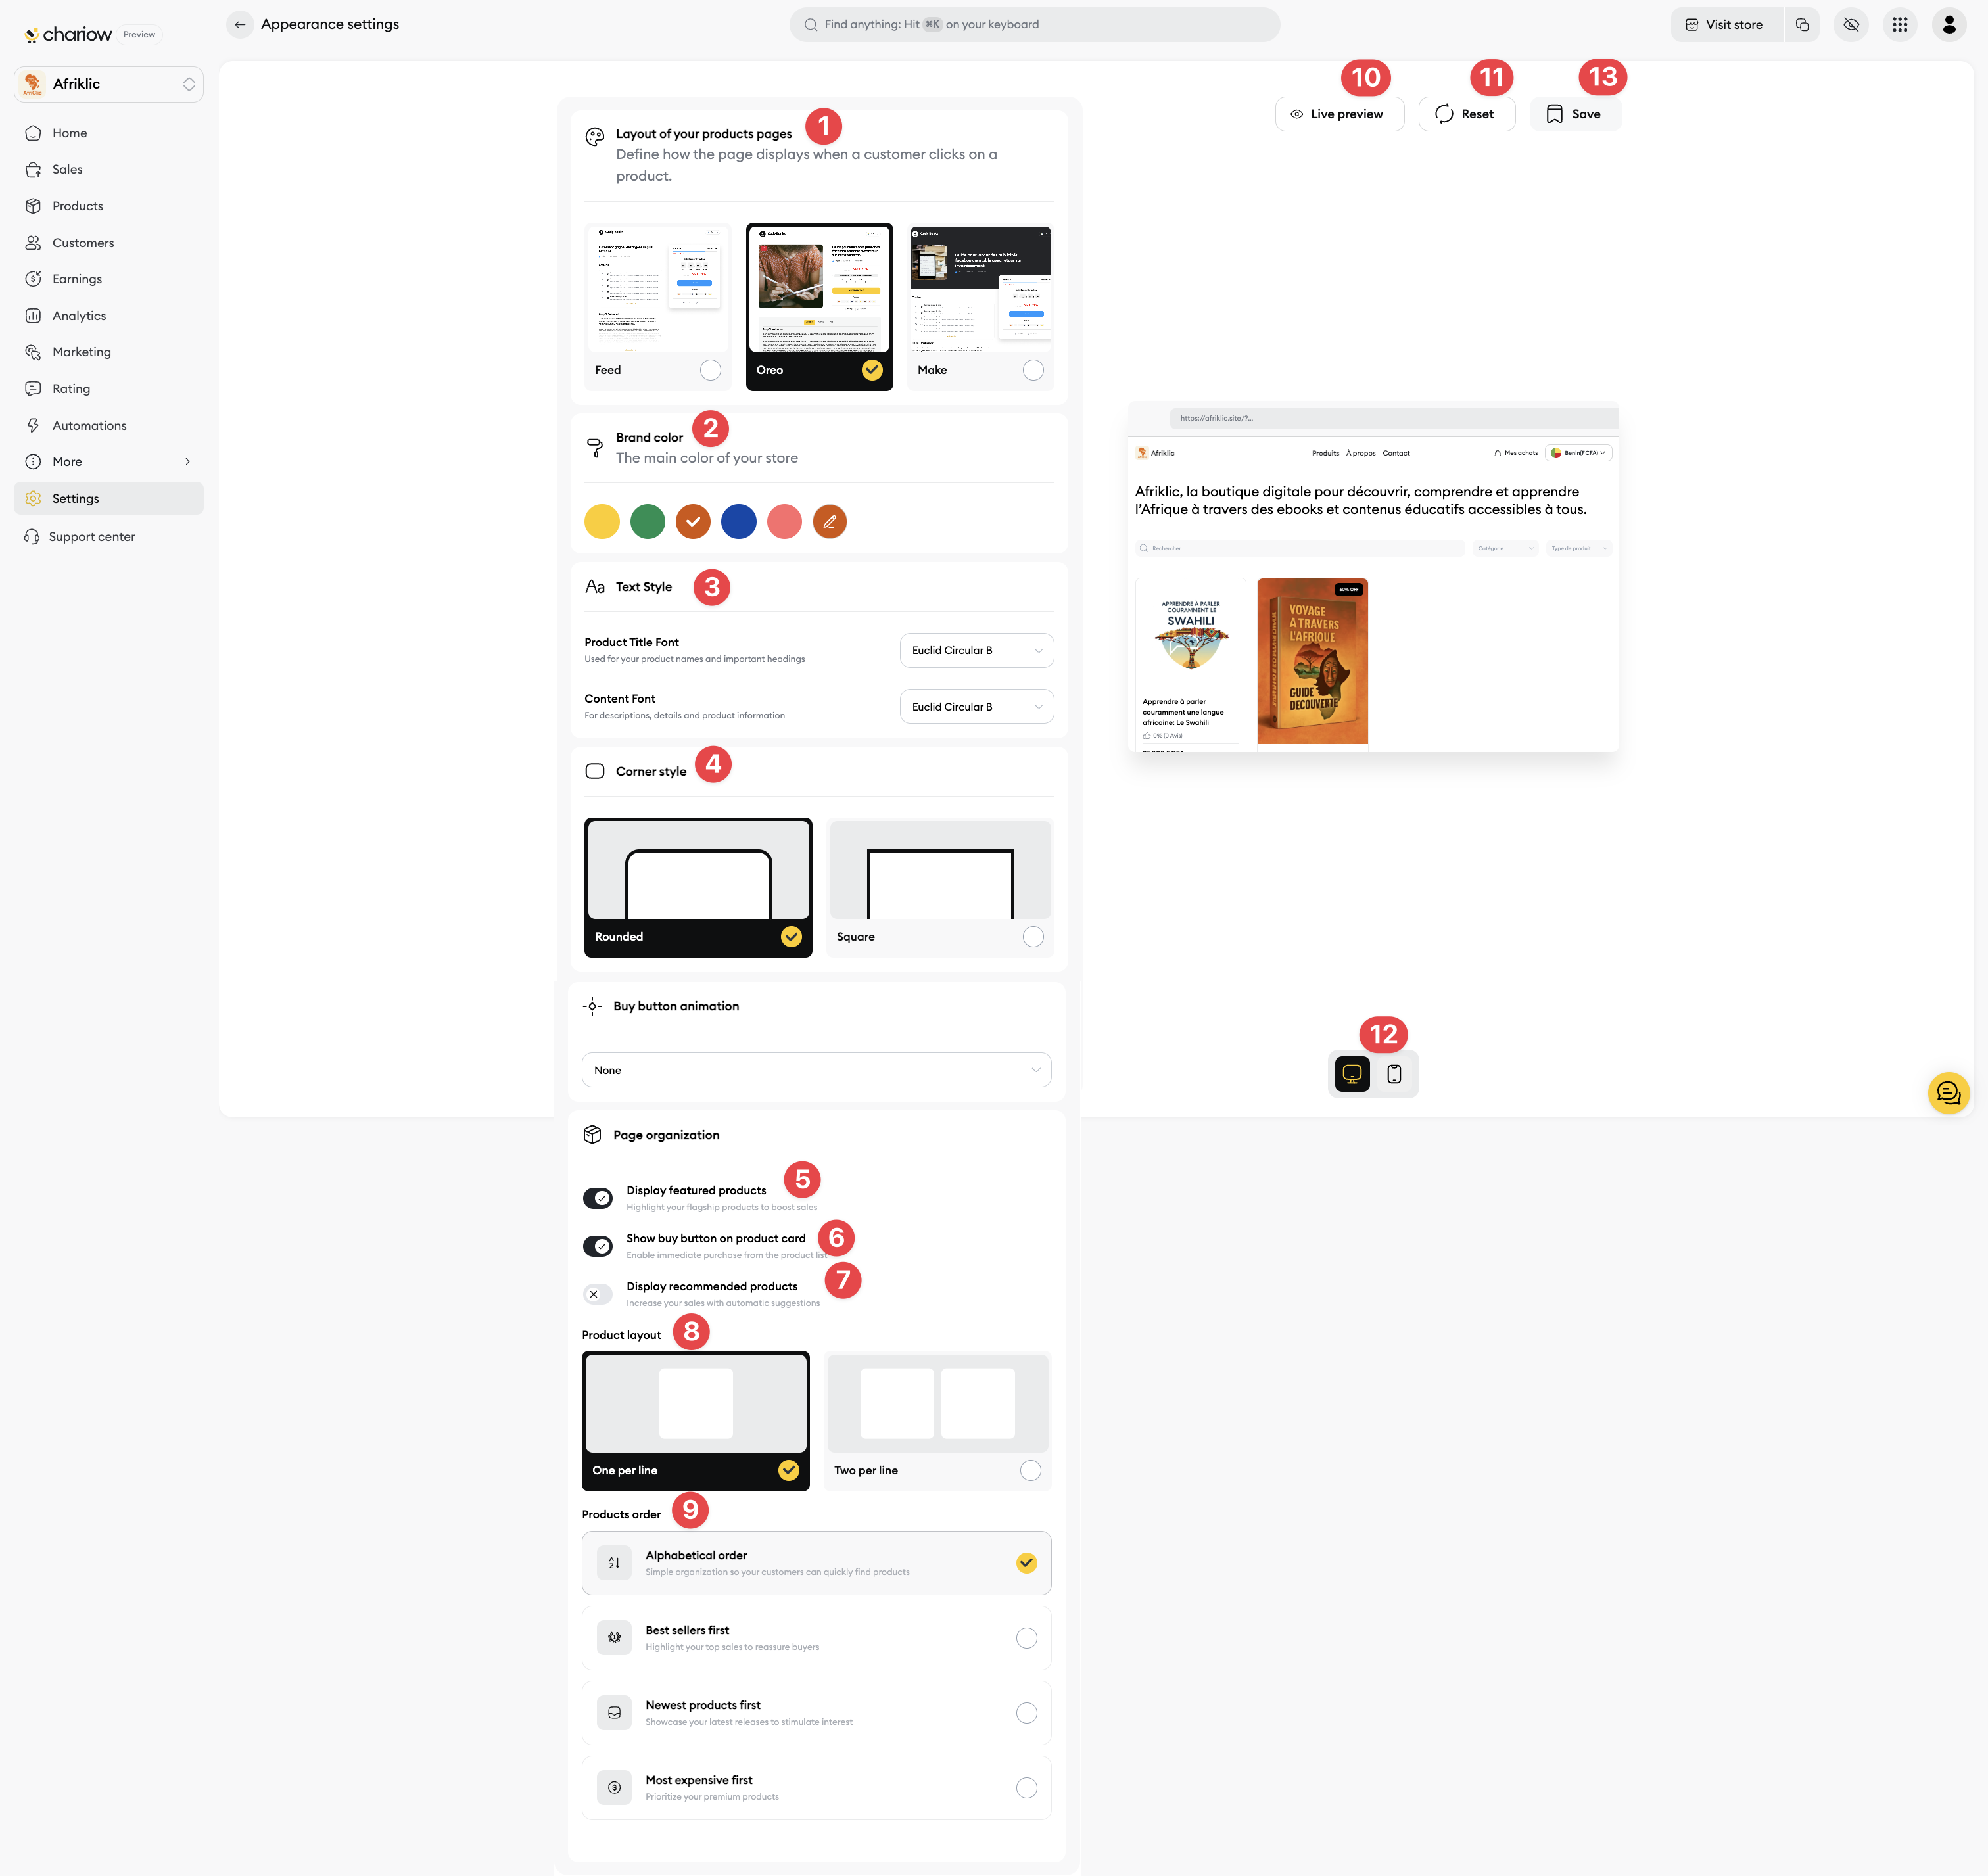
Select Appearance and Theme under Store Customization.
This section lets you choose your store’s visual identity:
Your store's appearance (1): Pick the design (template) that fits your brand best.
Your brand color (2): Select the main color that will be used for buttons, links, and other accent elements in your store.
Text style (3): Set the font and size for your store's headings.
Corner style (4): Choose between rounded or square edges
This is where you arrange how your products are displayed:
Display featured products (5): Check this option to highlight a specific selection of products.
Show the purchase box on the product card (6): Lets the user add a product straight to the cart from the list.
Show recommended products (7): Turn this on to suggest similar or complementary products.
Products per row (8): Choose if you want to show one product per row (large size) or two per row (compact) on your shop.
Product order (9): Set how your products are shown (alphabetical, best sellers, newest, etc.).
Before making your changes public, you can check them:
Preview (10) and (12): Use the Preview button (10) to check your changes right on your shop from a link, or (12) for a direct preview on mobile or desktop without affecting your online shop.
Reset (11): Click Reset (11) to wipe out all your shop settings in one click.
Save (13): Click Save (13) to apply the new settings and make them show up right away on your online shop.
Need help? Reach out to our support via chat or at [email protected]