Workflows on Chariow are powerful productivity tools that let you automate your business processes and marketing tasks so you can be more efficient and maximize your sales. Beyond simply sending emails, they let you map out your customers’ journeys based on their actions on your store.
From your dashboard, go to the Automations section, then click on Workflows.
Click the Create a workflow button in the top right

Once the creation window is open, you need to fill in the initial elements of your automation:
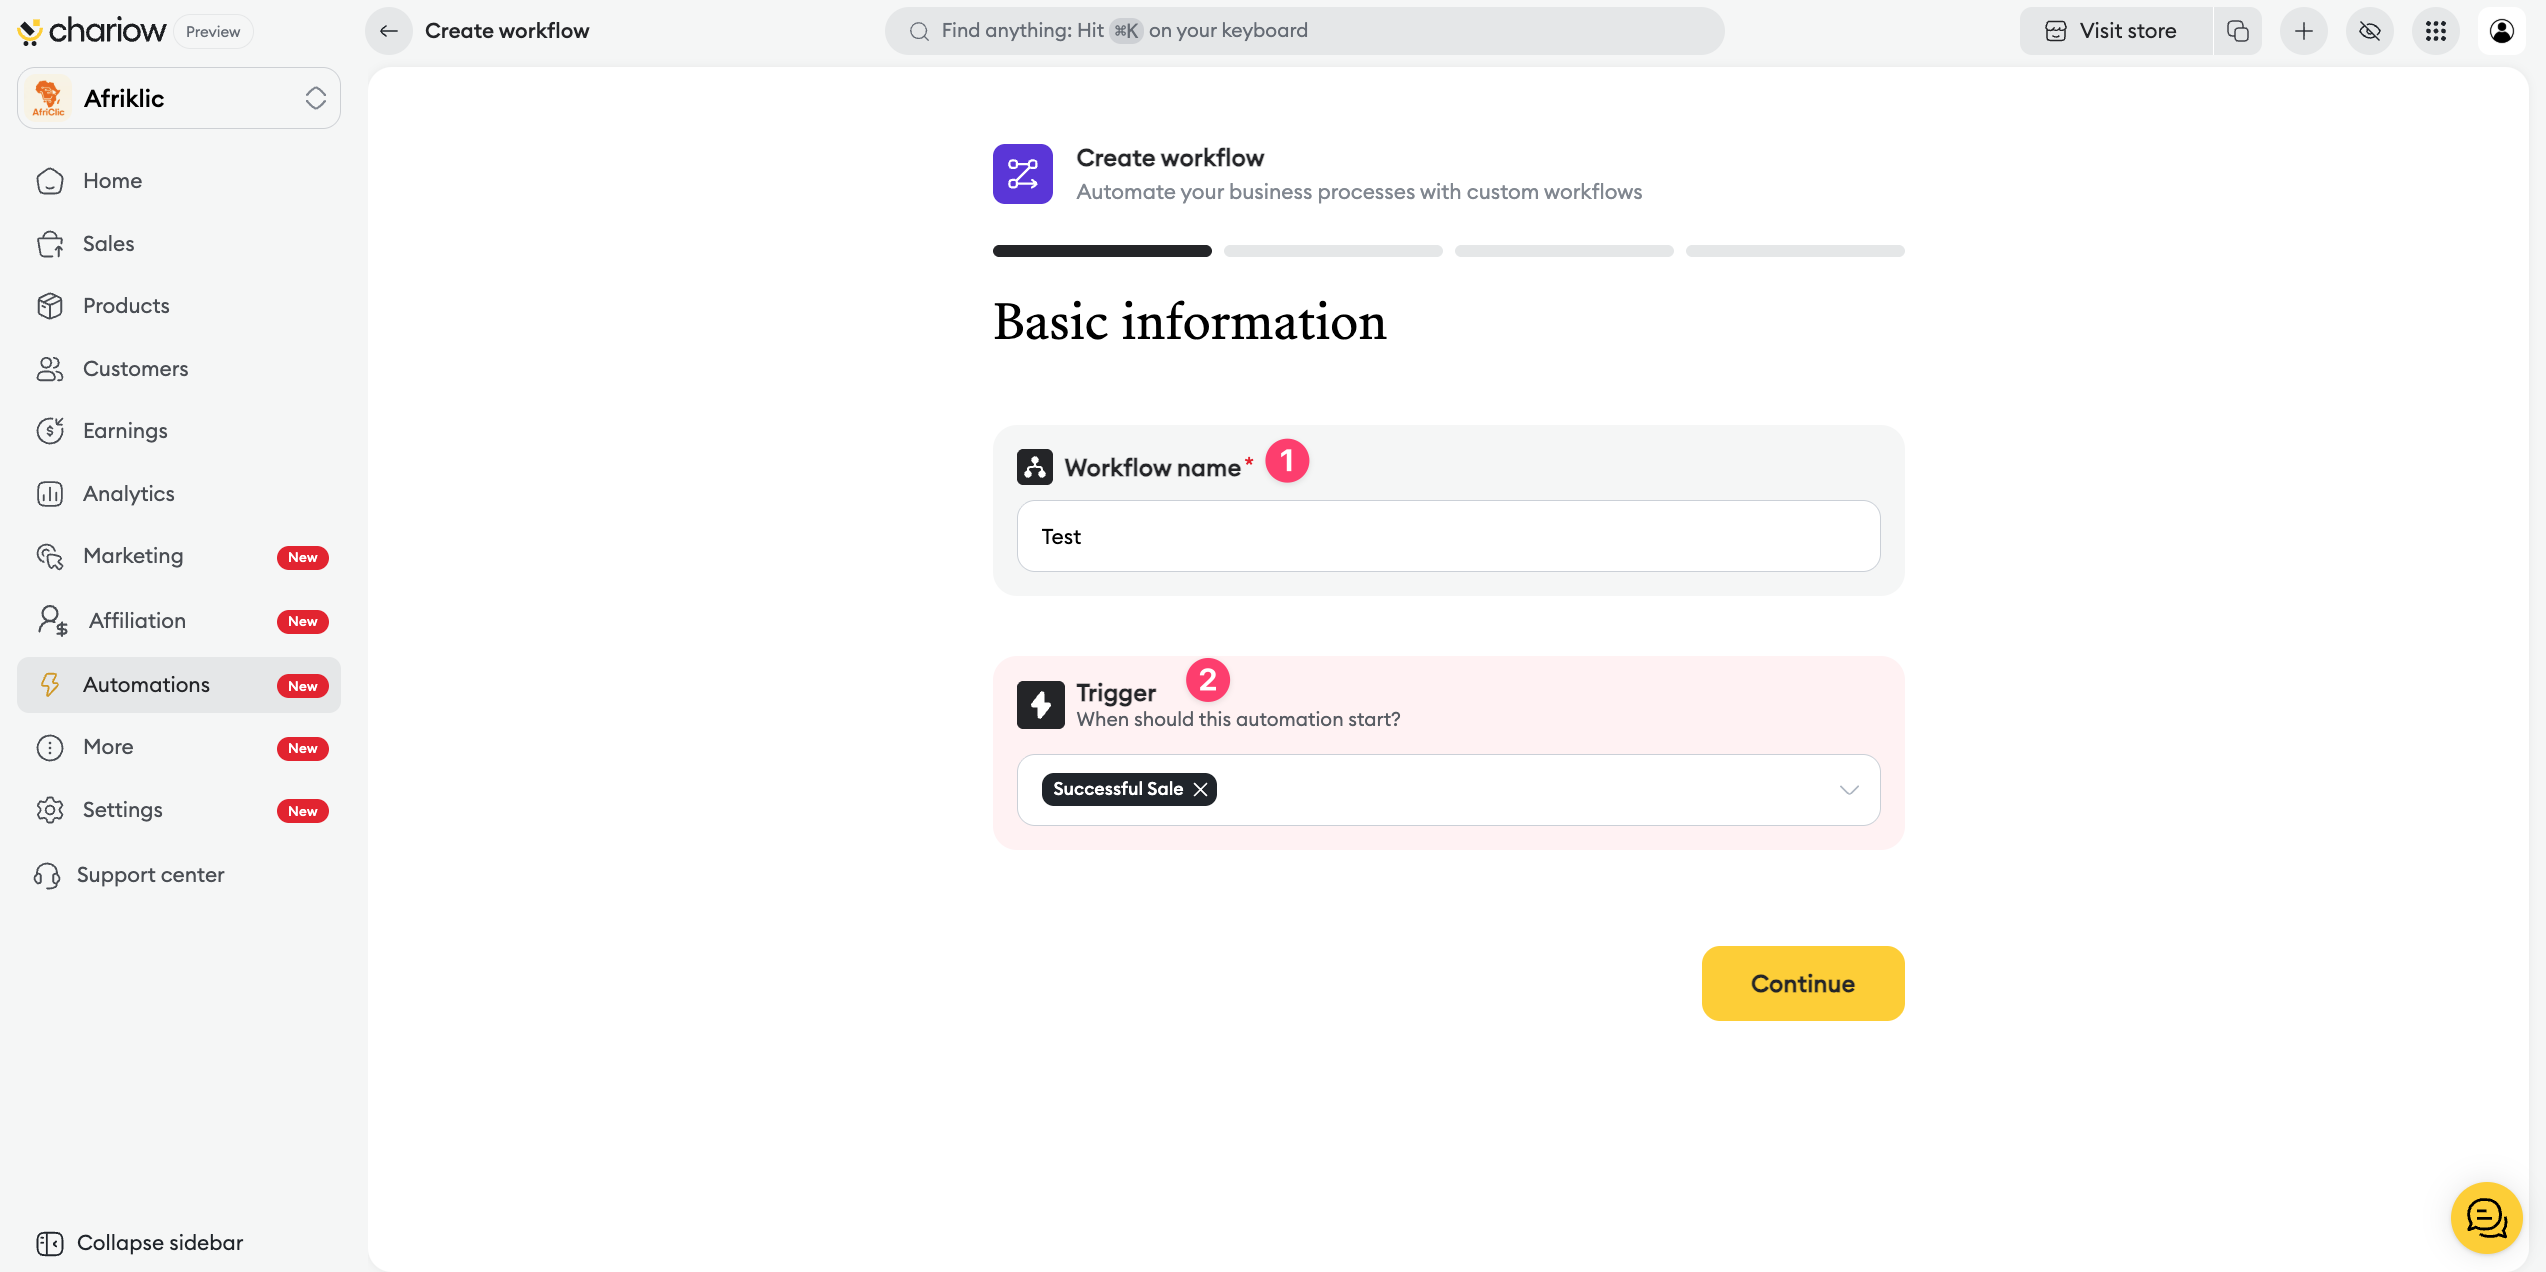
Automation name : Give your process a descriptive and mandatory name.
Triggers : Choose the event that will start the automation. You have three options, but you can only select two at most per workflow:
Successful sale : The workflow is triggered as soon as a payment is confirmed.
Abandoned sale : For a customer who leaves the payment page without completing the purchase.
Failed sale : For a transaction that isn’t completed due to a payment issue.
Actions are the tasks executed by the system. The options available depend directly on the integrations (email, WhatsApp, Brevo, etc.) enabled on your store.
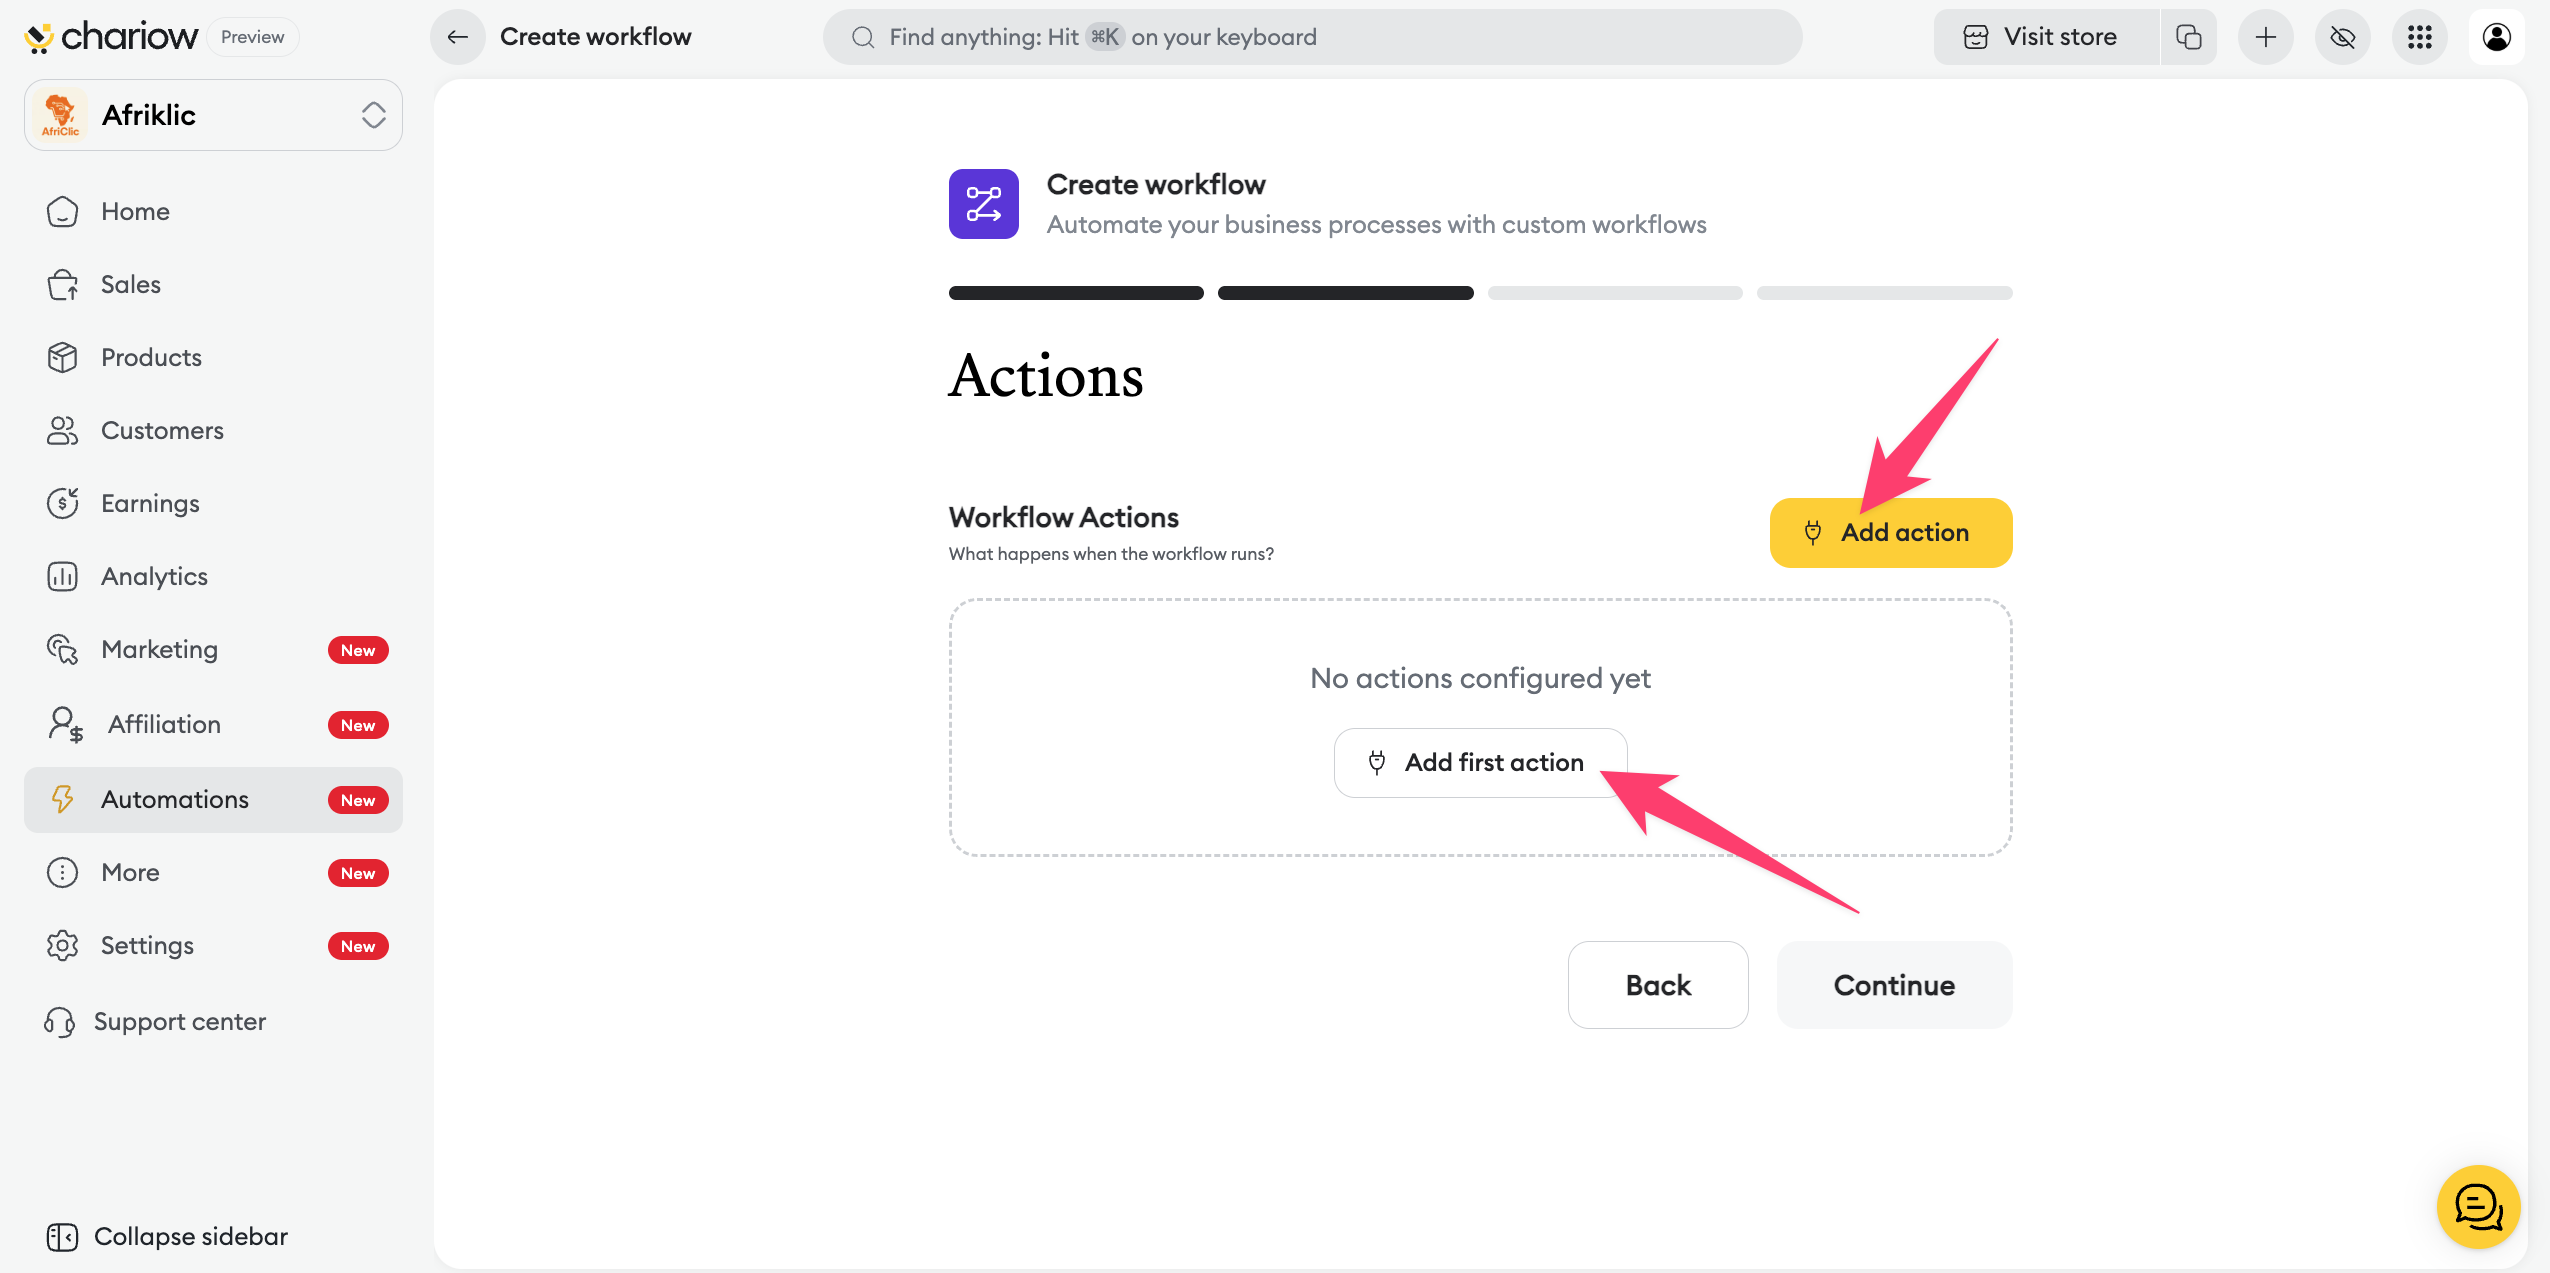
Click the "Add an action" button.
Select the action type: By default, the suggested option is sending an email. If you’ve added other integrations, you’ll be able to choose specific actions related to those tools.
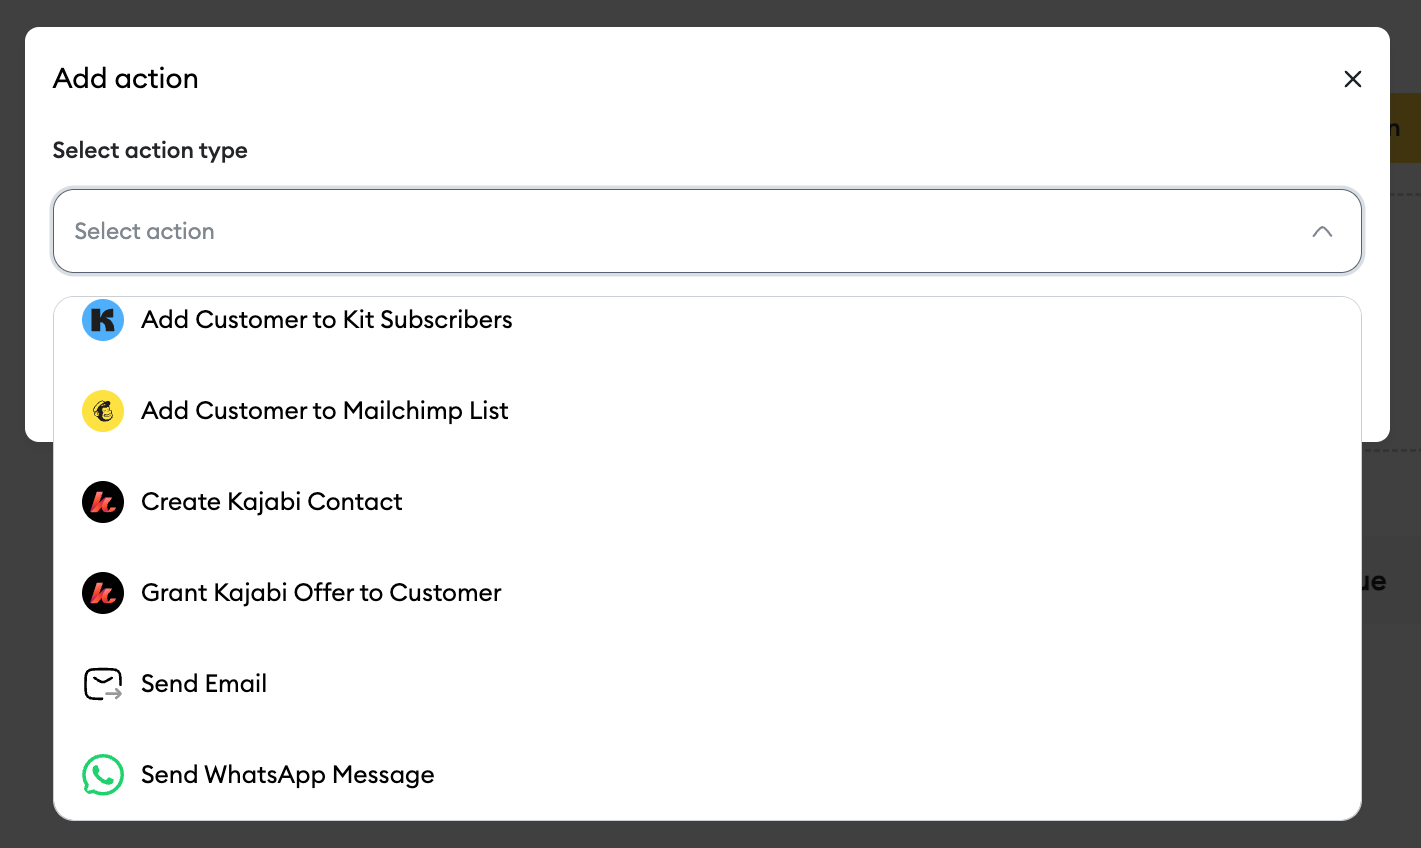
Adaptive configuration: Once the action is selected, the fields automatically adapt (subject, content, recipients). You can use merge tags to personalize the send with the customer or product name.
You can add up to 10 actions to build a complete sequence.
This step lets you fine-tune how your automation behaves:
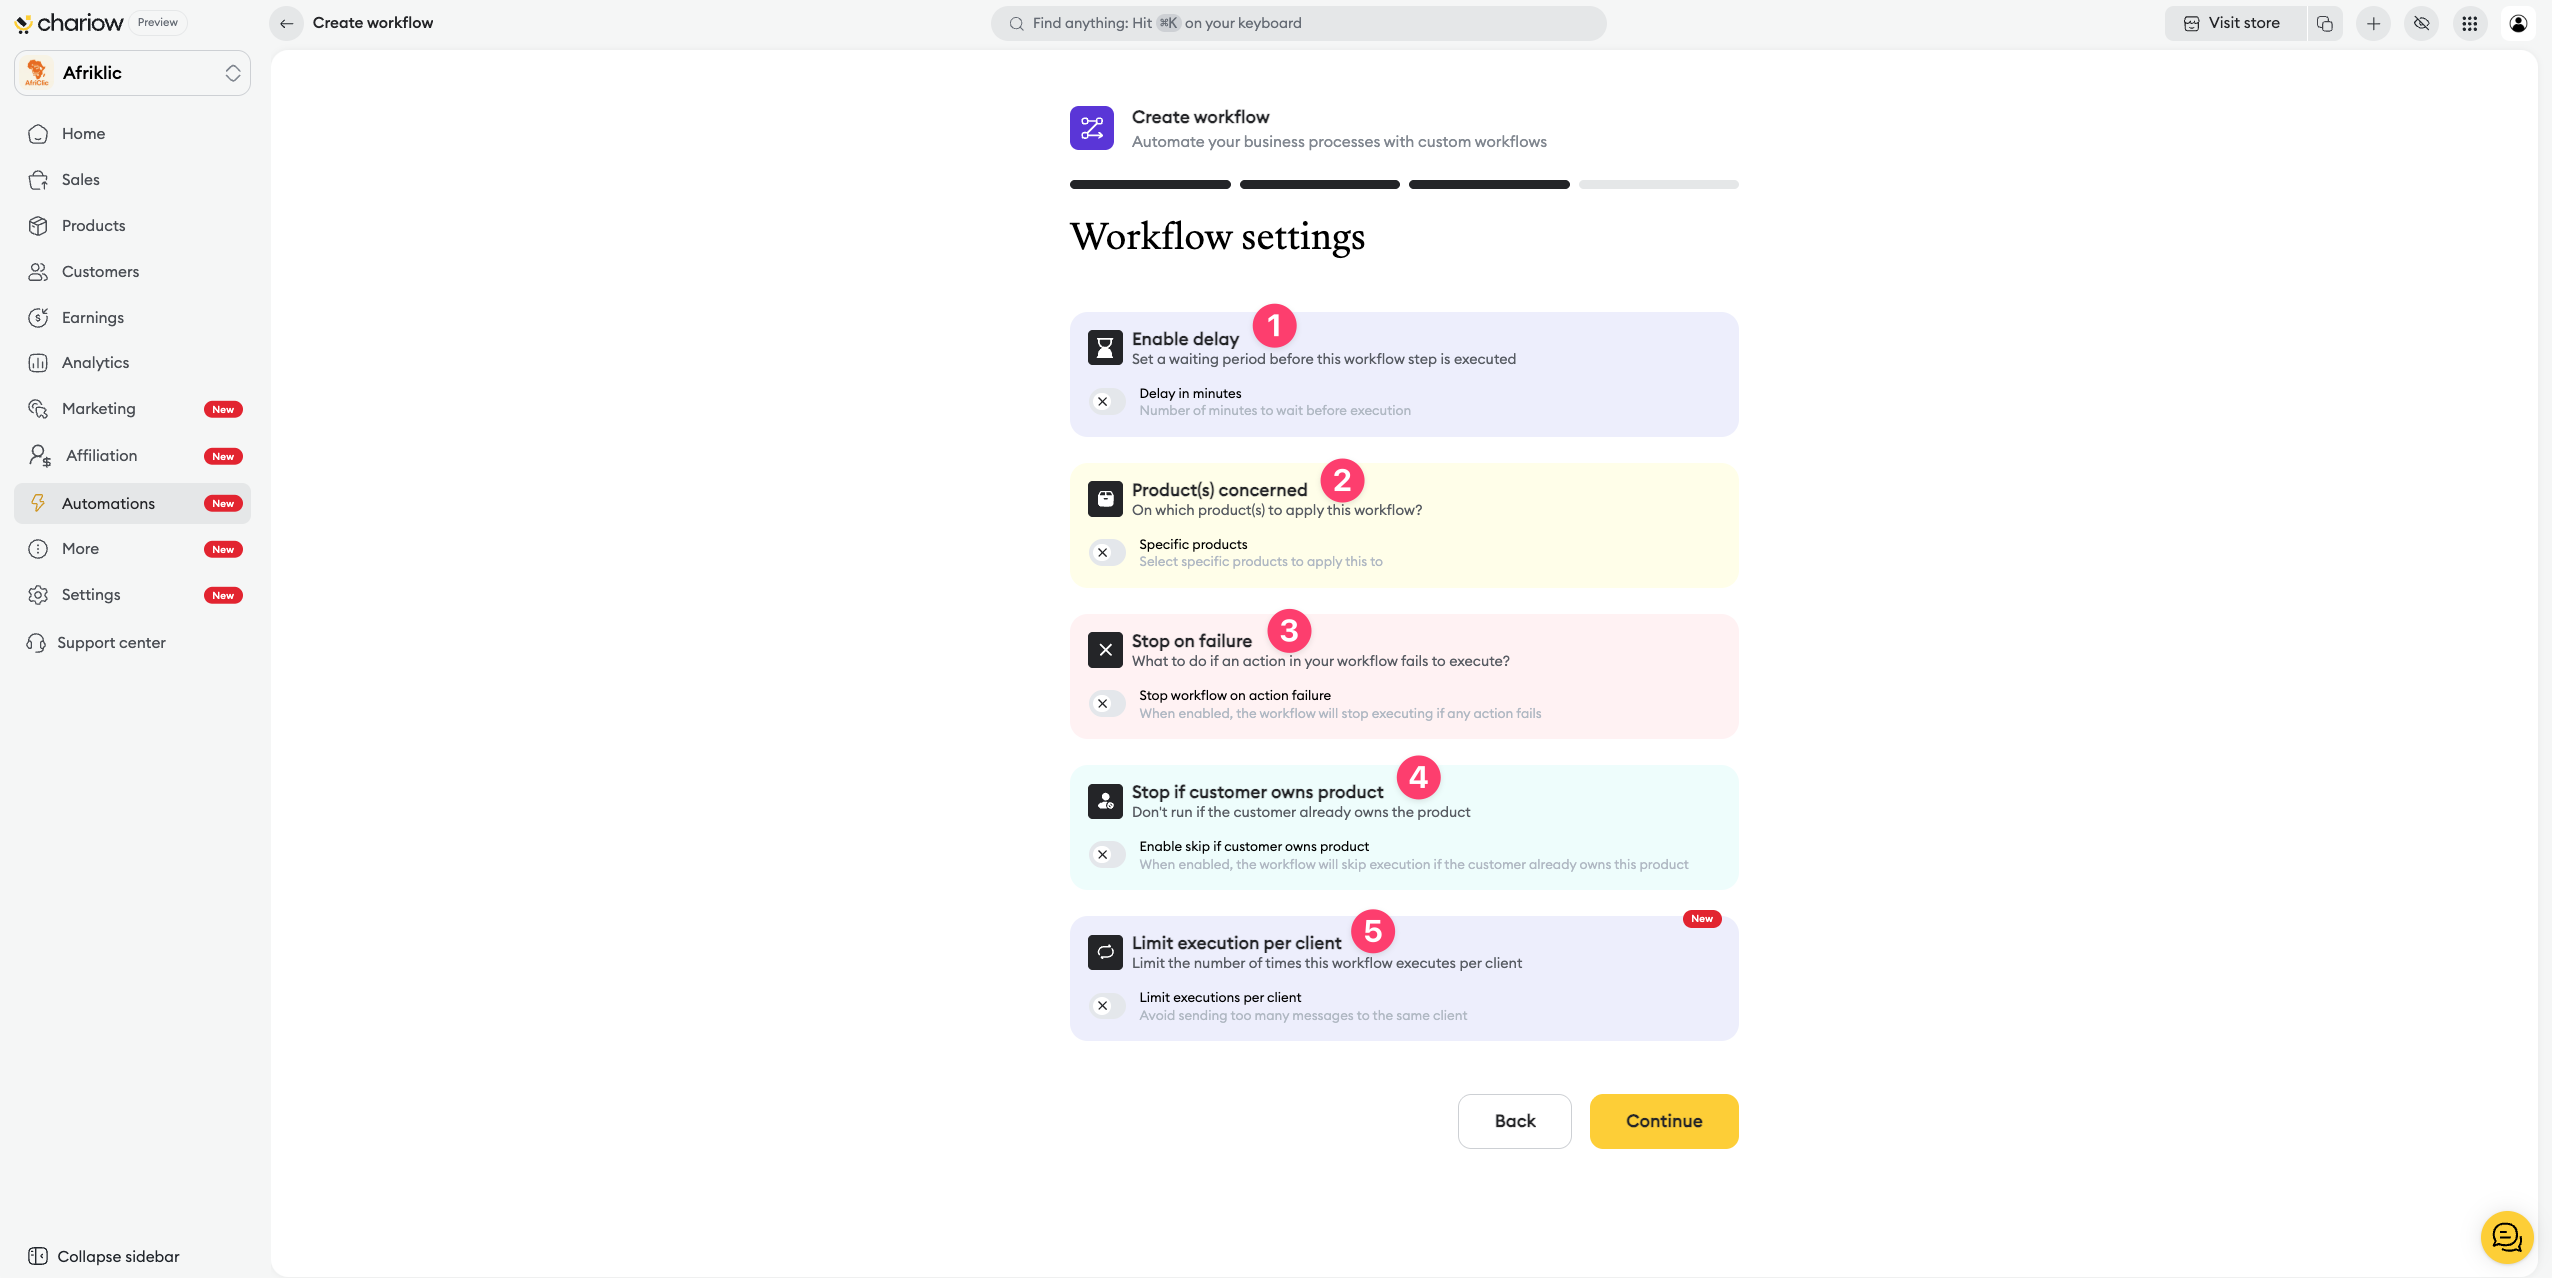
Execution delay: Set a specific delay (in minutes, hours, or days) before execution. Leave empty for an instant action.
Relevant product(s): Select whether this automation applies to your entire catalog or to specific products.
Stop in case of failure: Choose whether the workflow should stop if an action encounters a technical error.
Stop if the customer already owns the product: Essential to avoid sending a follow-up for a product the customer has already bought.
Execution limit: Set how many times this workflow can be triggered for the same customer. This helps avoid repeatedly sending the same sequence to a recurring user.
Once saved, Chariow takes you to a final preview page. This recap (name, triggers, delays, actions) is a safety step so you can read everything again before going live.

To launch : Click on the "Activate" button on this preview page.
Need help? Contact our support via chat or at [email protected]