Calendly is an appointment scheduling solution that simplifies getting in touch by eliminating endless email exchanges. By connecting Calendly to Chariow, you let your clients book slots directly while centralizing the management of your appointments in your "Automations" interface.
An active Chariow account.
A Calendly account (free or paid).
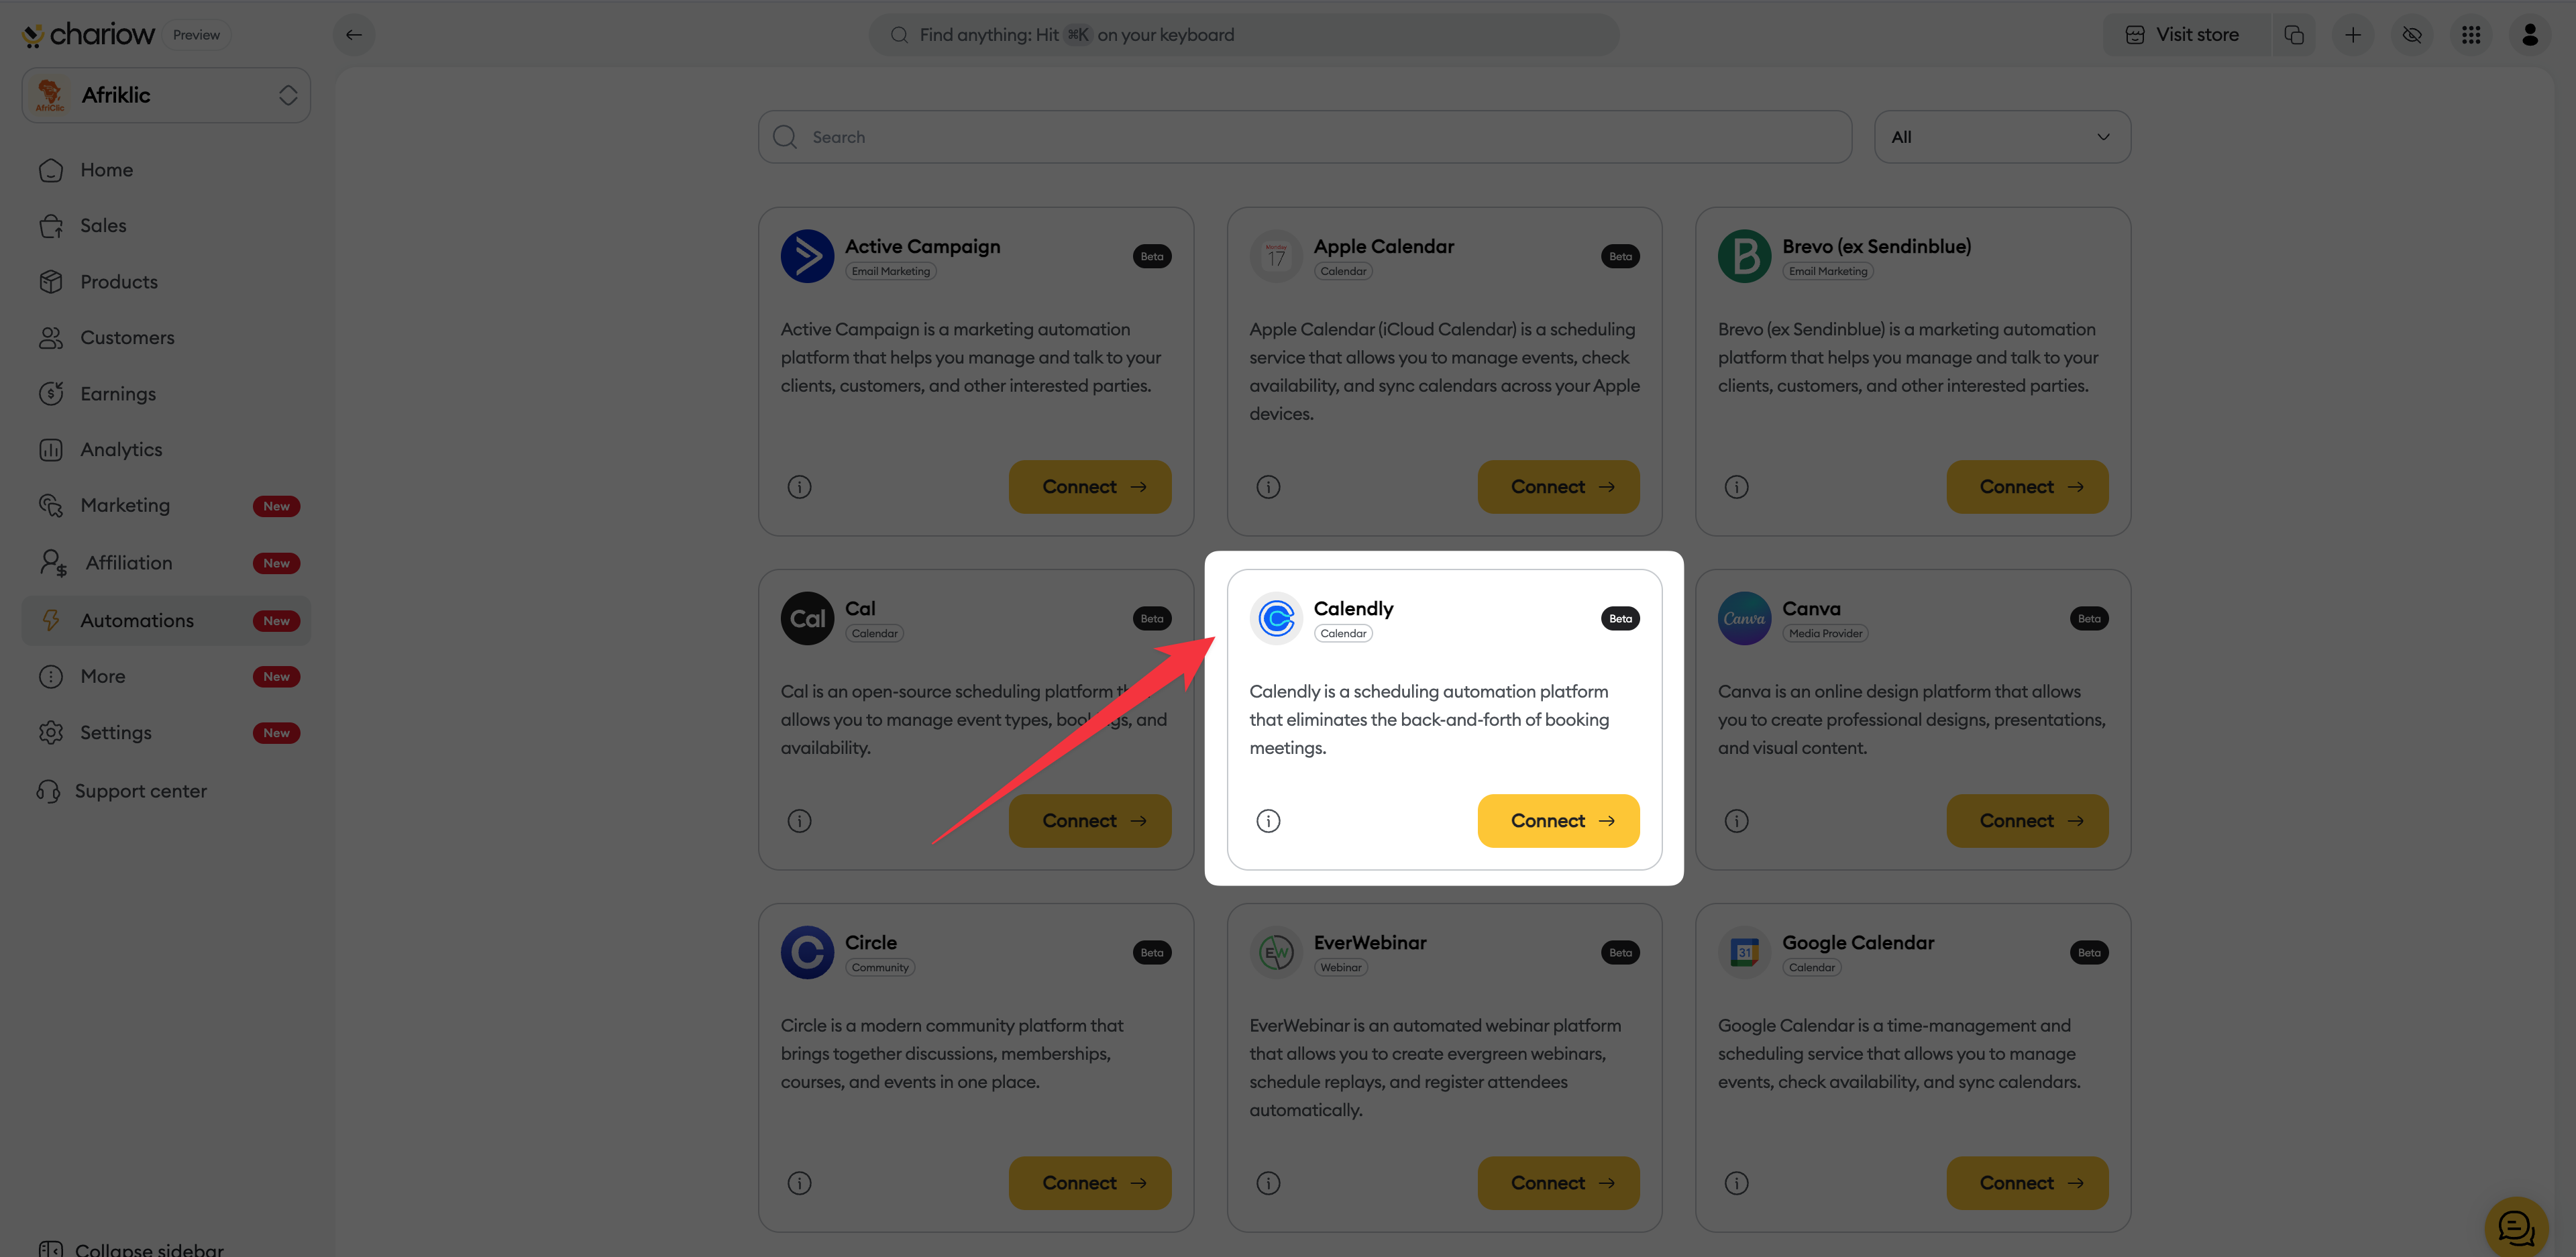
From your Chariow dashboard, go to the left sidebar menu and click on the "Automations" tab. Then click on the "Connect a tool" button located at the top right of the screen.
Browse the list of integrations and locate the "Calendly" card. Click on the "Connect" button.

On the configuration page that appears:
Enter the name you want to give this connection in the "Nom du compte" field.
Click the "Se connecter avec Calendly" button.
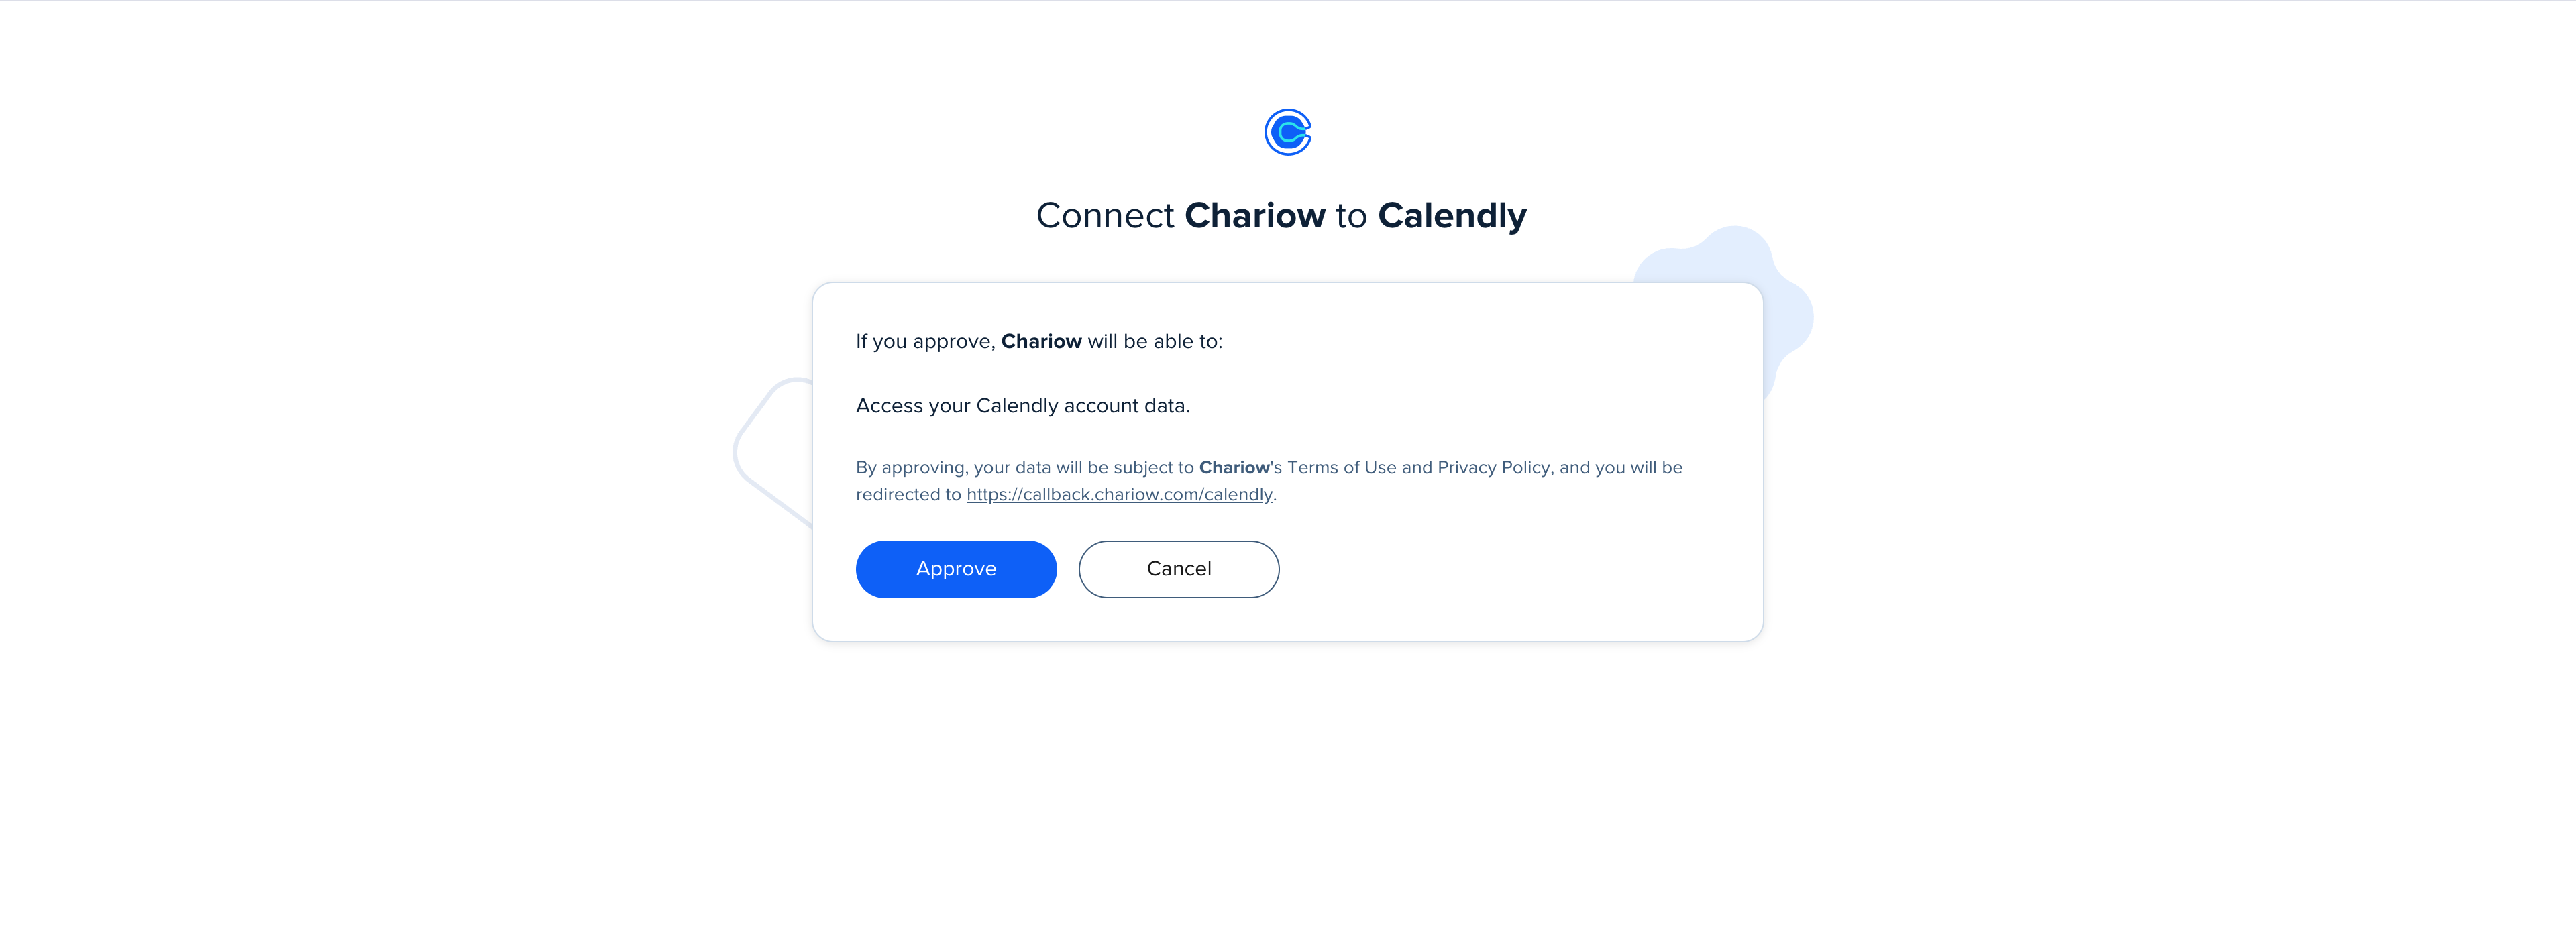
An external Calendly window will open to confirm the connection:
The message will say that Chariow wants to access data from your Calendly account.
Click the blue "Approve" button (or "Autoriser") to finish authentication.
You’ll be automatically redirected to your "Integrations" list on Chariow. The "Calendly" row should now appear with a green checkmark next to the name and the switch in the "Status" column should be turned on.
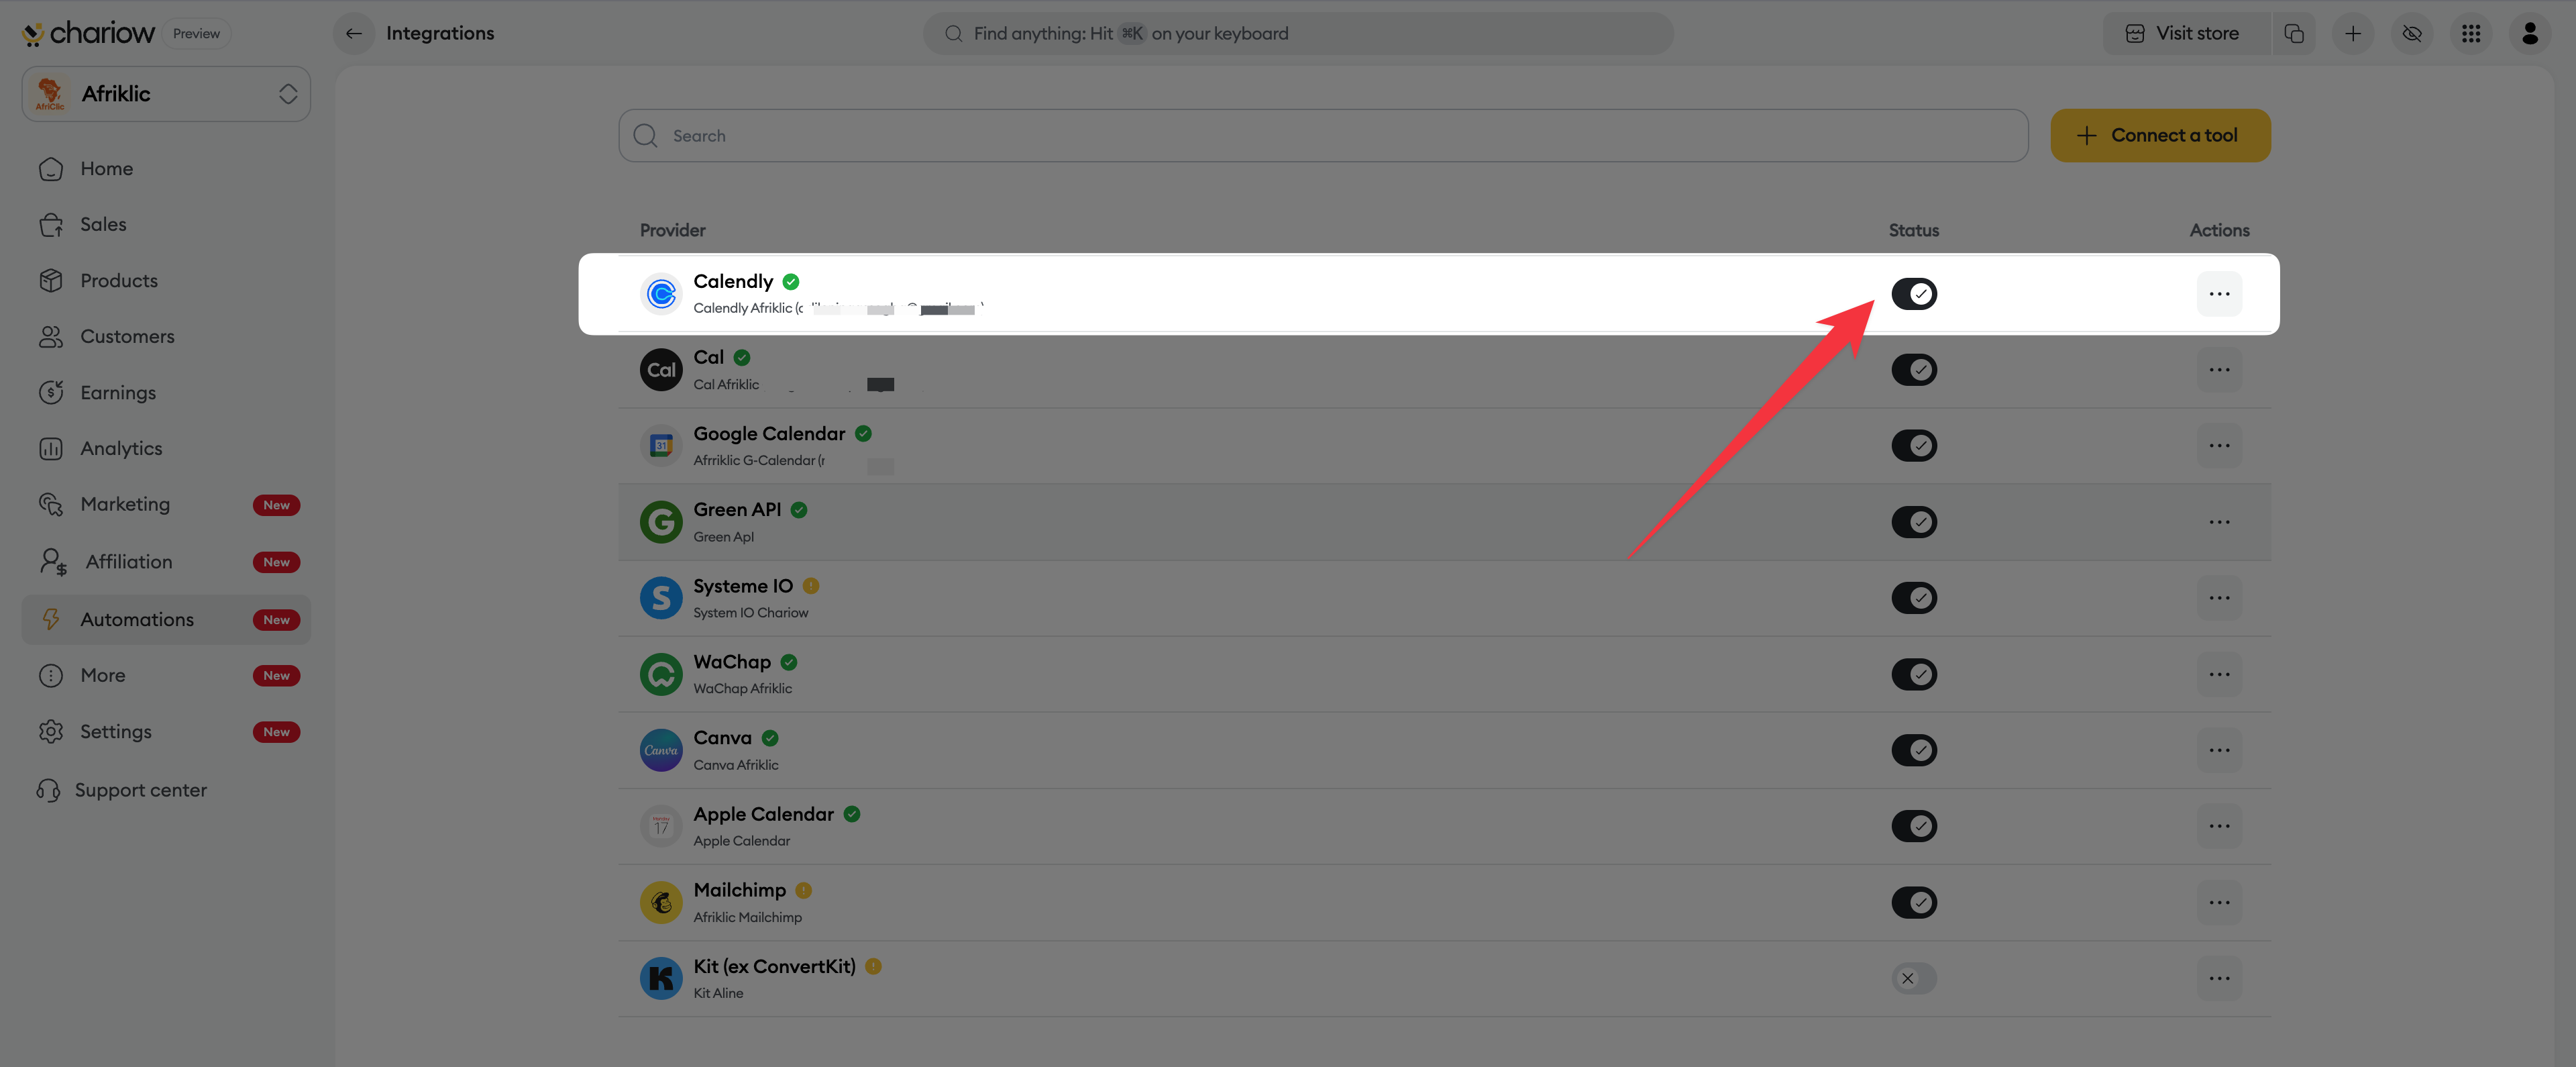
Multiple management: If you have several Calendly calendars for different services, you can easily tell them apart by using clear account names in step 3.
Connection status: If you want to temporarily stop syncing without deleting your settings, just use the switch in the "Status" column.
Session logout: If the approval window doesn’t show up, make sure you’re logged into your Calendly account in the same browser.
Need help? Contact our support via chat or at [email protected].