Cal.com is an open-source scheduling platform that lets you manage your event types, bookings, and availability. By connecting Cal.com to Chariow, you can sync your calendars and automate your workflows related to booking appointments with your clients.
An active Chariow account.
An existing Cal.com account.
Log in to your Chariow dashboard. In the left sidebar menu, click on the "Automations" tab, then select "Connect a tool" at the top of the page.
In the list of available tools, look for the "Cal" card. Click on the "Connect" button on the corresponding card.
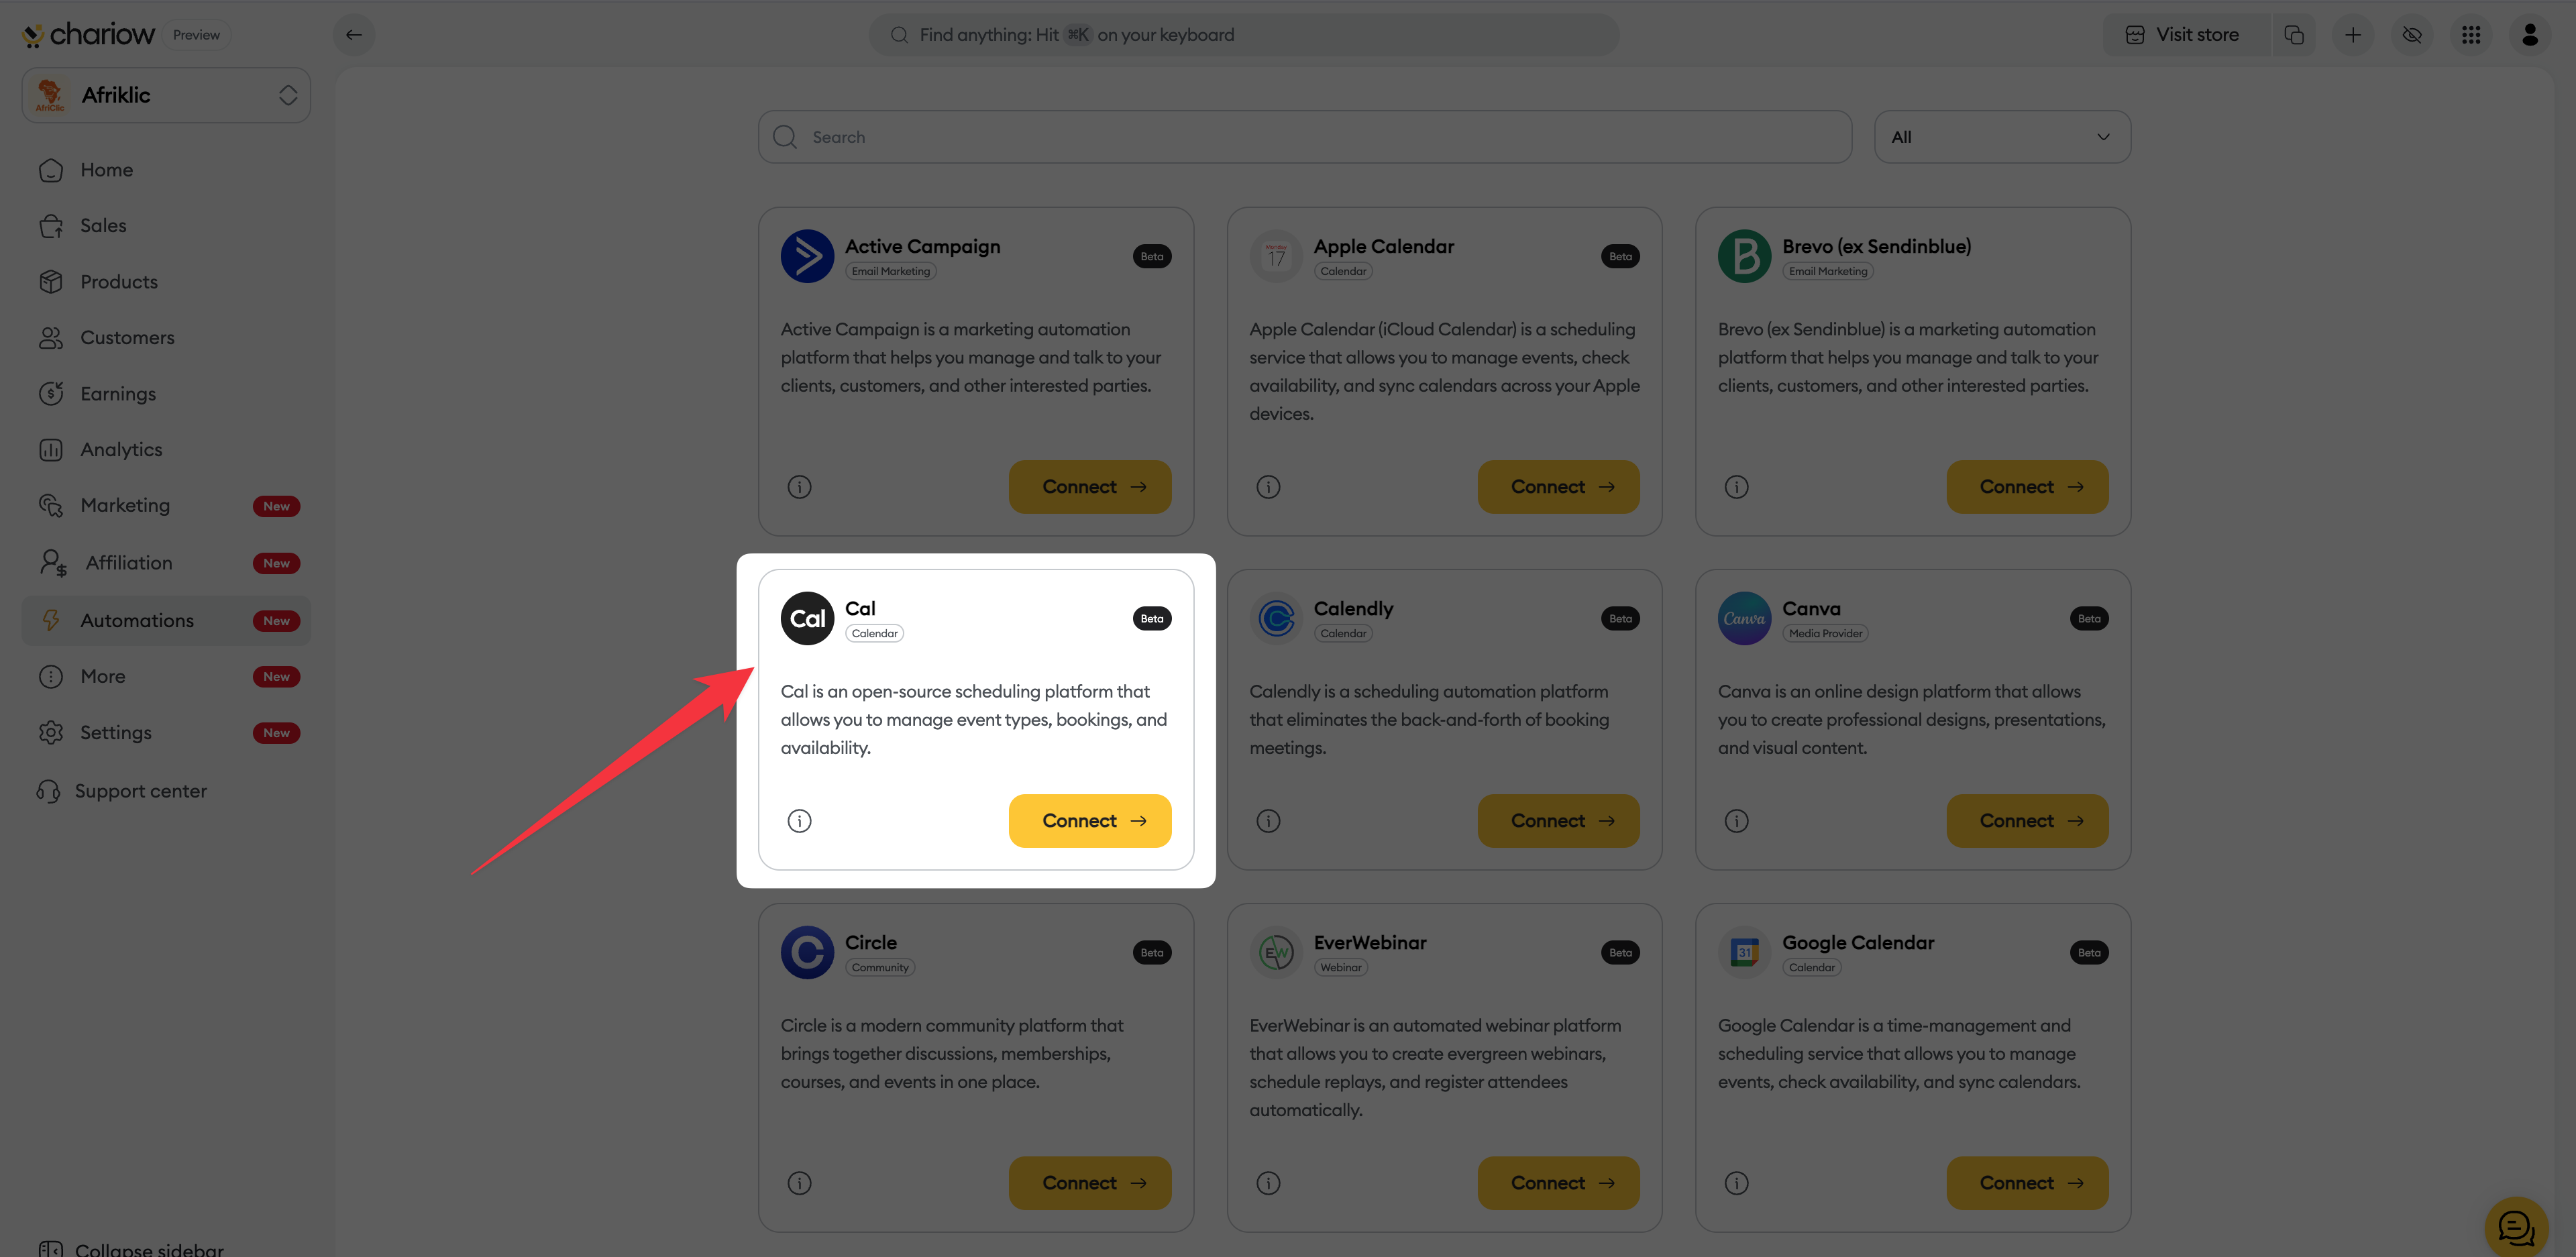
A new window will open to start the connection.
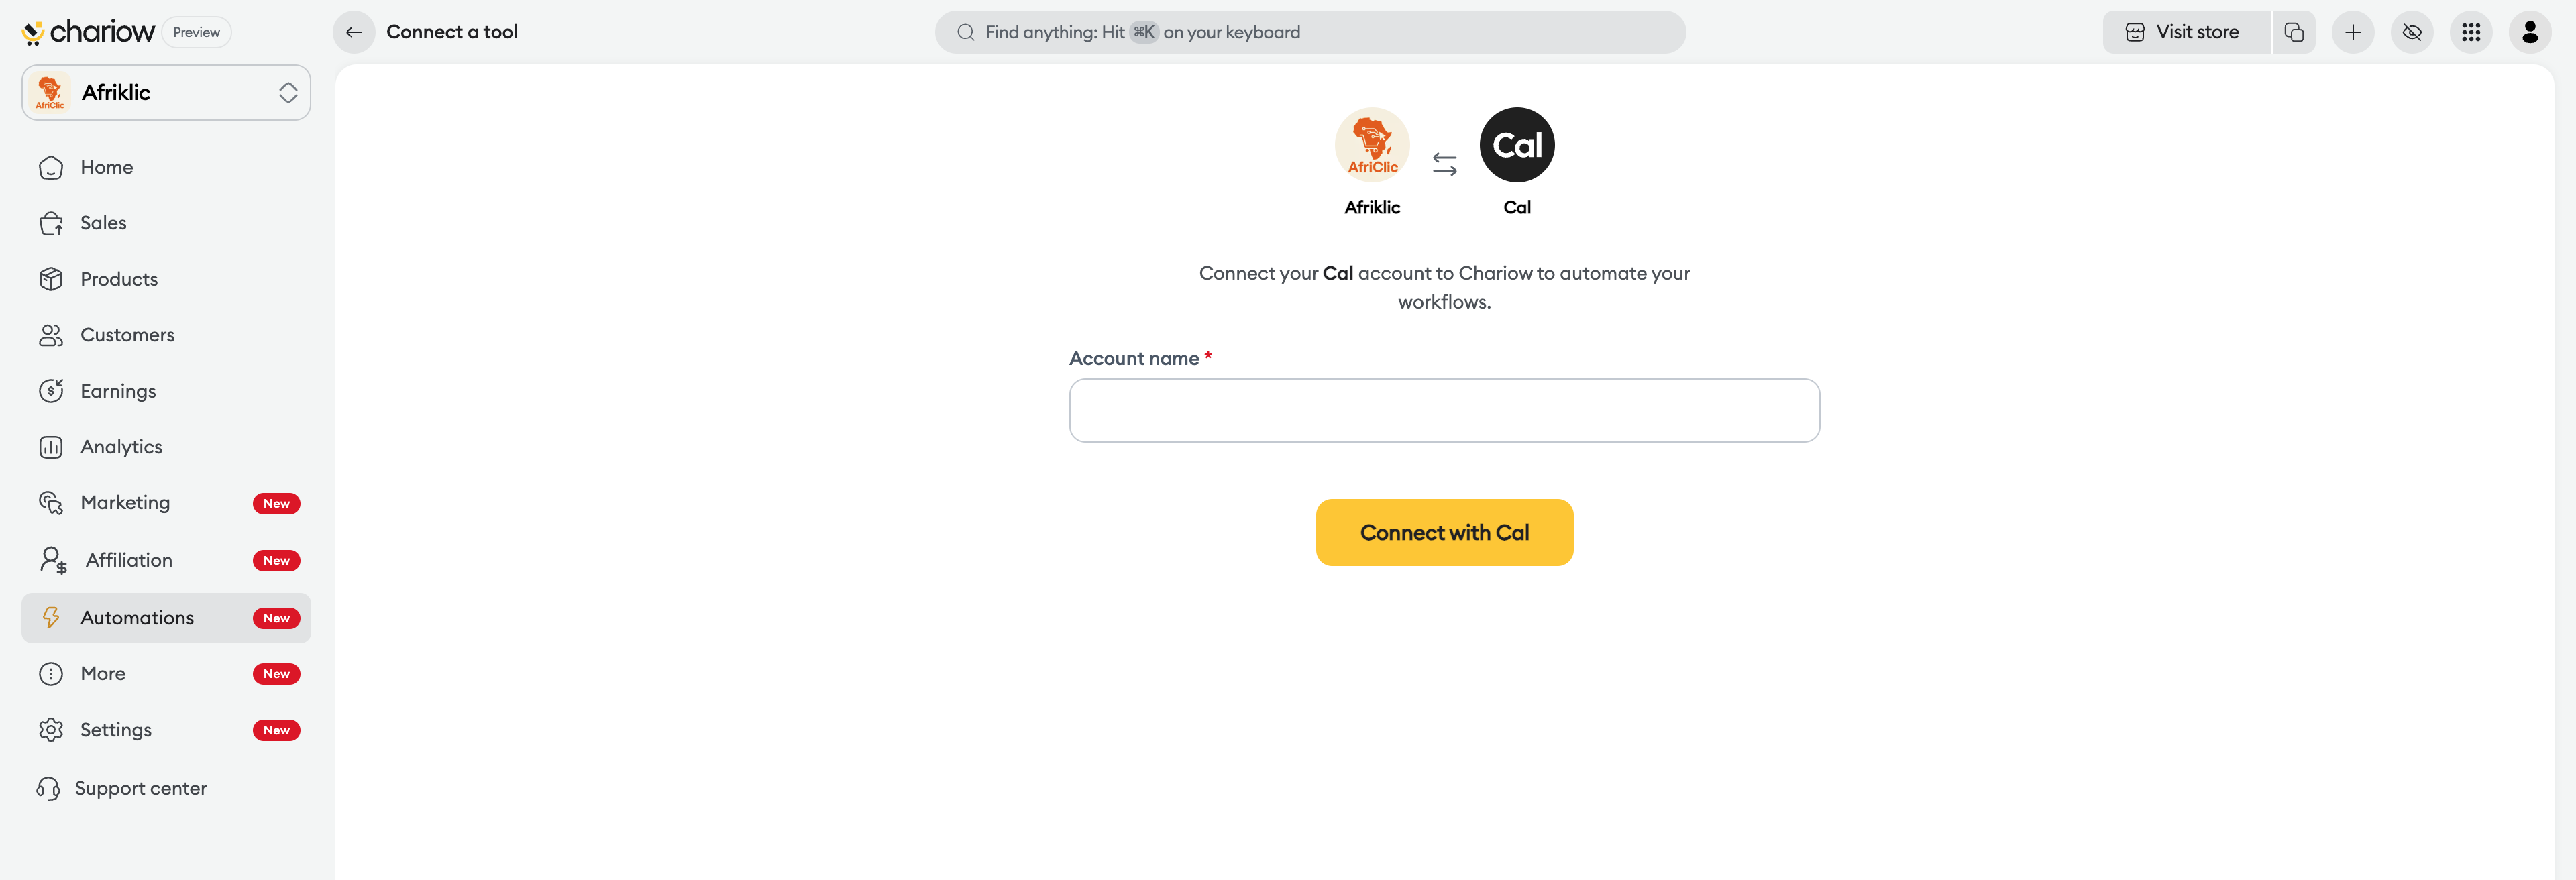
Enter the "Account name" in the dedicated field.
Click the "Sign in with Cal" button.
You’ll be redirected to a Cal.com authorization page. This step lets Chariow:
Read, edit or delete your event types.
Manage your availability and your bookings.
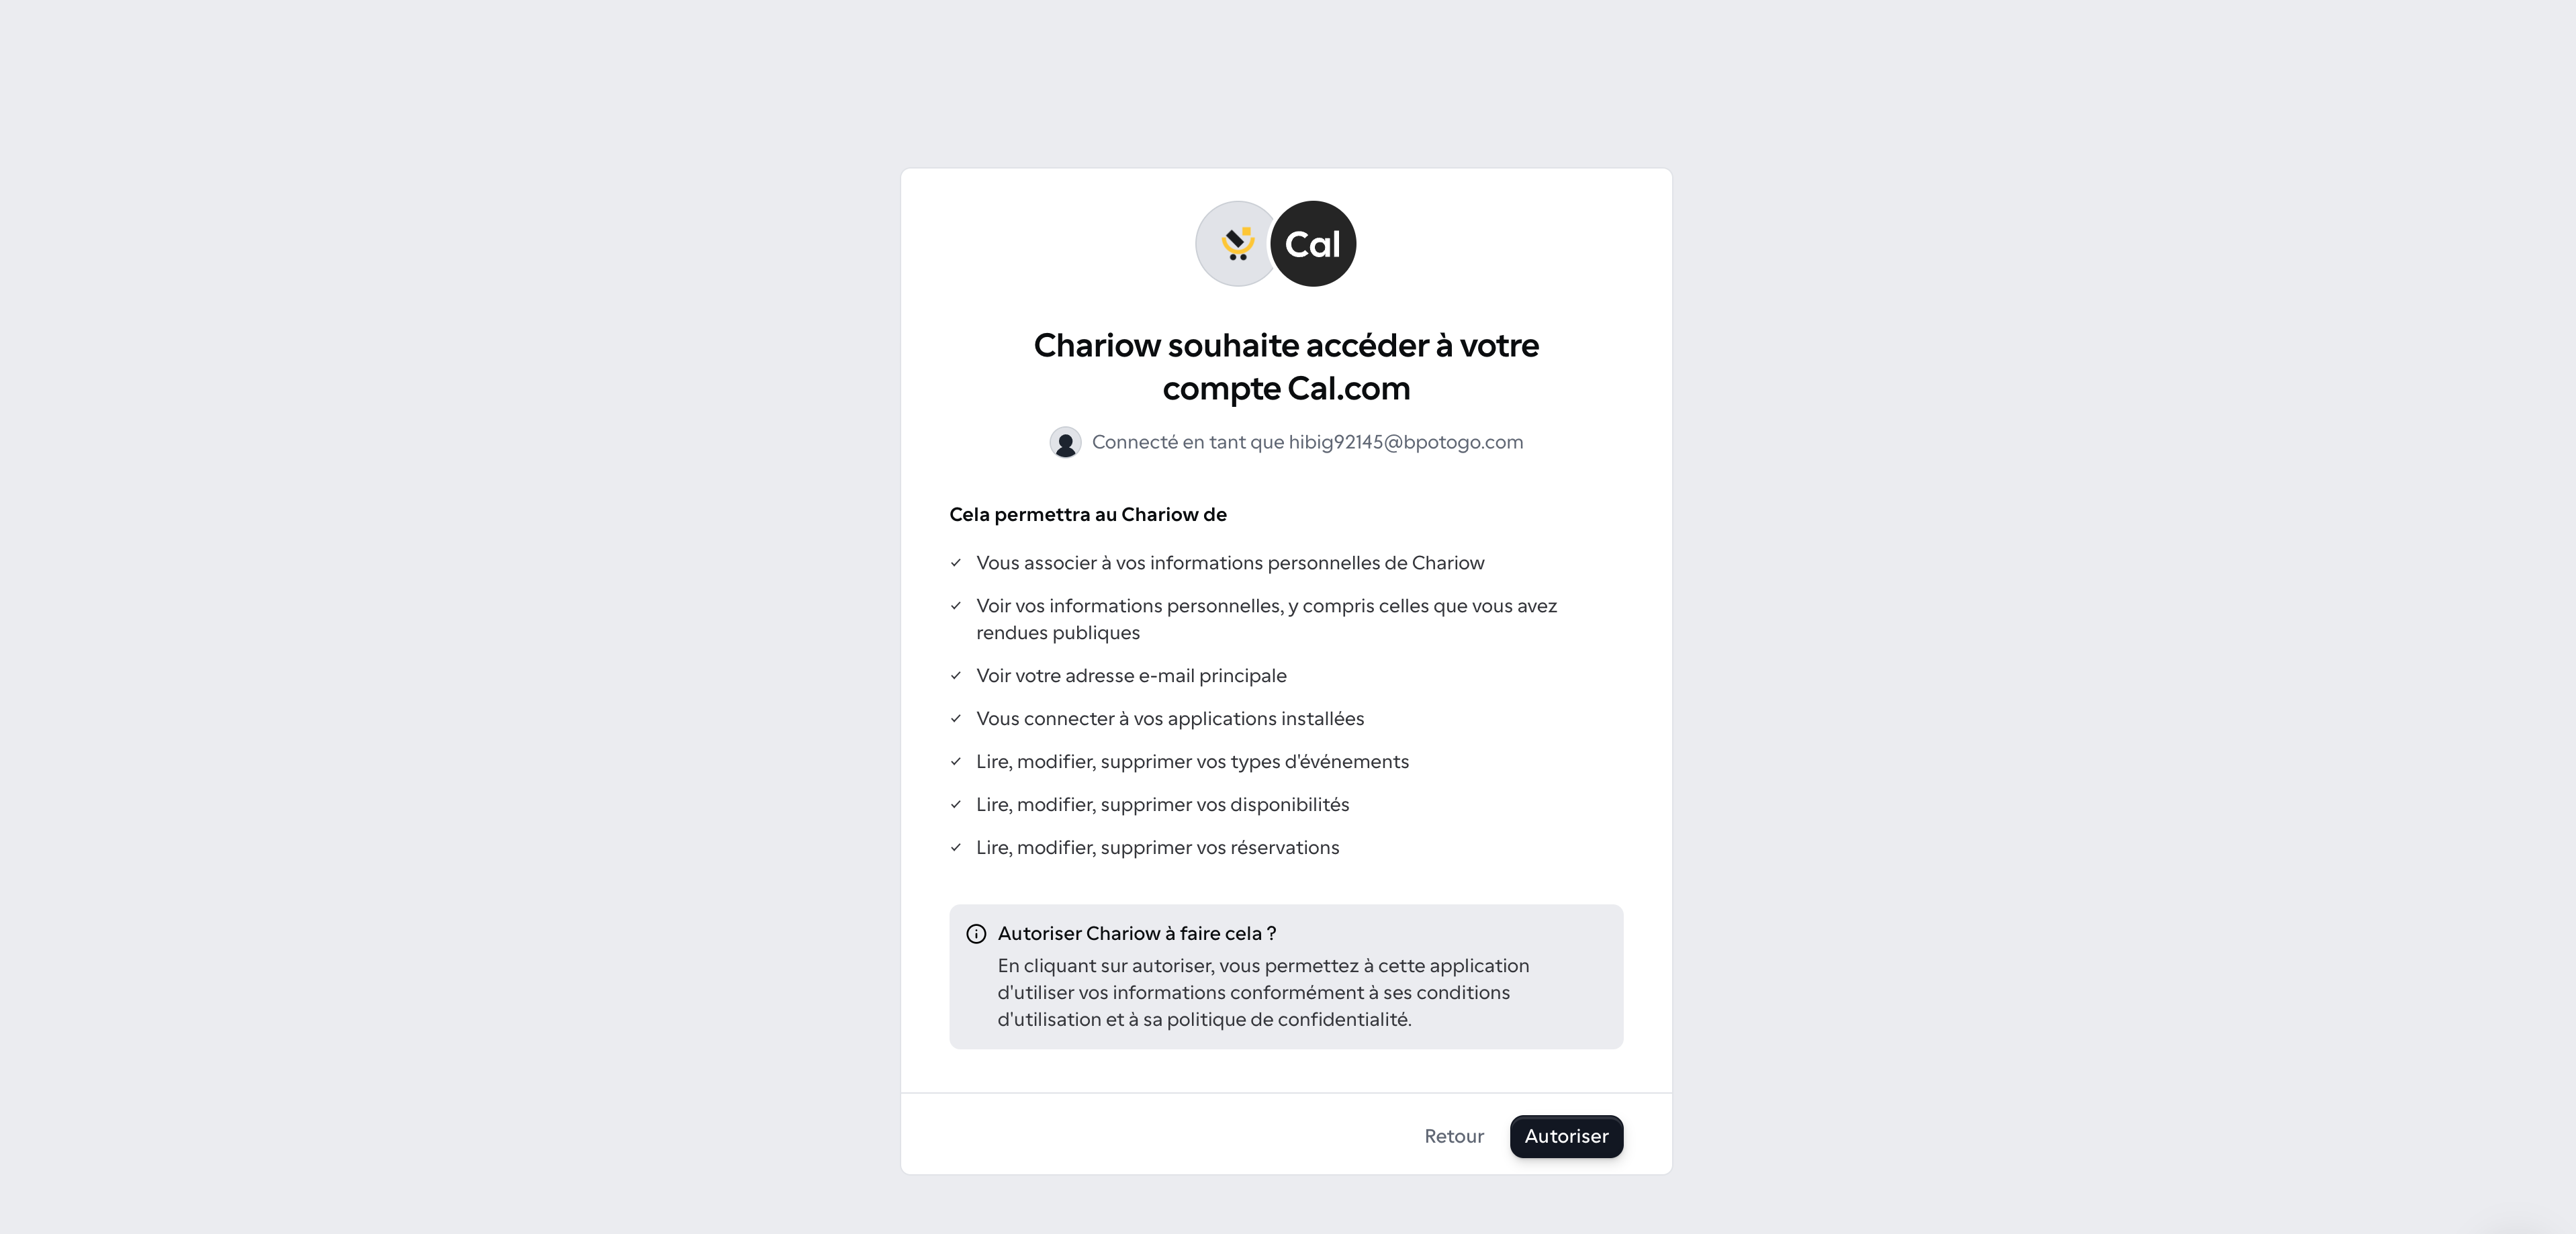
Make sure you're logged in with the right Cal.com account, then click the "Allow" button.
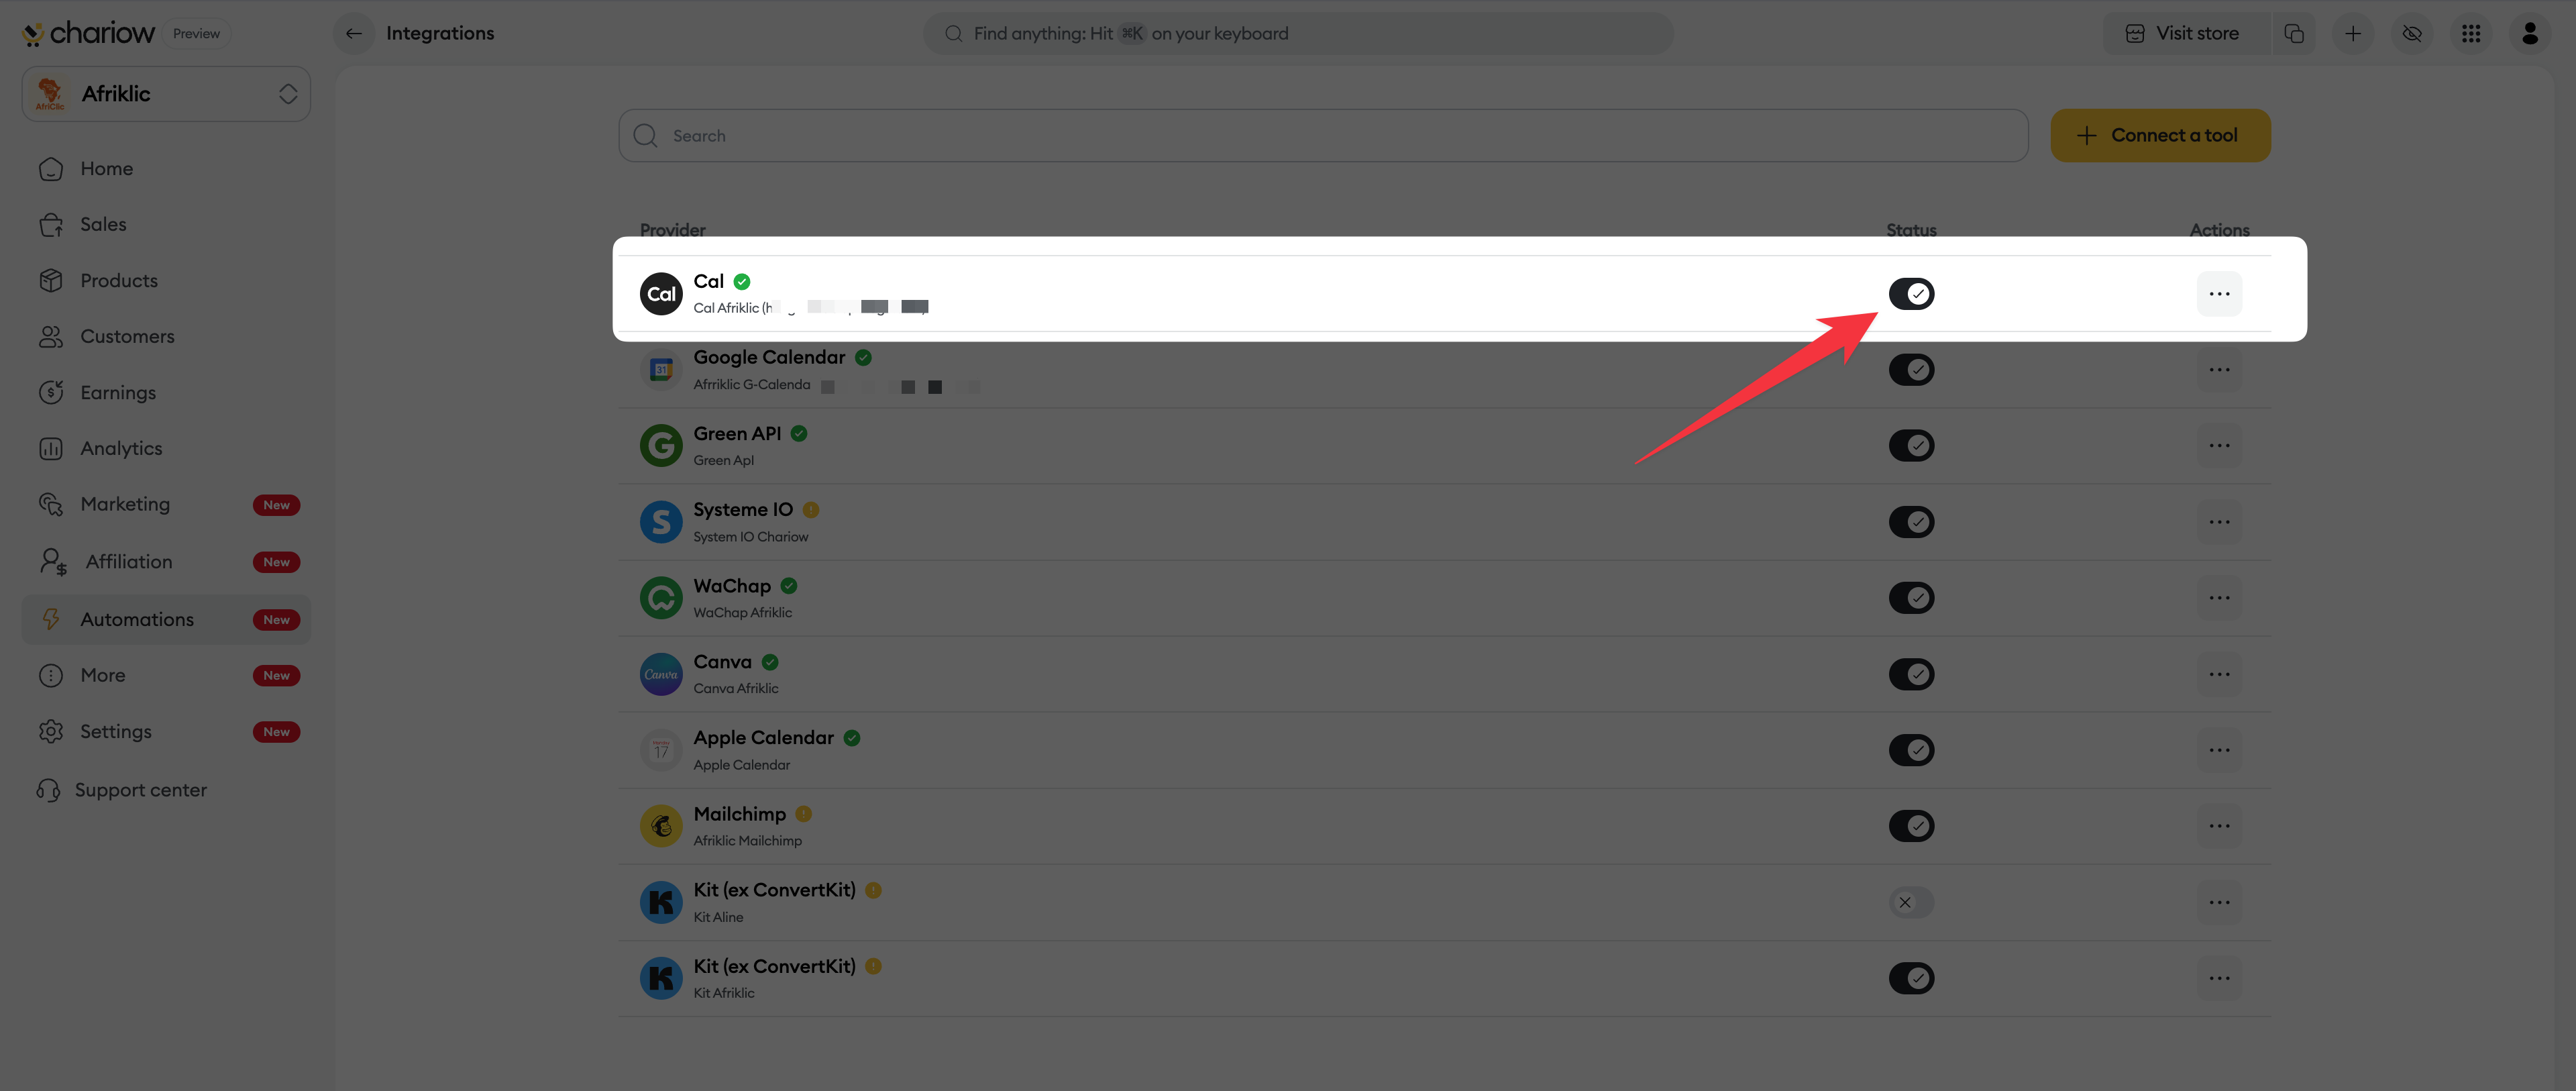
Once the authorization is confirmed, you'll be redirected to Chariow's "Integrations" tab. You should see "Cal" appear in the list of providers with an active status (switch in the on position).
Renaming: Give your account a clear name at step 3 if you plan to connect several different calendar accounts.
Temporary deactivation: You can pause the integration at any time without deleting it by toggling the switch in the "Status" column.
Need help? Contact our support via chat or at [email protected]