Installing the Conversions API (CAPI) lets your storefront provide Meta with more reliable sales data. Unlike the standard pixel (which tracks events from the browser), the API sends data directly from the Affiliate server. This ensures more accurate conversion tracking, since it’s not affected by ad blockers or browser restrictions.
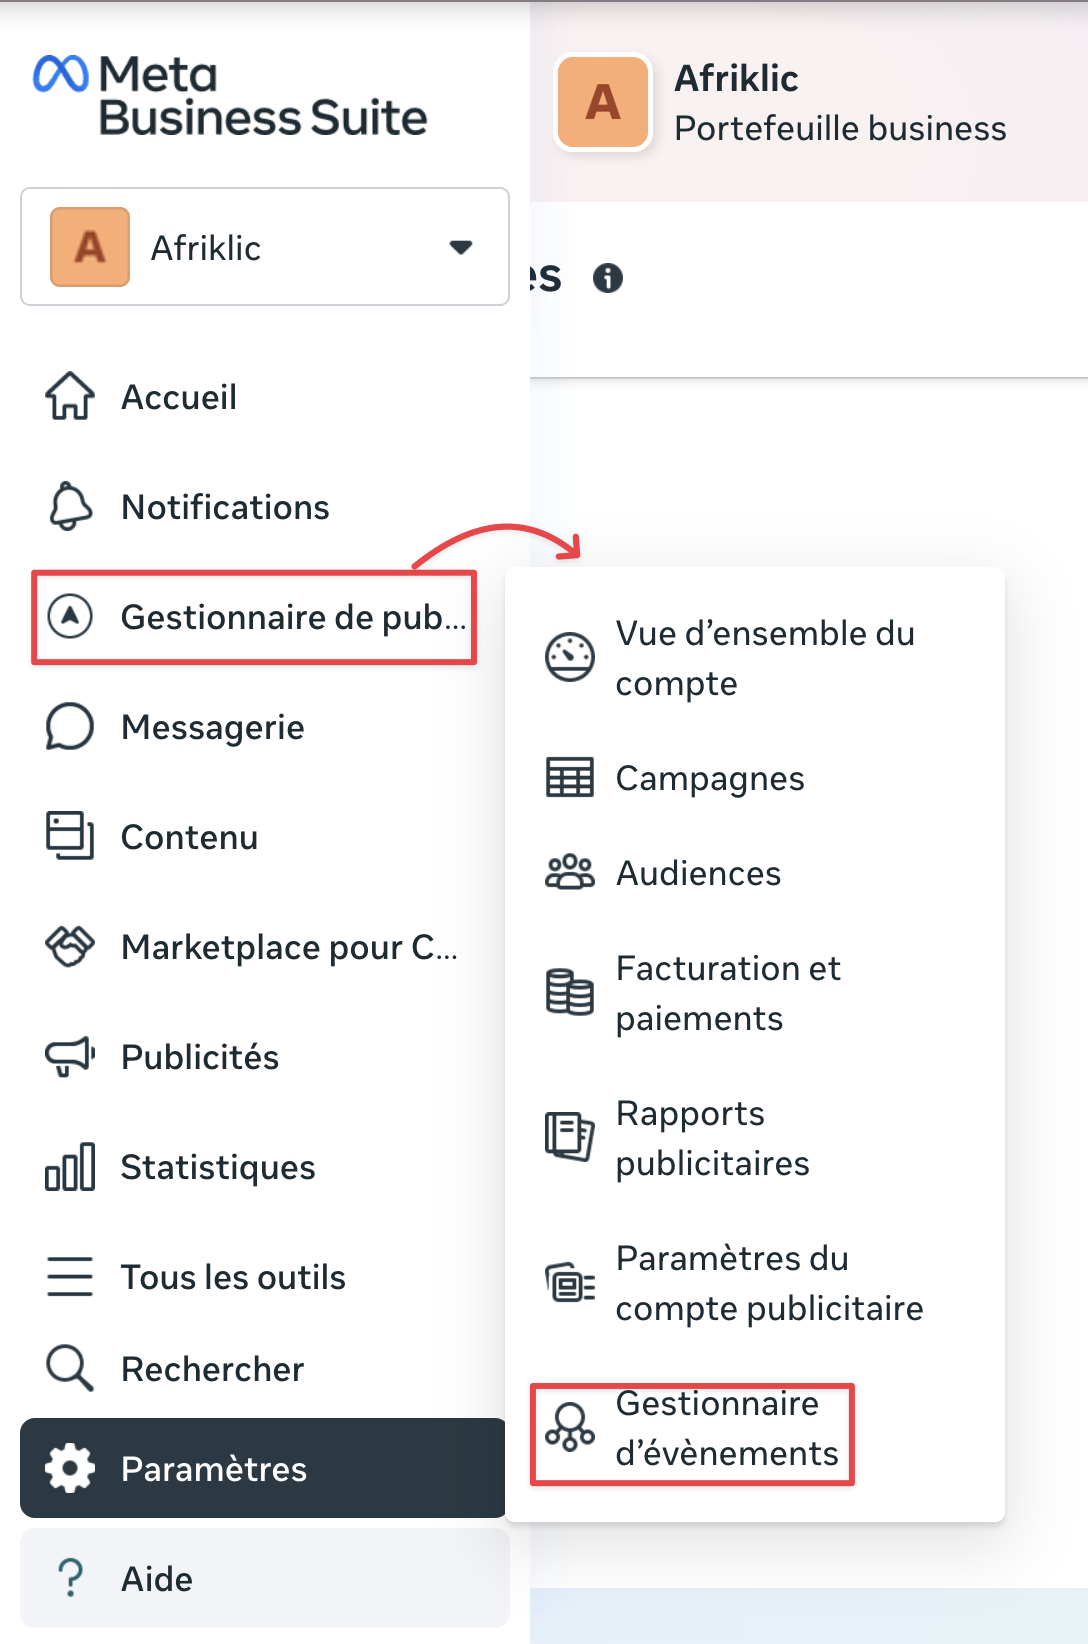
Log in to your Meta Business Suite.
In the side menu, click on Ads Manager.
In the dropdown menu, select Events Manager.
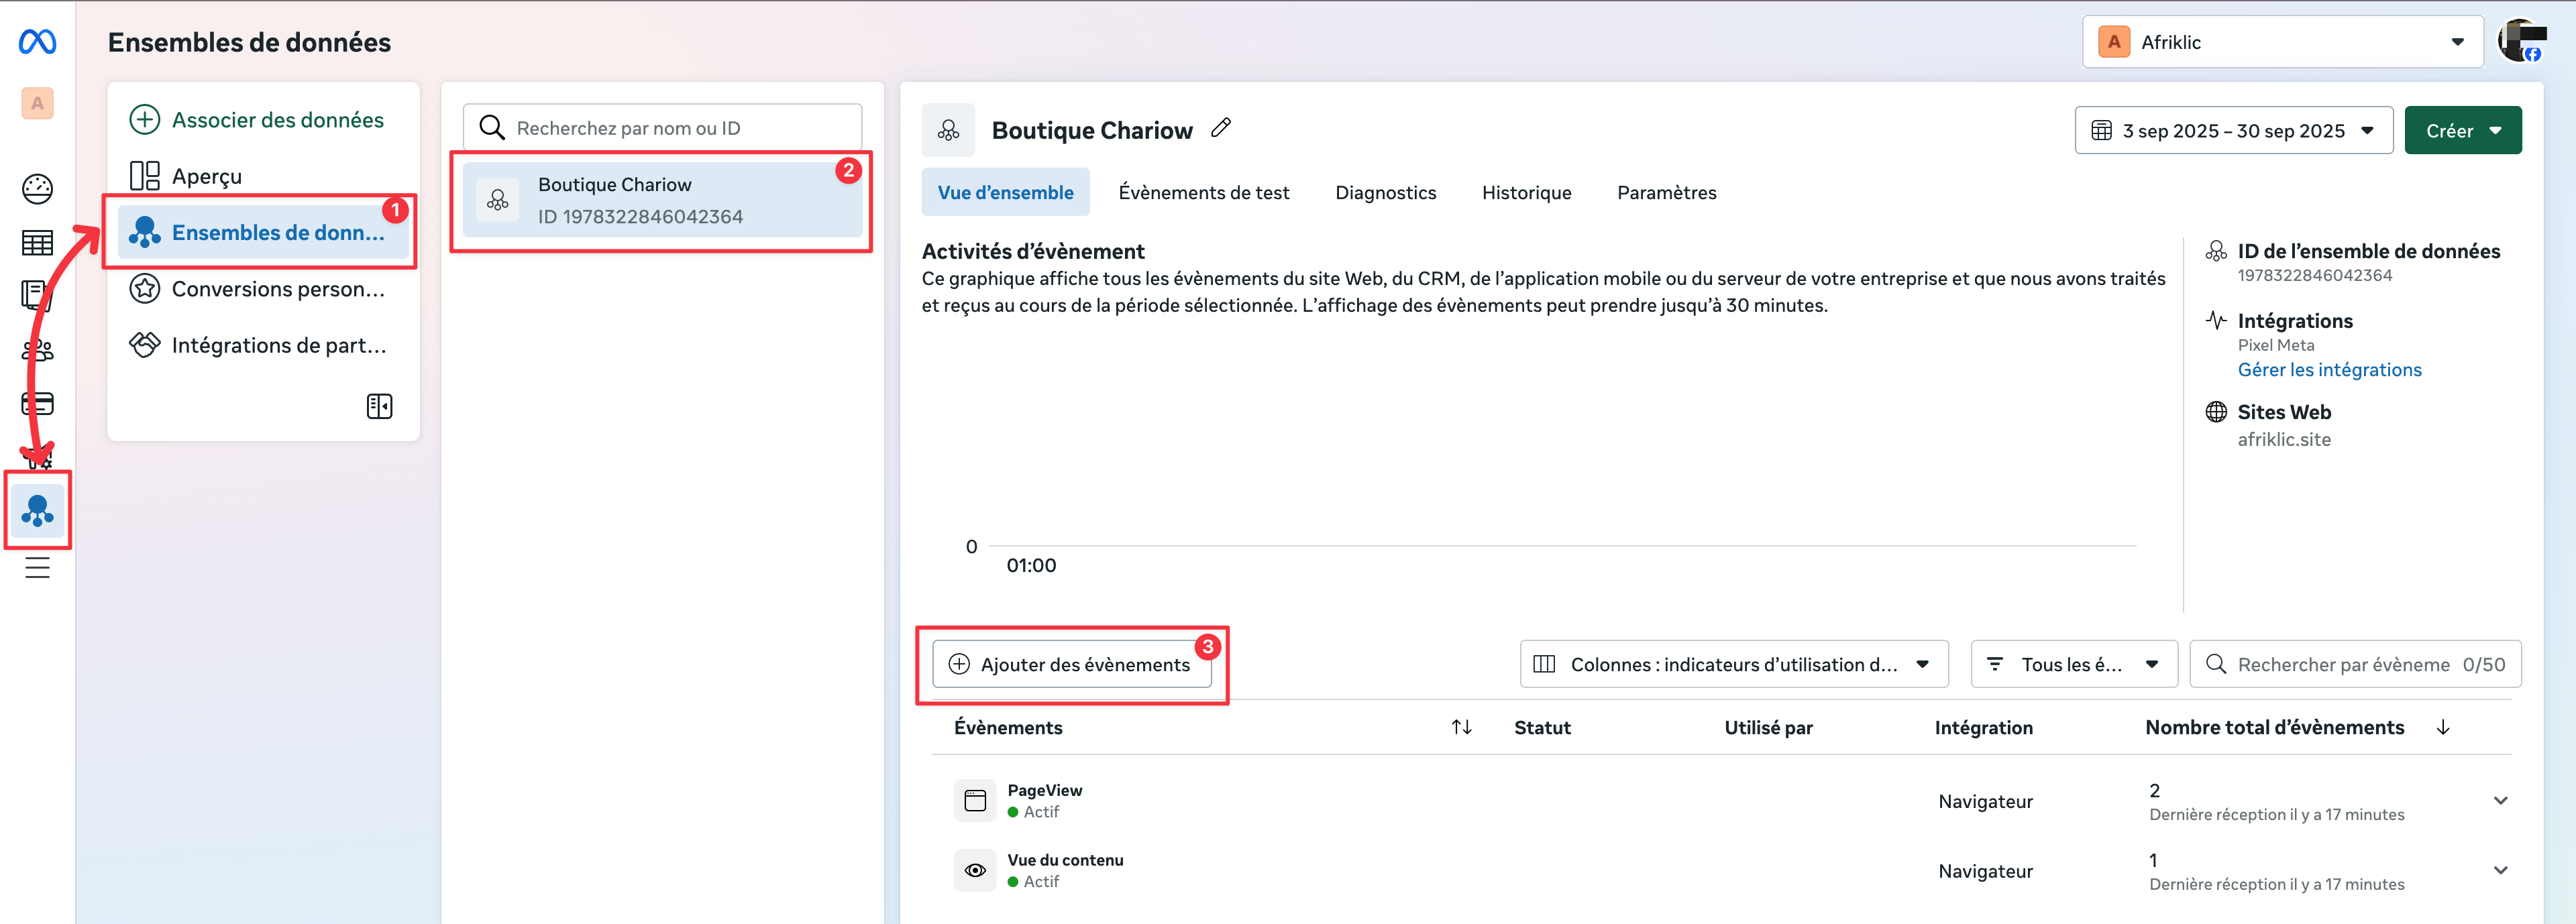
In the Events Manager, go to the Datasets tab (1) and select the account dataset (Pixel) (2).
Click Add events (3).
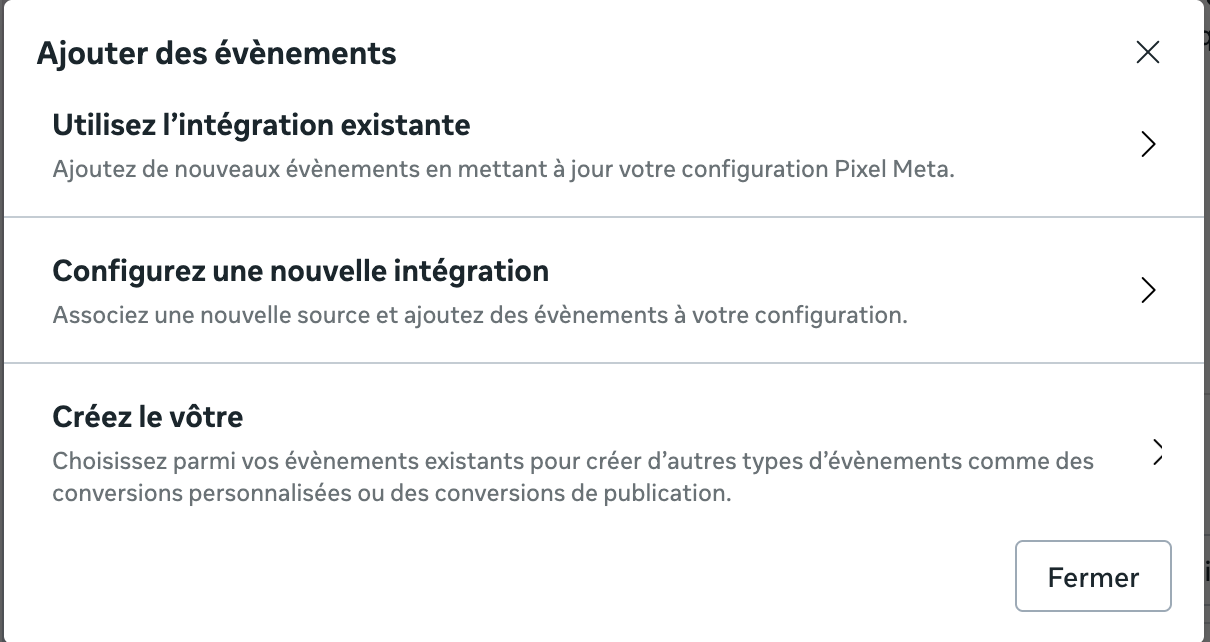
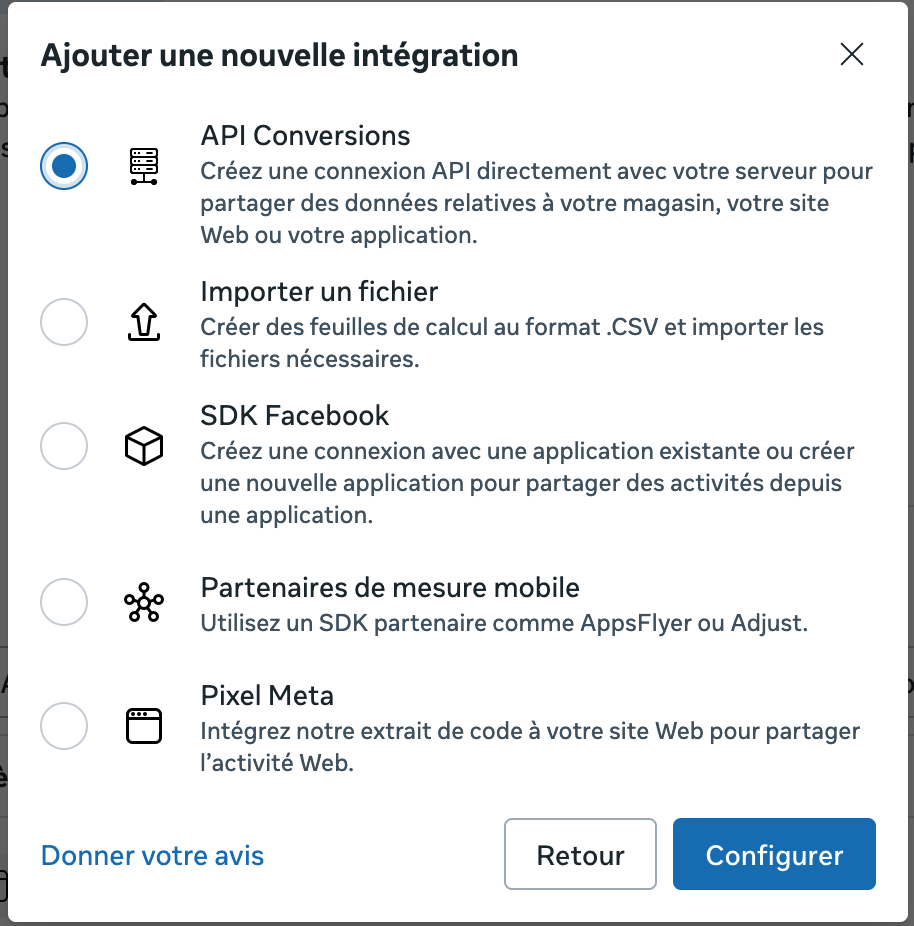
In the window that appears, choose Set up a new integration, then select Conversions API and click Set up.
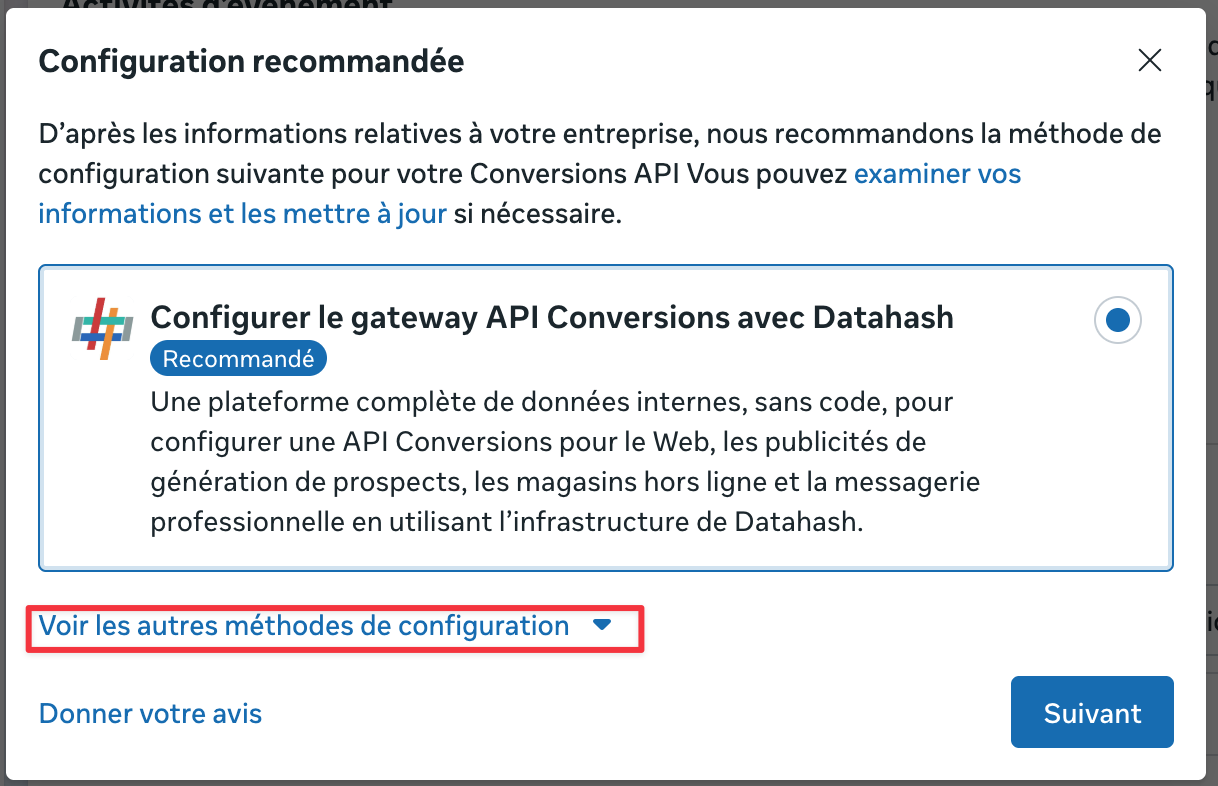
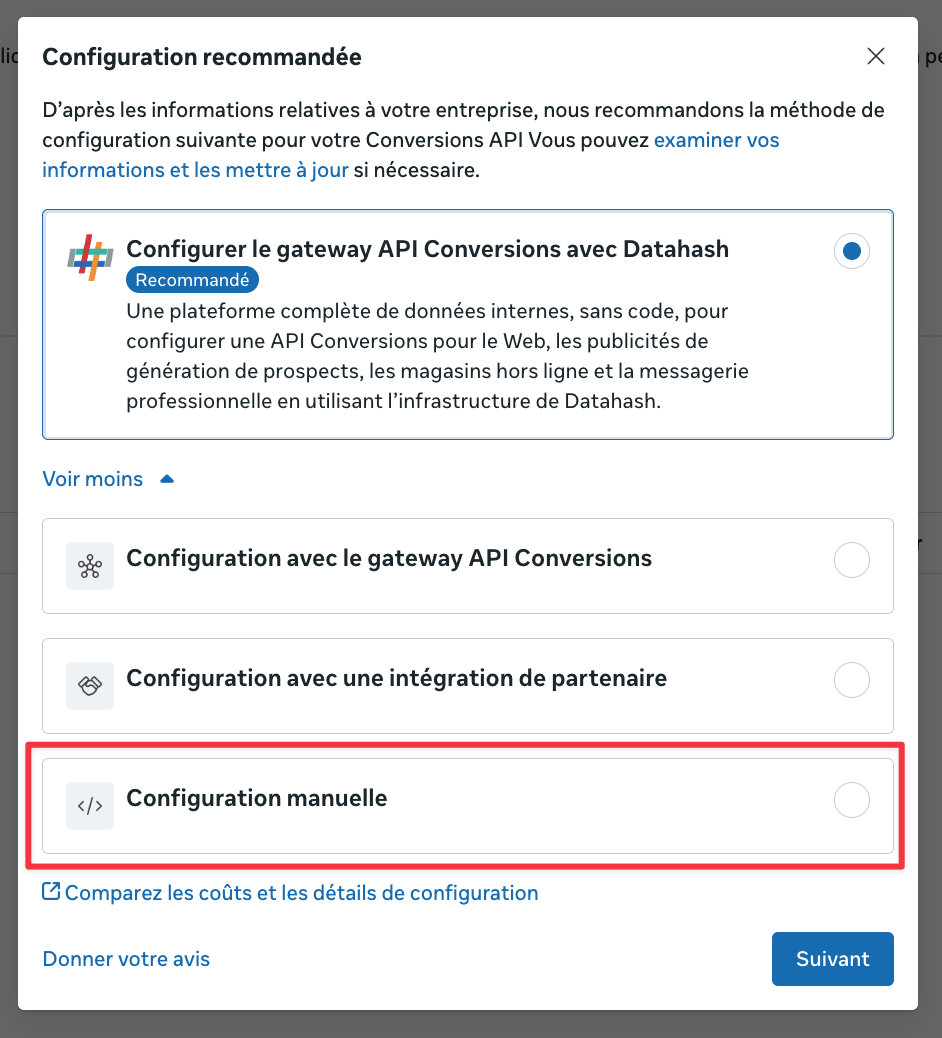
Meta will suggest a Setup. Click on View other setup methods and select the Manual setup option (via direct integration).
The next window will ask how you want to associate your website. Select the Conversions API and Meta Pixel option to combine browser and server tracking.
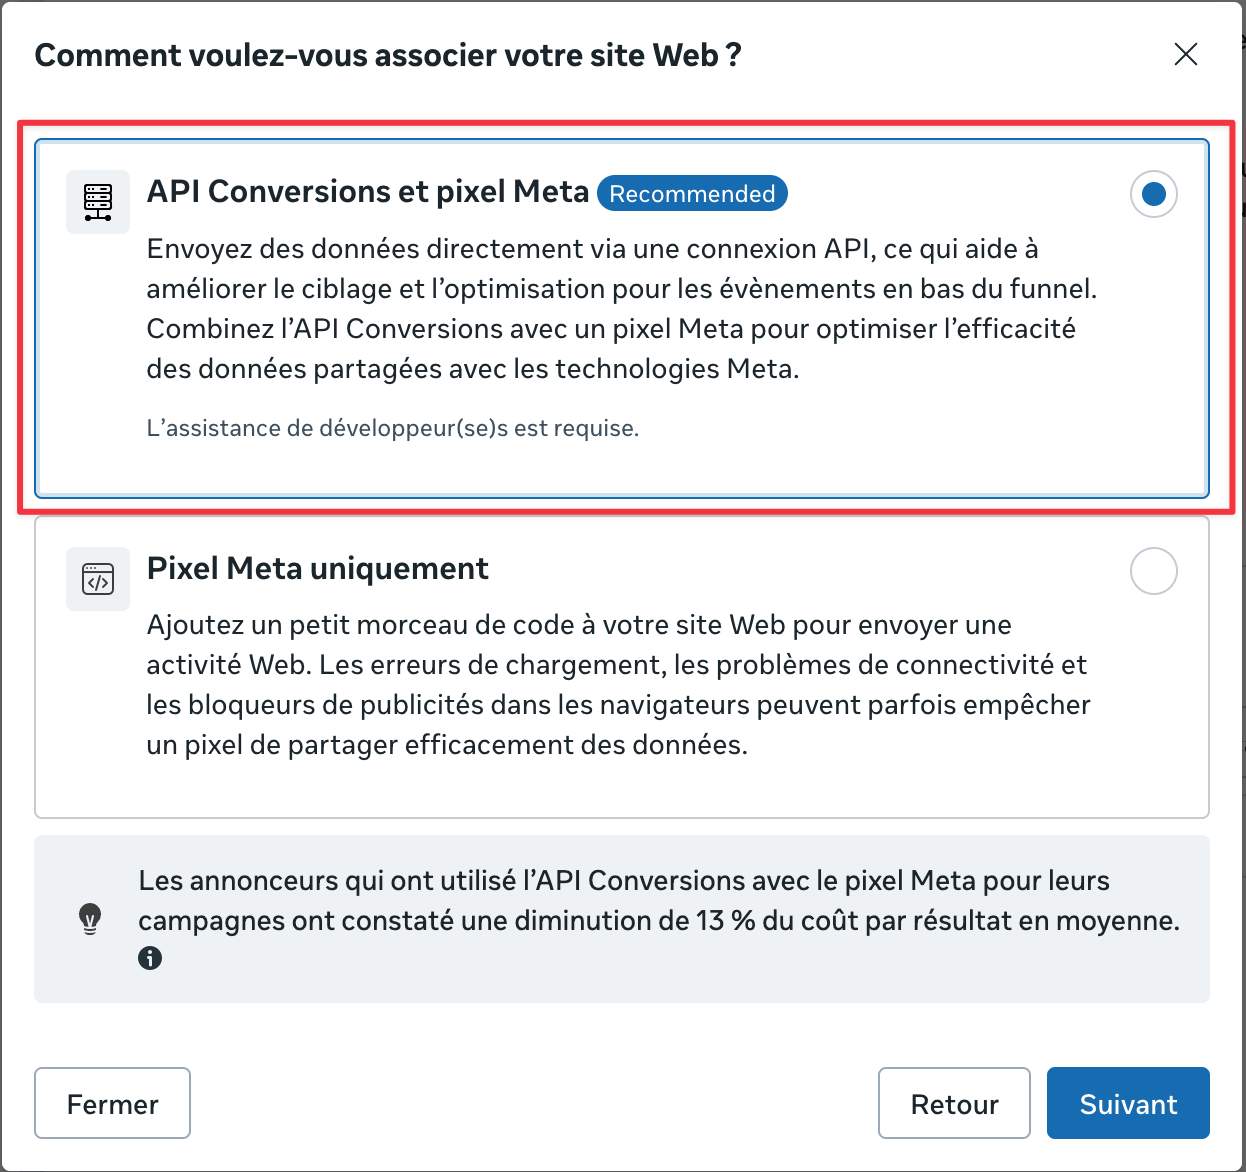
After choosing the integration option, click on Start API setup, read the instructions and continue.
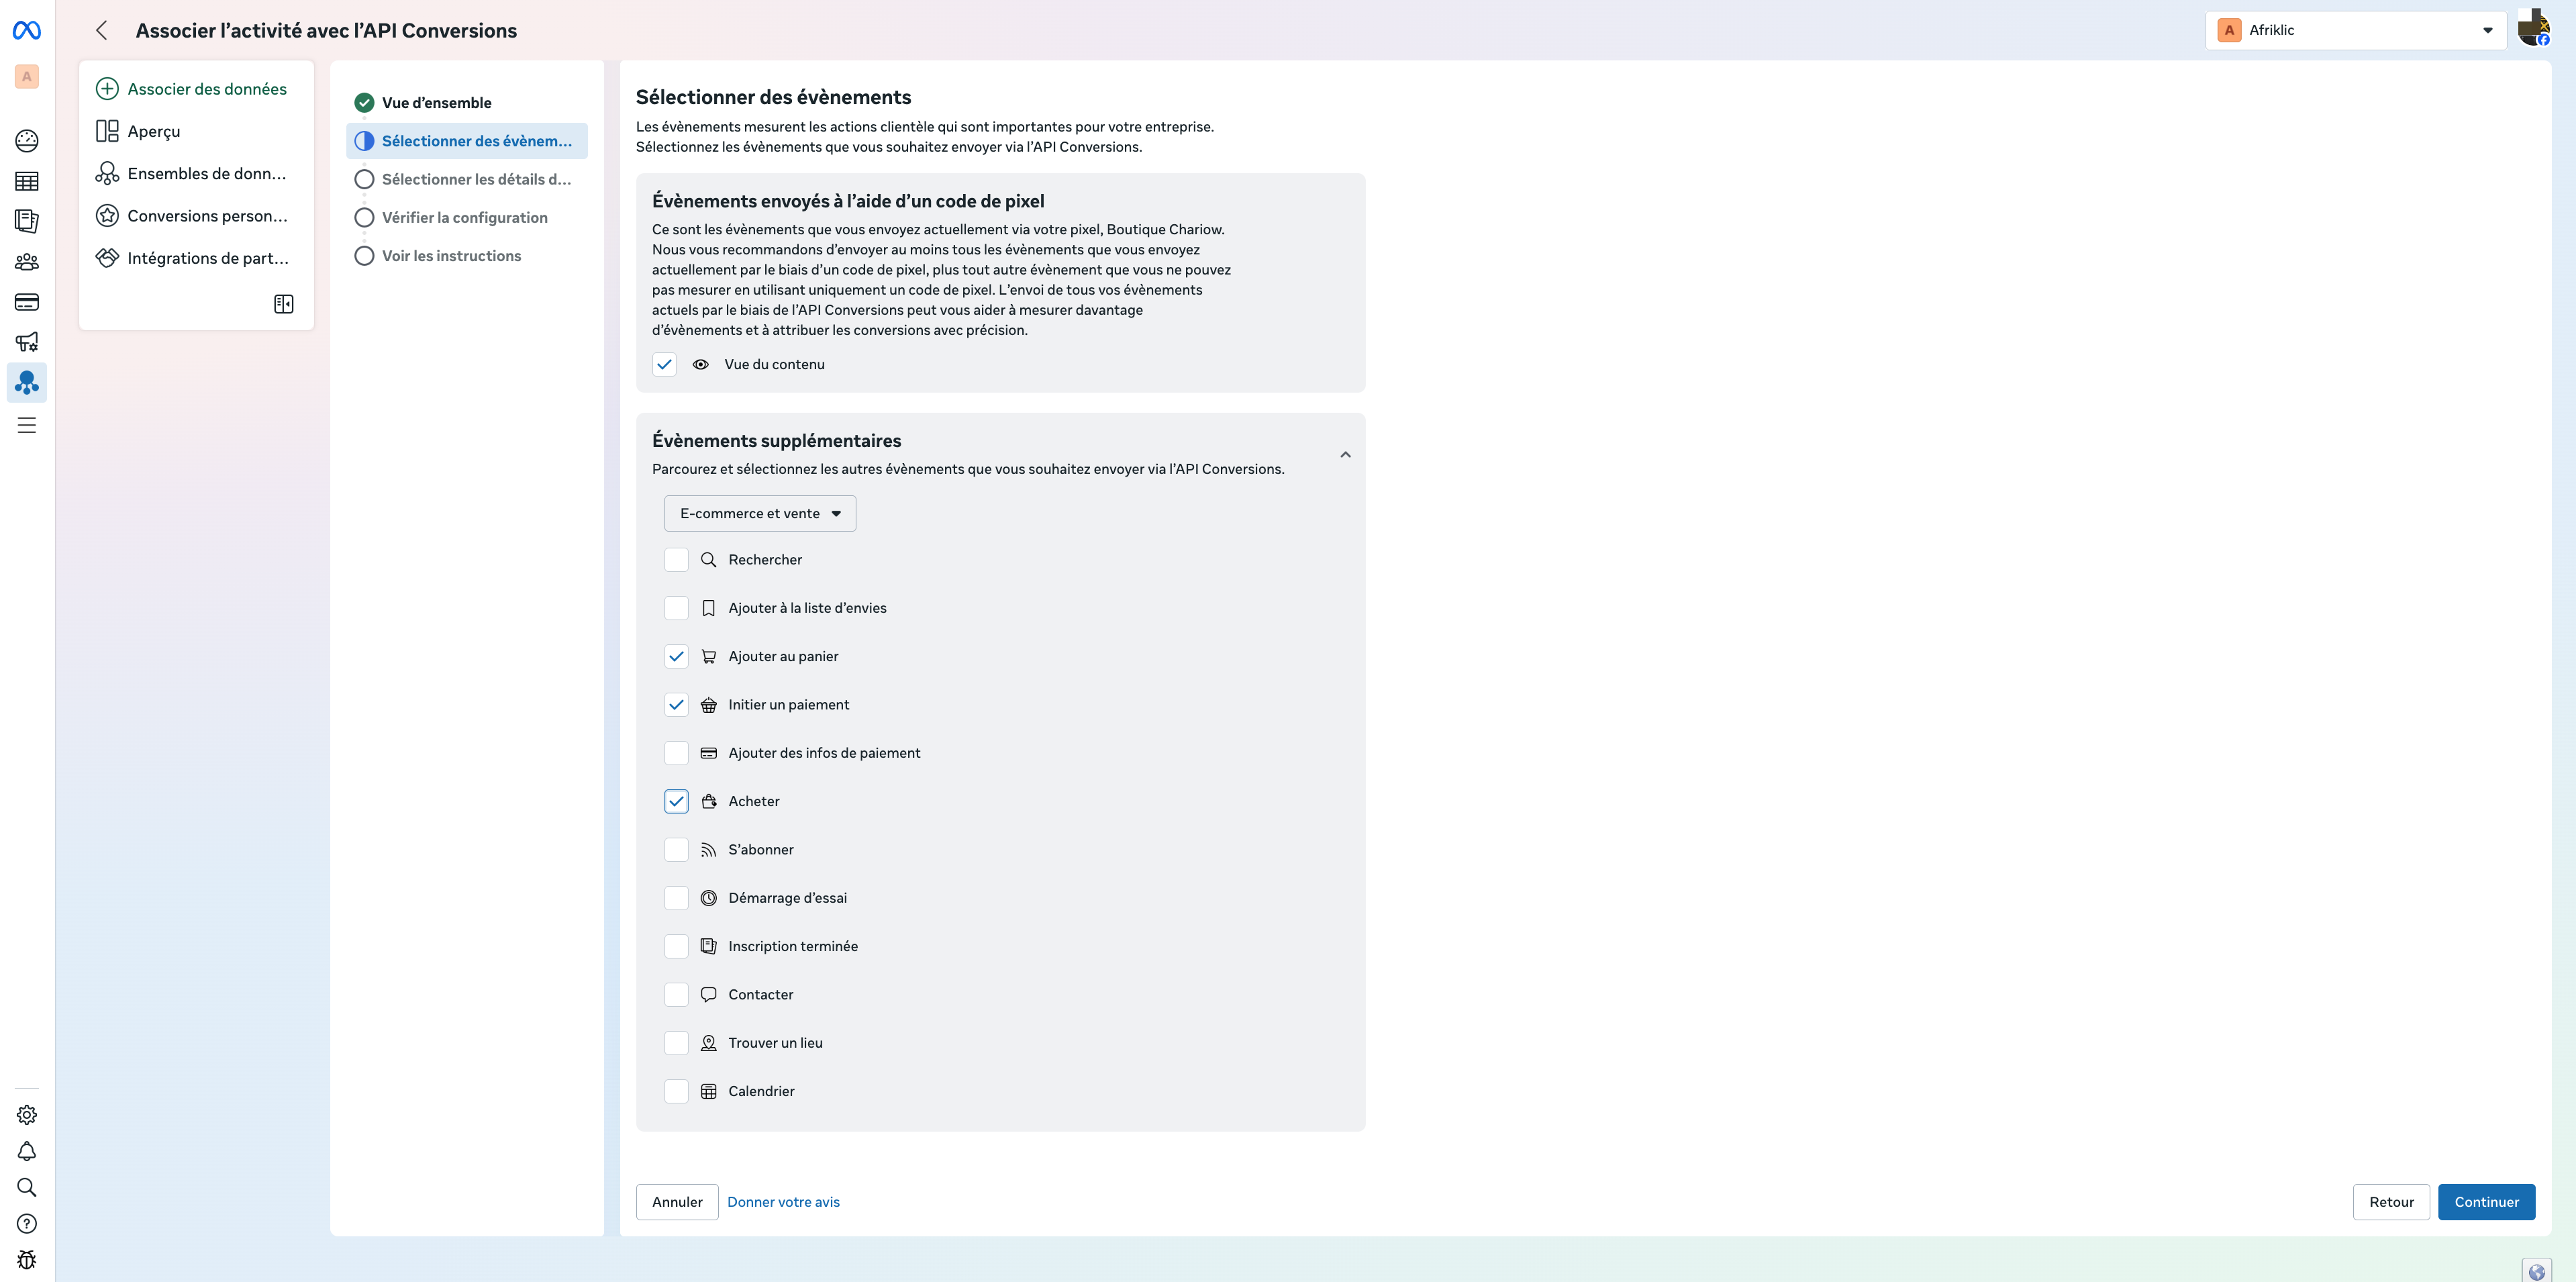
Select the events you want to send via the conversions API. Use the dropdown menu to get event recommendations, then click on Continue.
Select the parameters you want to send for each of the events. (You must select at least one customer information parameter to optimize attribution.)
Check your events and parameters, then click on "Finish"
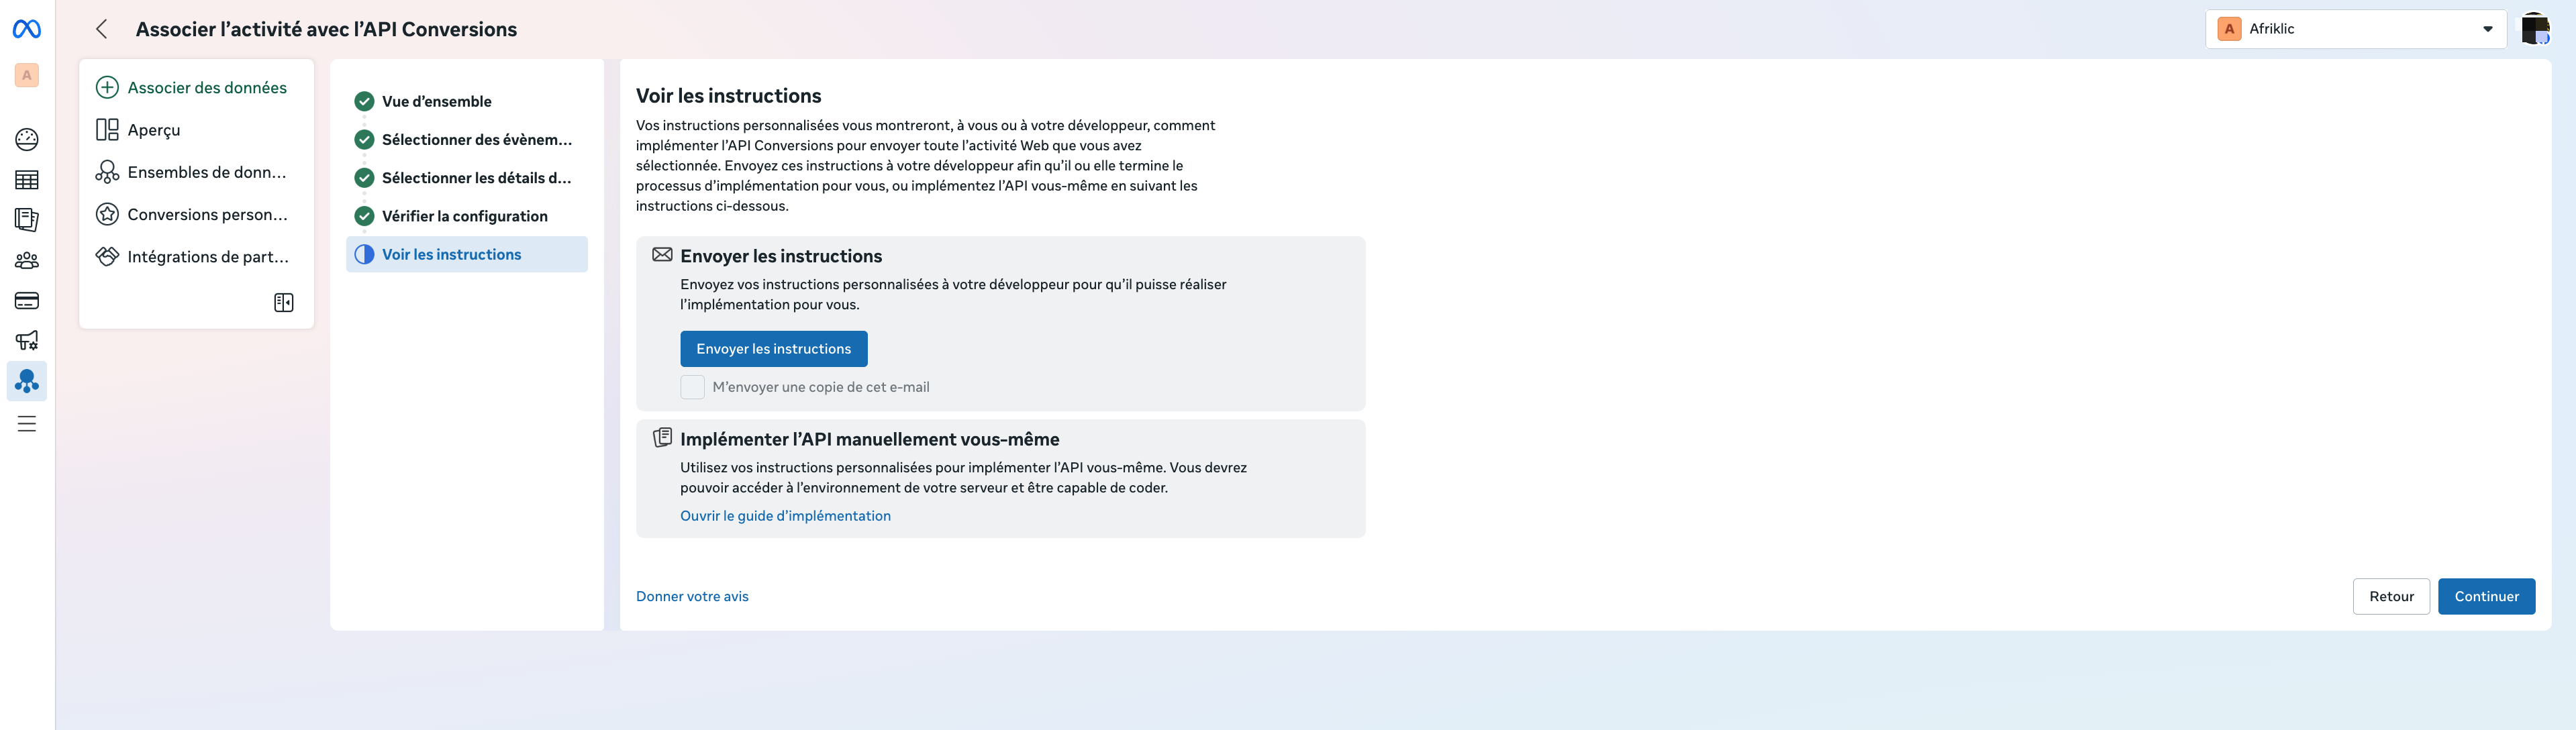
Once the previous steps are done, you land directly on the Conversions API usage page. This is where you generate the connection key:
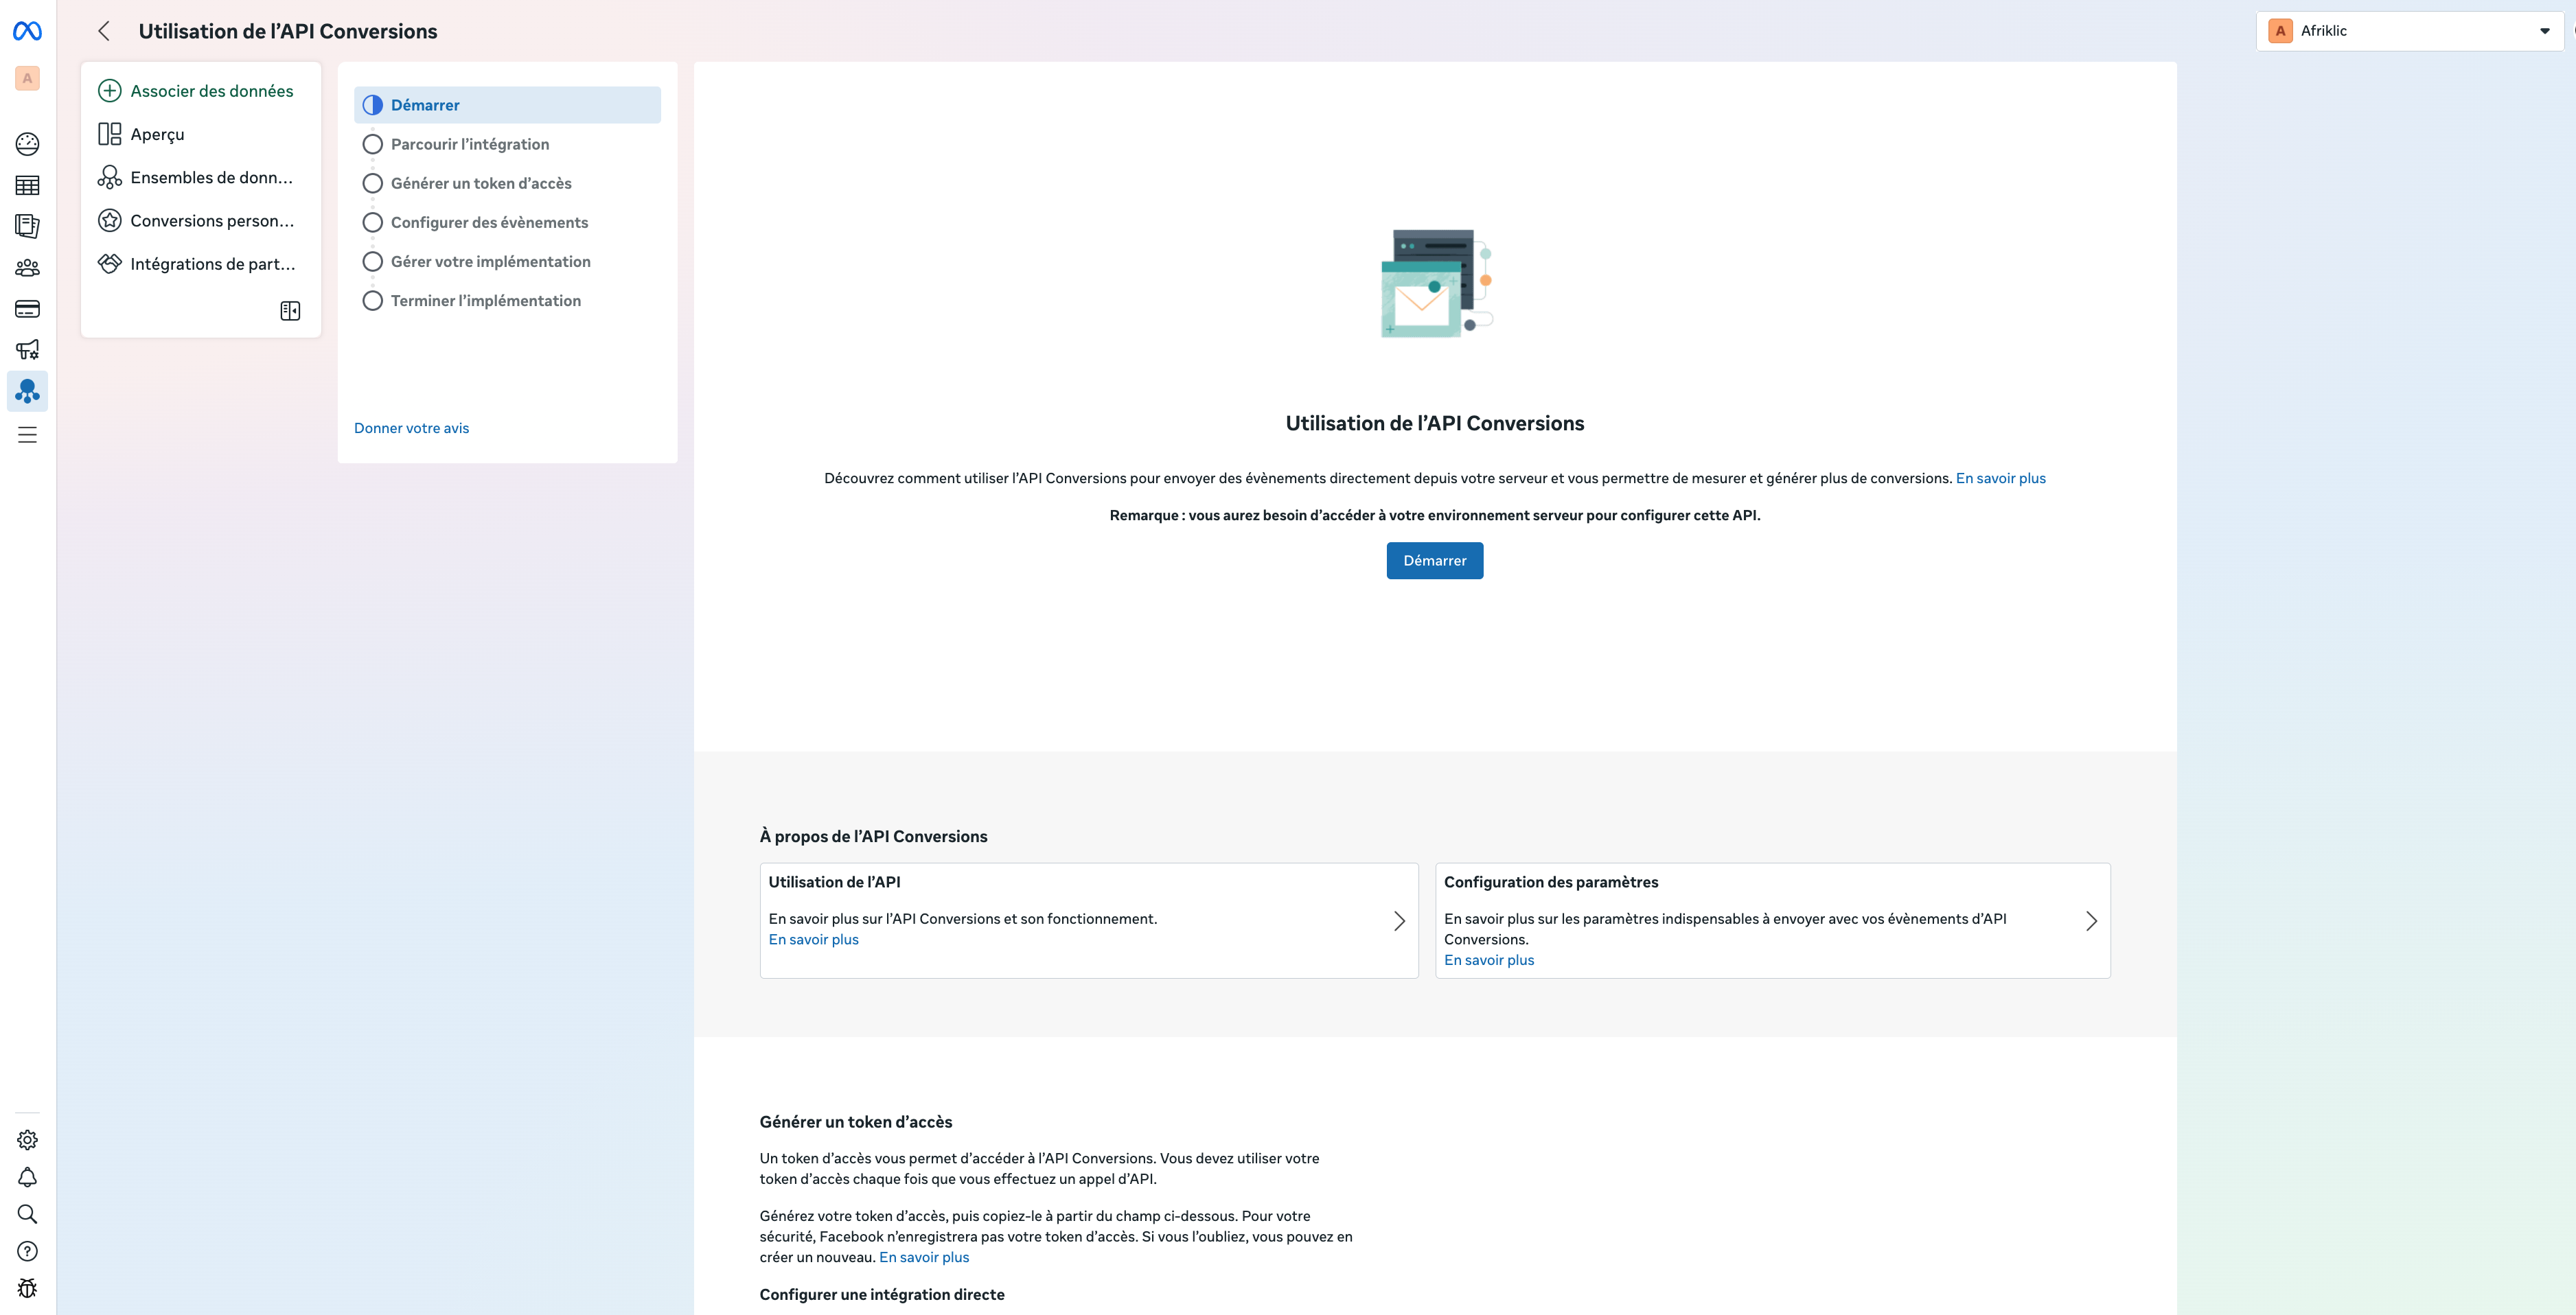
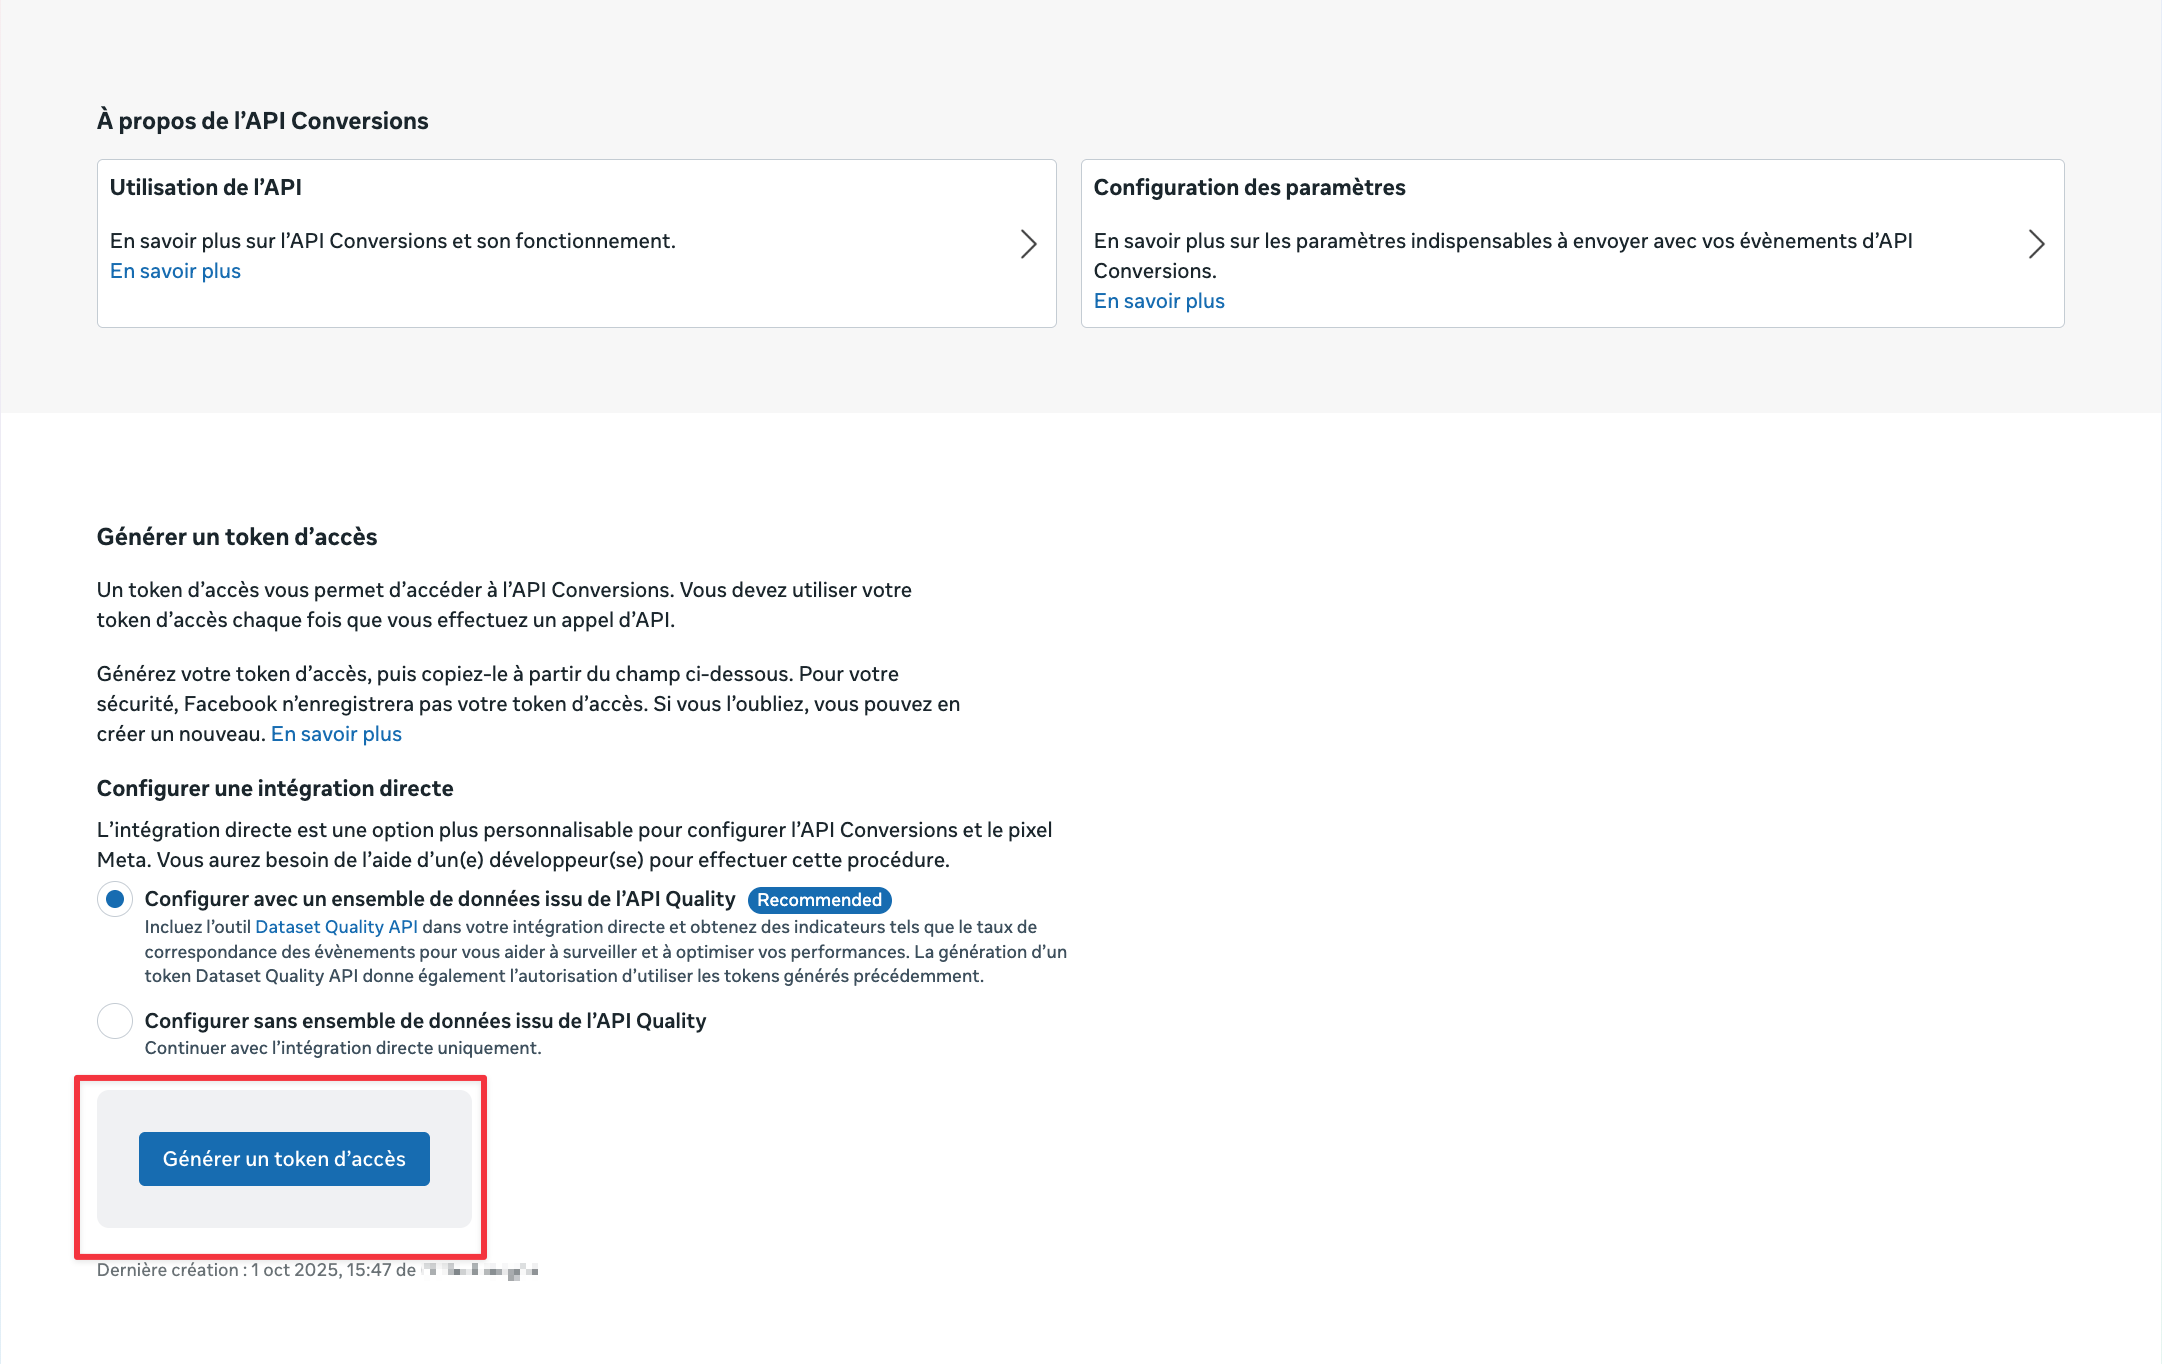
Scroll down to the section Generate an access token.
Click the Generate an access token button.
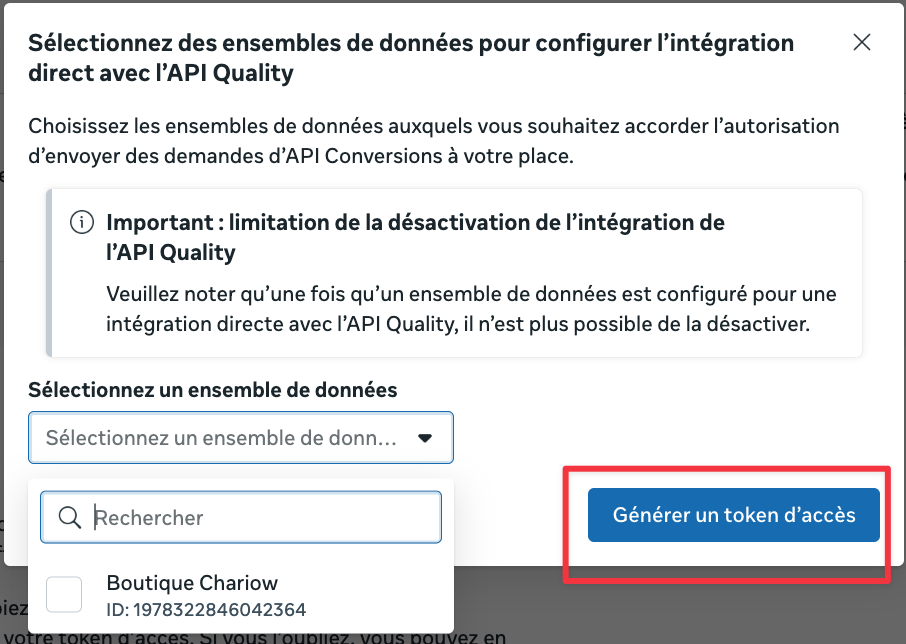
A window will open, asking you to Select the dataset for which you're creating the token.
Click the Generate an access token button again to get your key.
Copy this access token right away and keep it somewhere safe for later, as it's essential for the next step.
Once you have your Pixel ID and your Access Token, you can finalize the server-to-server connection:
Log in to your Affiliate dashboard.
Go to Settings then open the Pixels section.
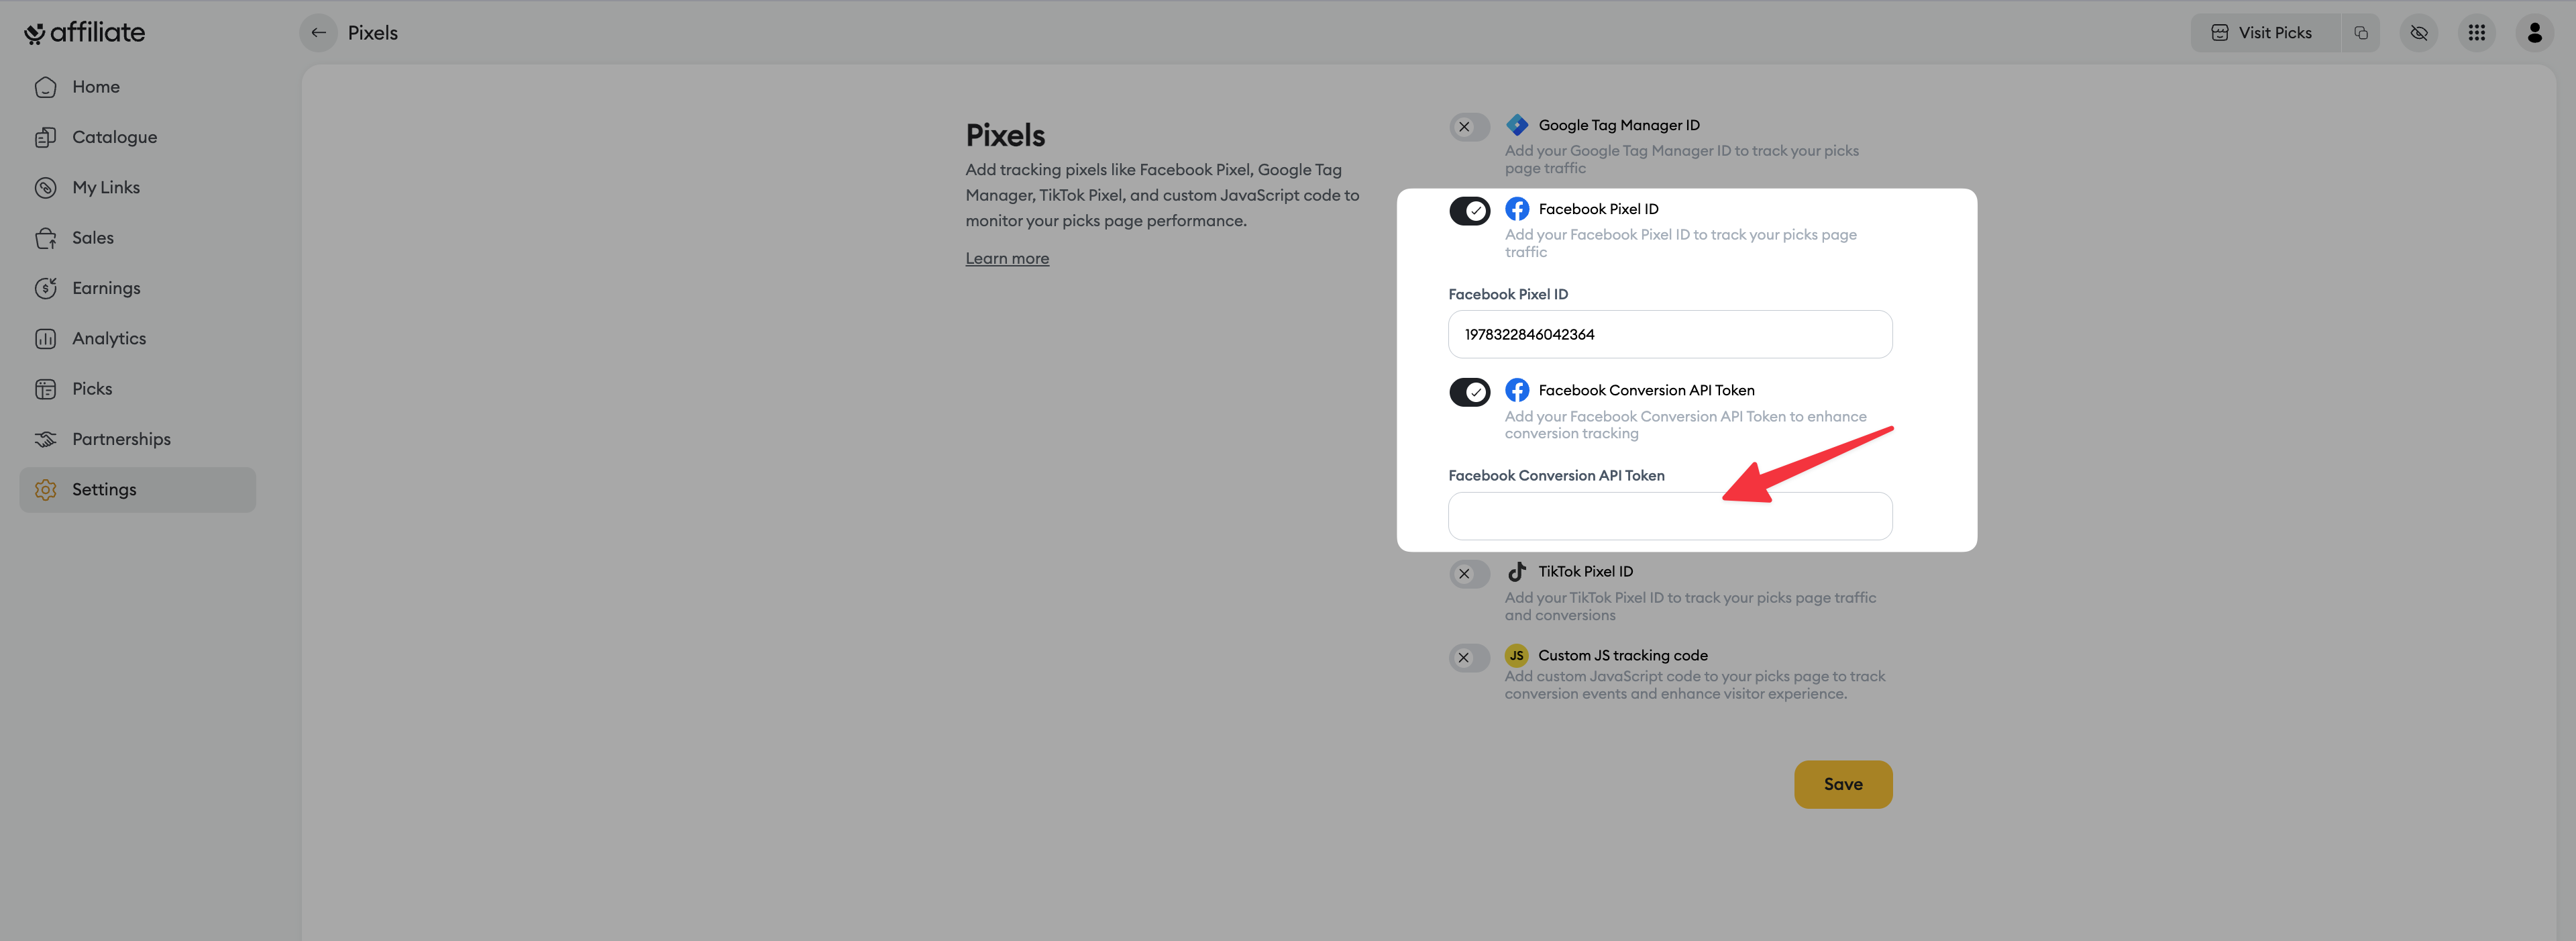
Paste your Meta Pixel ID (if you haven’t done it yet) in the appropriate field(1).
Paste your Access Token into the field dedicated to the Conversions API(2).
Save to activate server-to-server tracking.

Need help? Contact our support via chat or at [email protected].