The Meta Pixel (formerly Facebook Pixel) is an essential tool to track your visitors’ actions (product view, purchase, etc.) after they’ve seen your ads. Connecting this pixel is simple and is done directly via your Pixel ID.
Log in to your Meta Business Suite and go to the Events Manager.
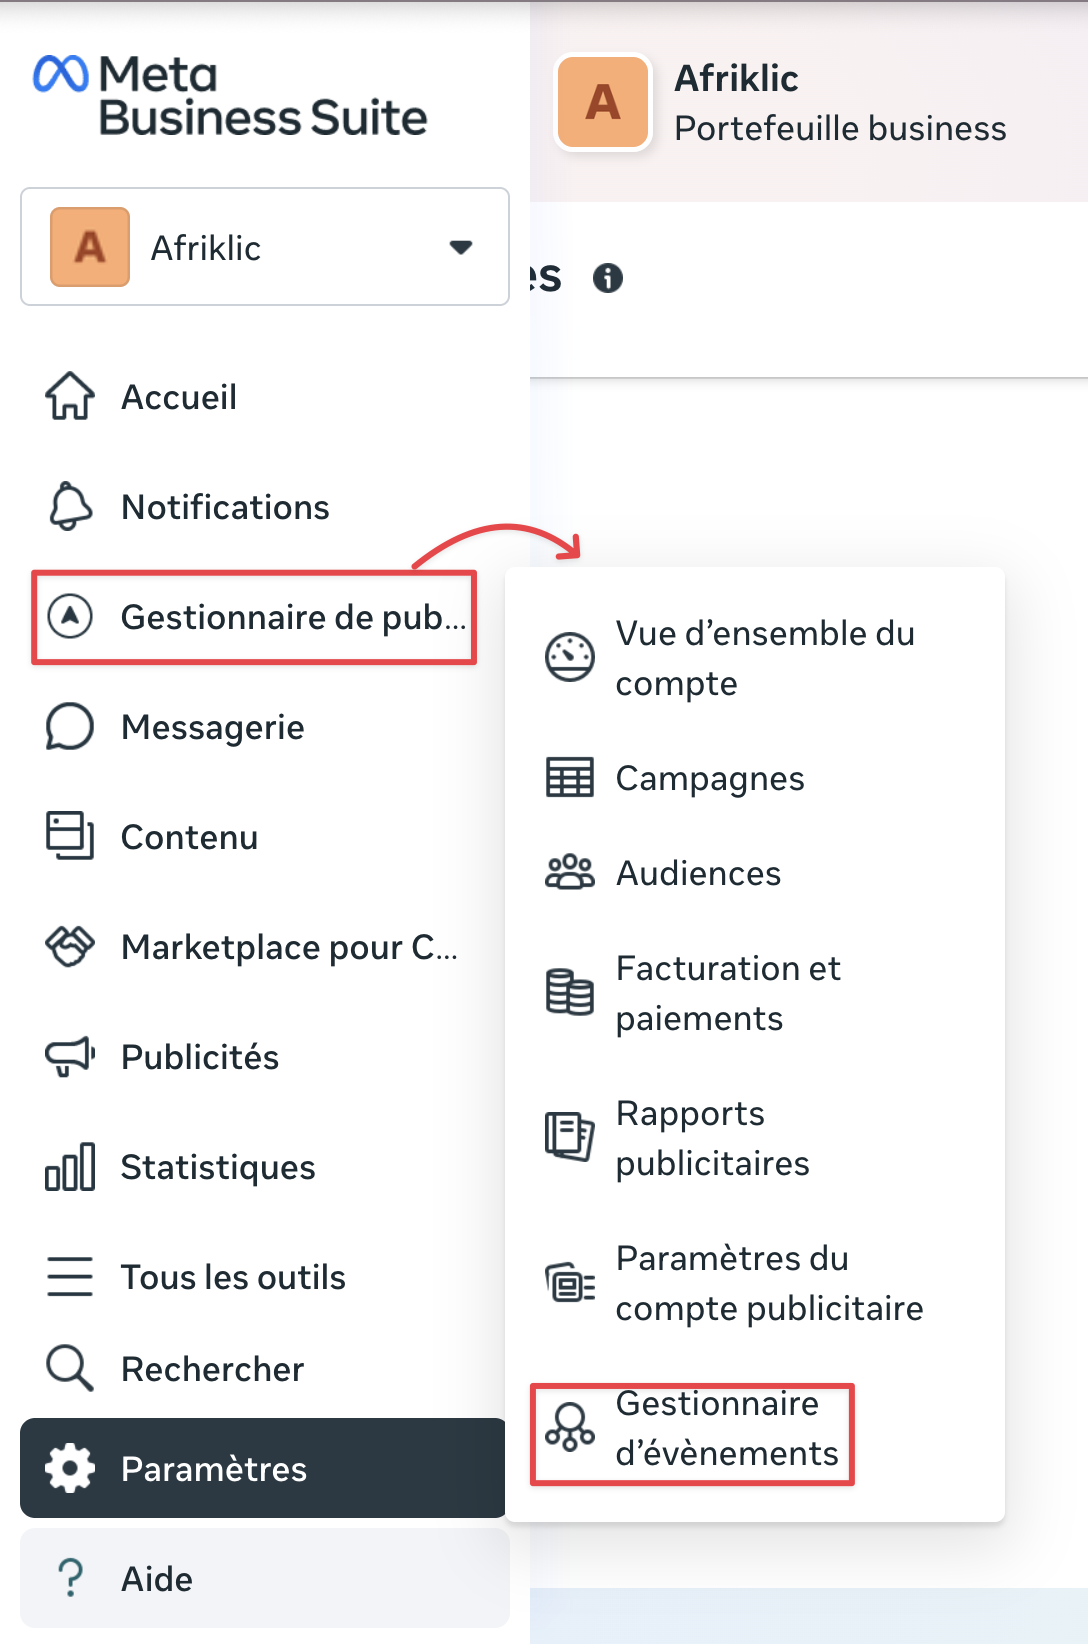
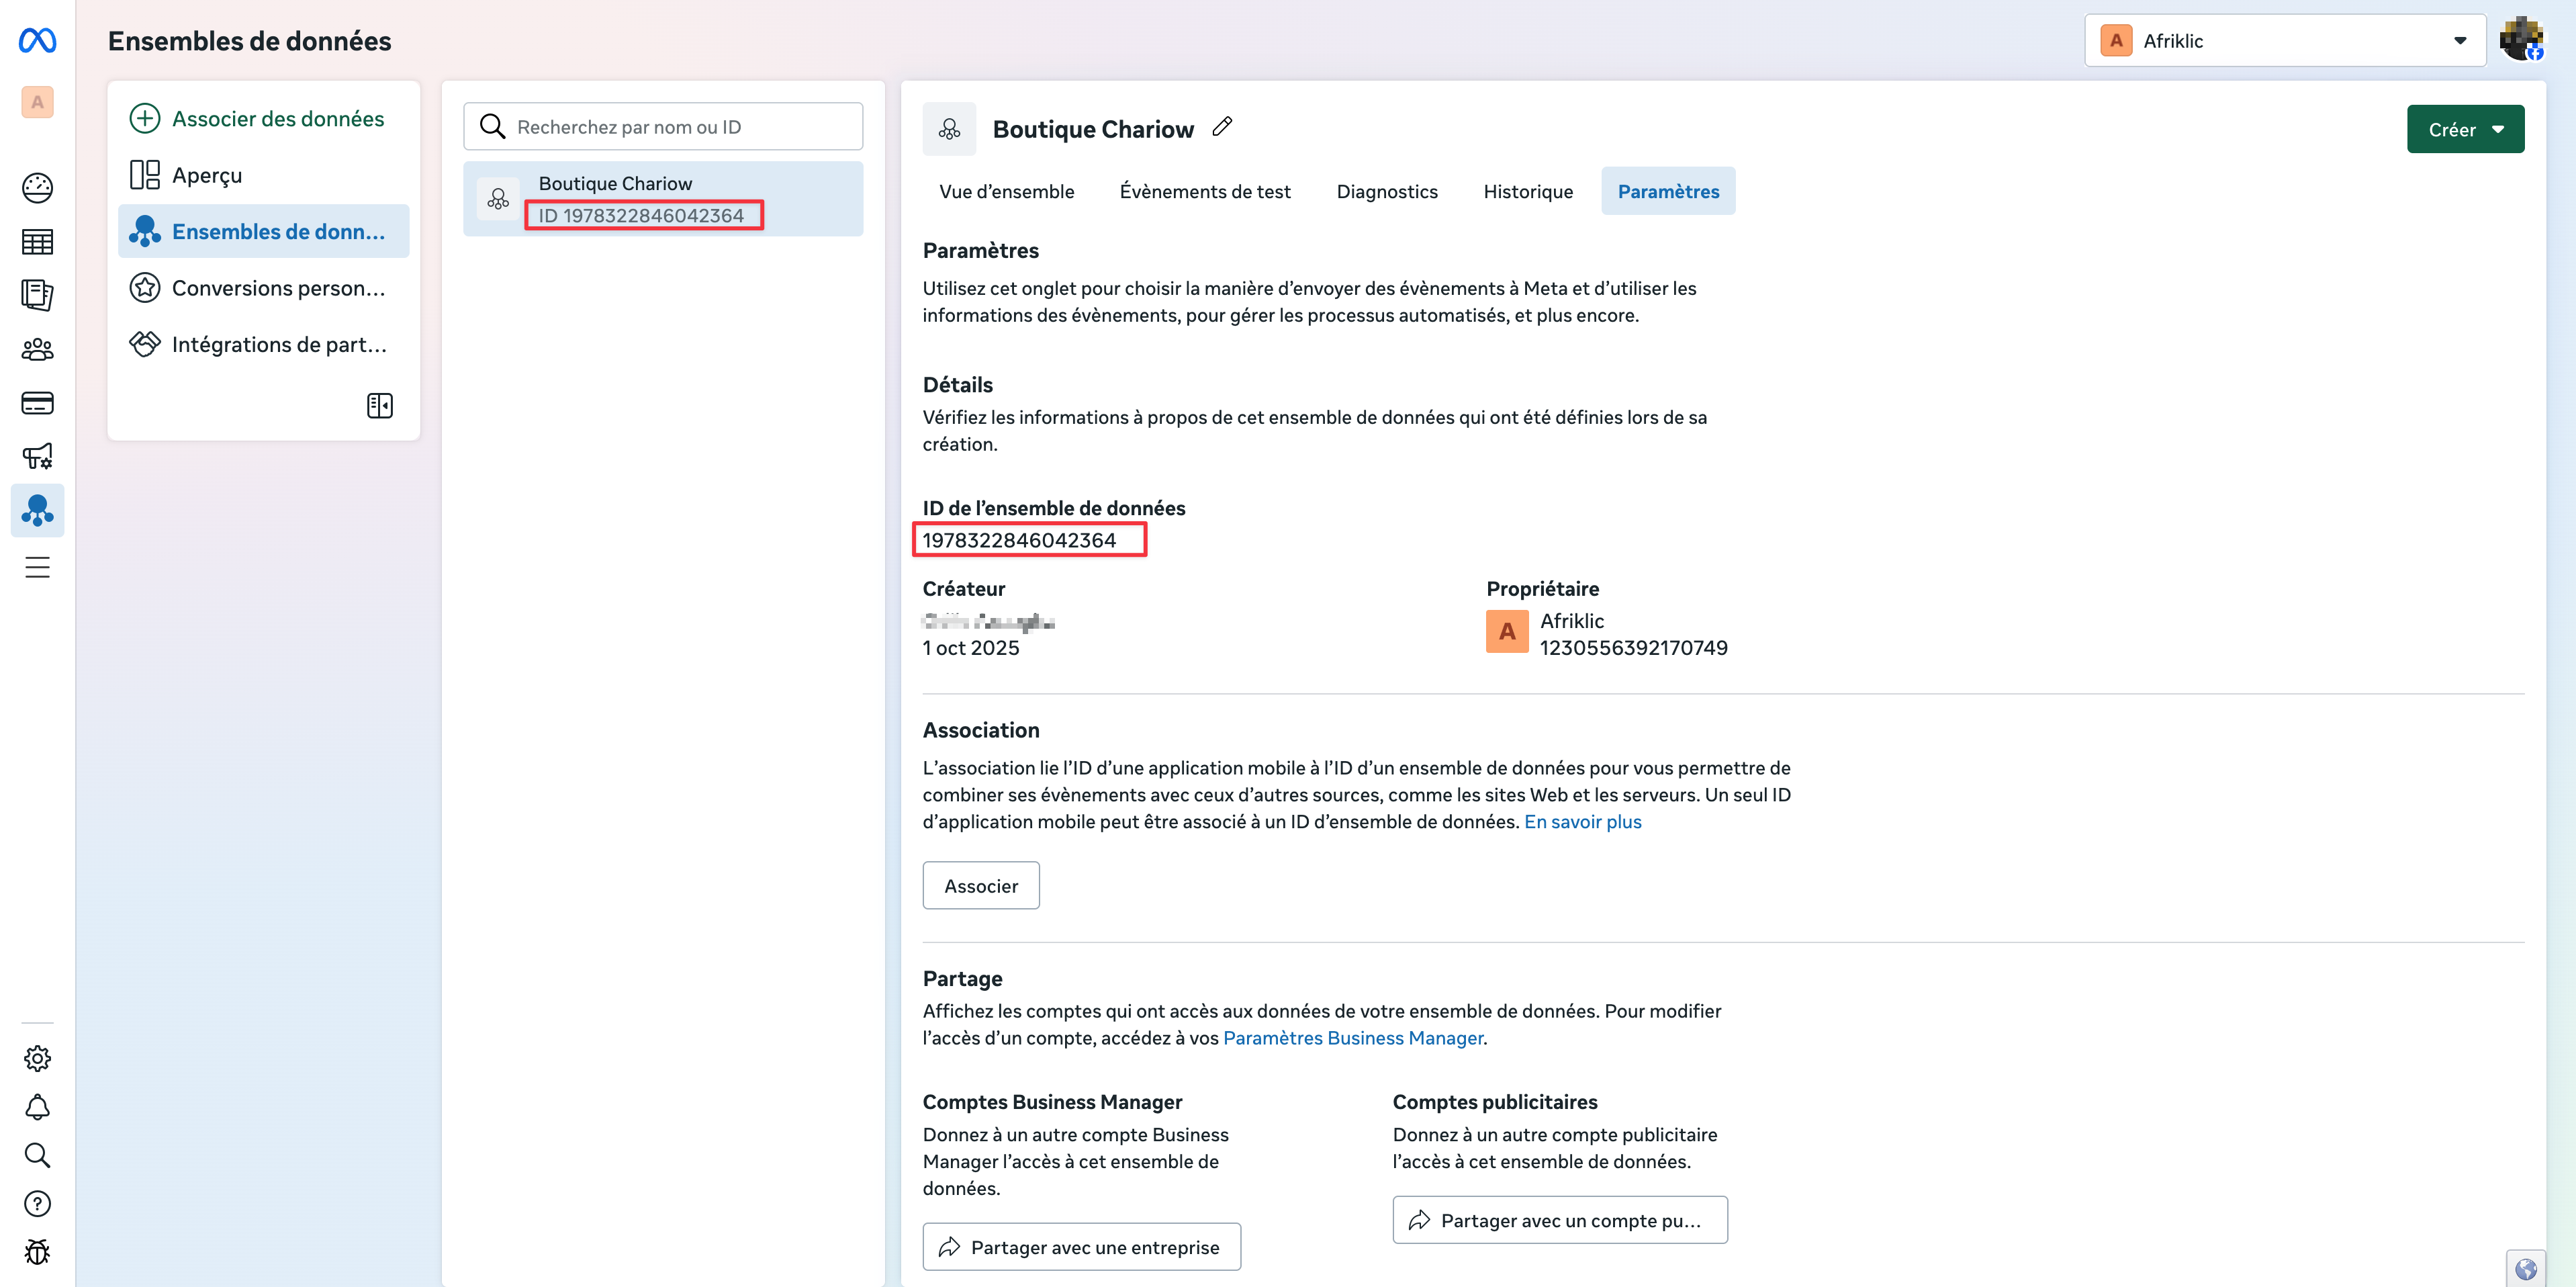
Select the Pixel you want to connect to your storefront.
Copy the Meta Pixel ID (a 15- or 16-digit number). This is the code you’ll add to your storefront.
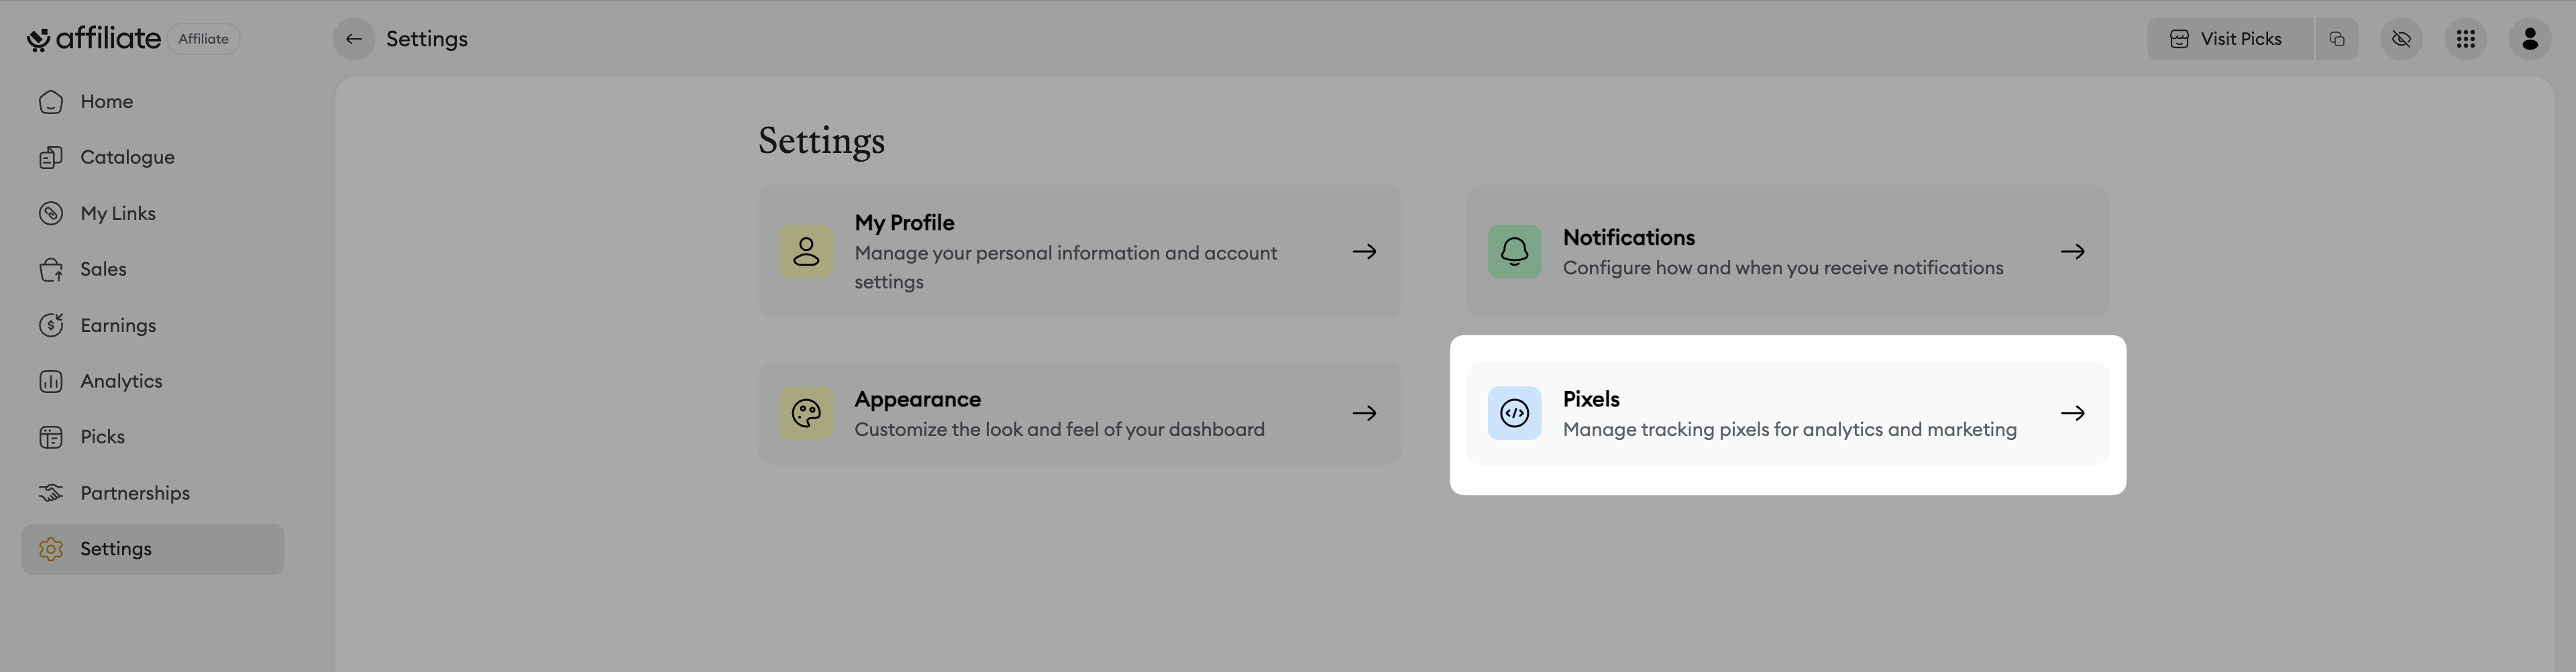
Log in to your Affiliate dashboard.
Go to Settings then open the Pixels section.
Enable the Facebook Pixel ID option and paste the ID you copied in step 1.
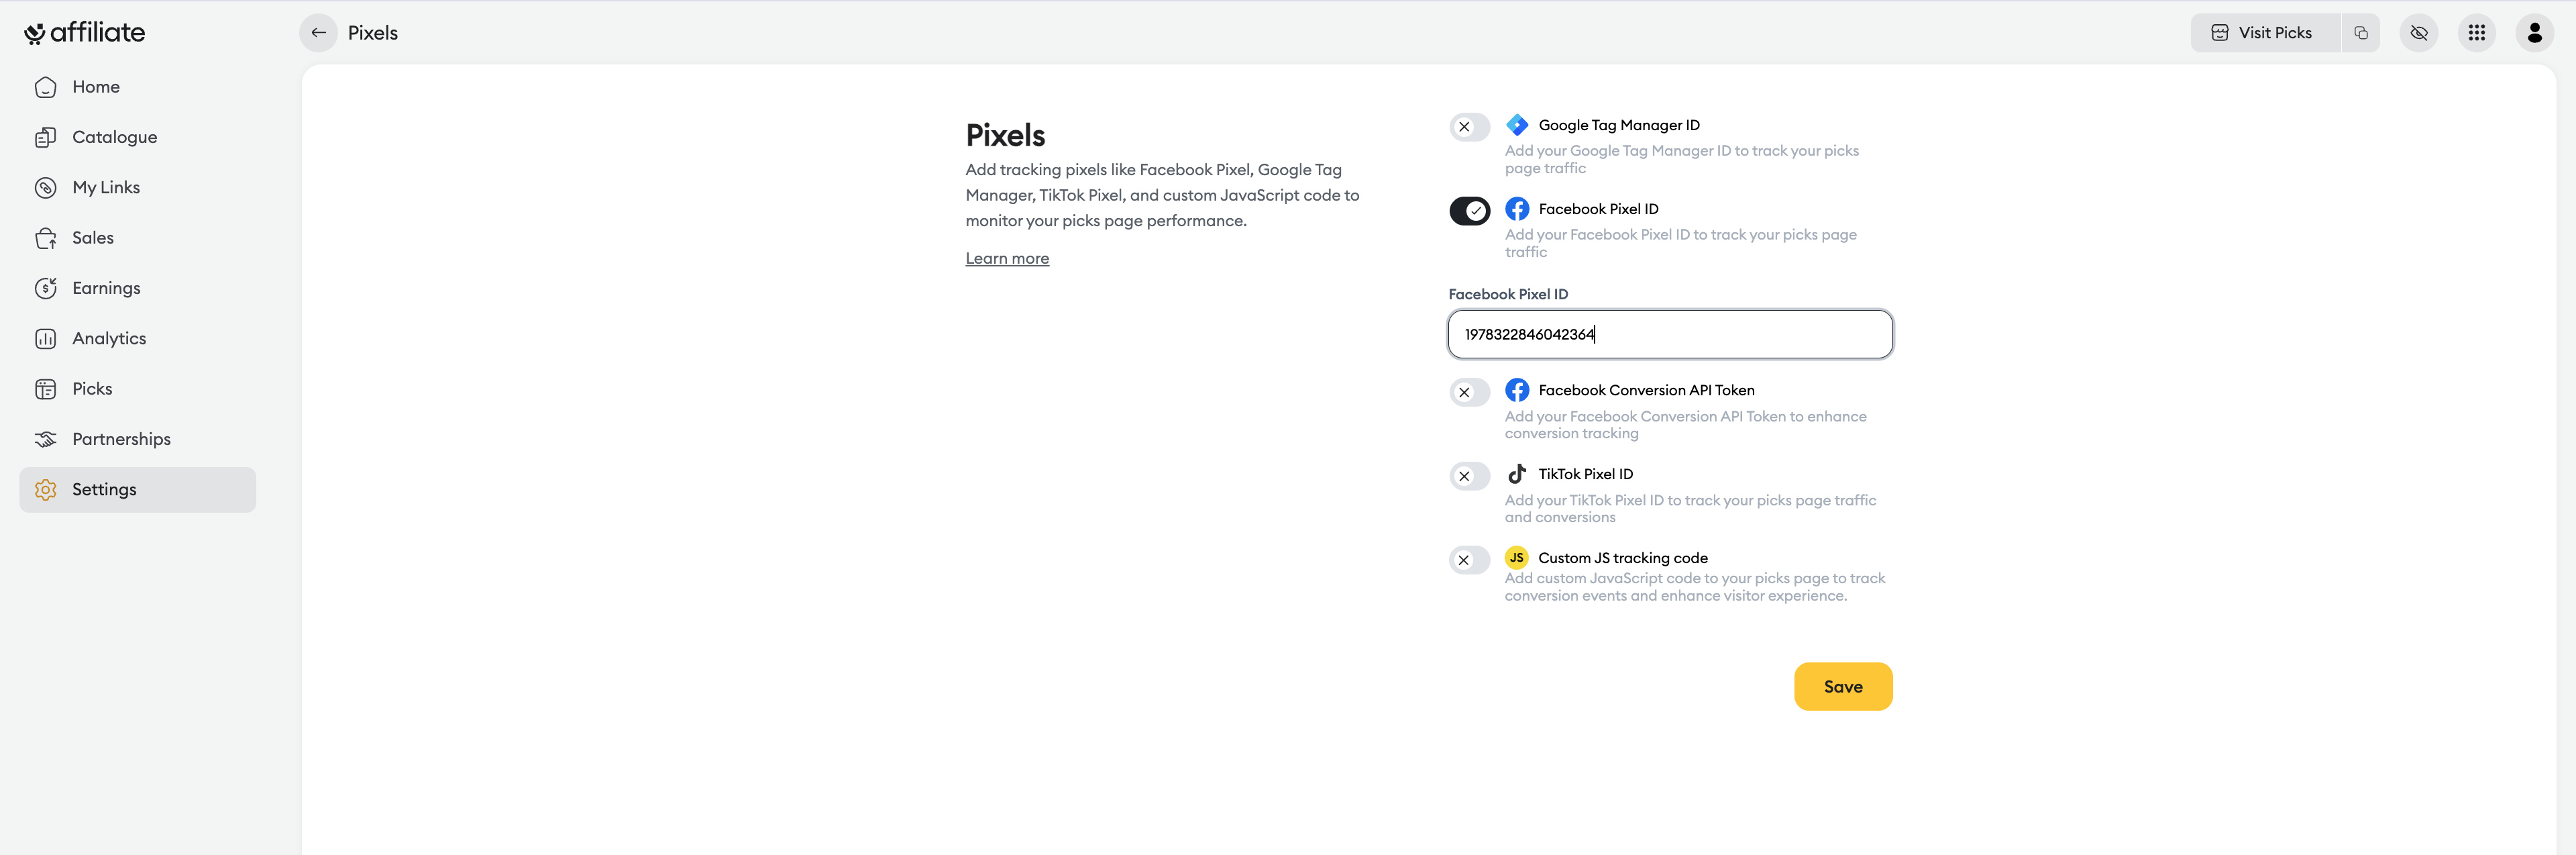
Click Save to enable tracking.
Once the ID is added and saved, Chariow automatically starts sending basic events to your Pixel (Page View, Purchase, etc.).
To check that the Pixel is working properly:
Install the Chrome extension Meta Pixel Helper.
Go to your online storefront page.
Click on the extension icon to confirm that it detects your Pixel and logs the events.

Need help? Contact our support via chat or at [email protected]