This article guides you through installing and using the n8n-nodes-chariow package. This integration lets you connect your Chariow store to more than 400 third-party apps (complex CRMs, specific billing tools, external databases, etc.) for custom automation.
Before you start the installation, make sure your environment meets the following conditions:
n8n Version: v1.0.0 or higher.
Node.js : Version 20.19.0. or higher.
Package manager : npm or pnpm
Chariow store : A valid API key
Useful link: https://chariow.dev/en/n8n/setup
There are three ways to add Chariow to your n8n instance:
Go to the Settings of your n8n instance.
Click on Community Nodes.
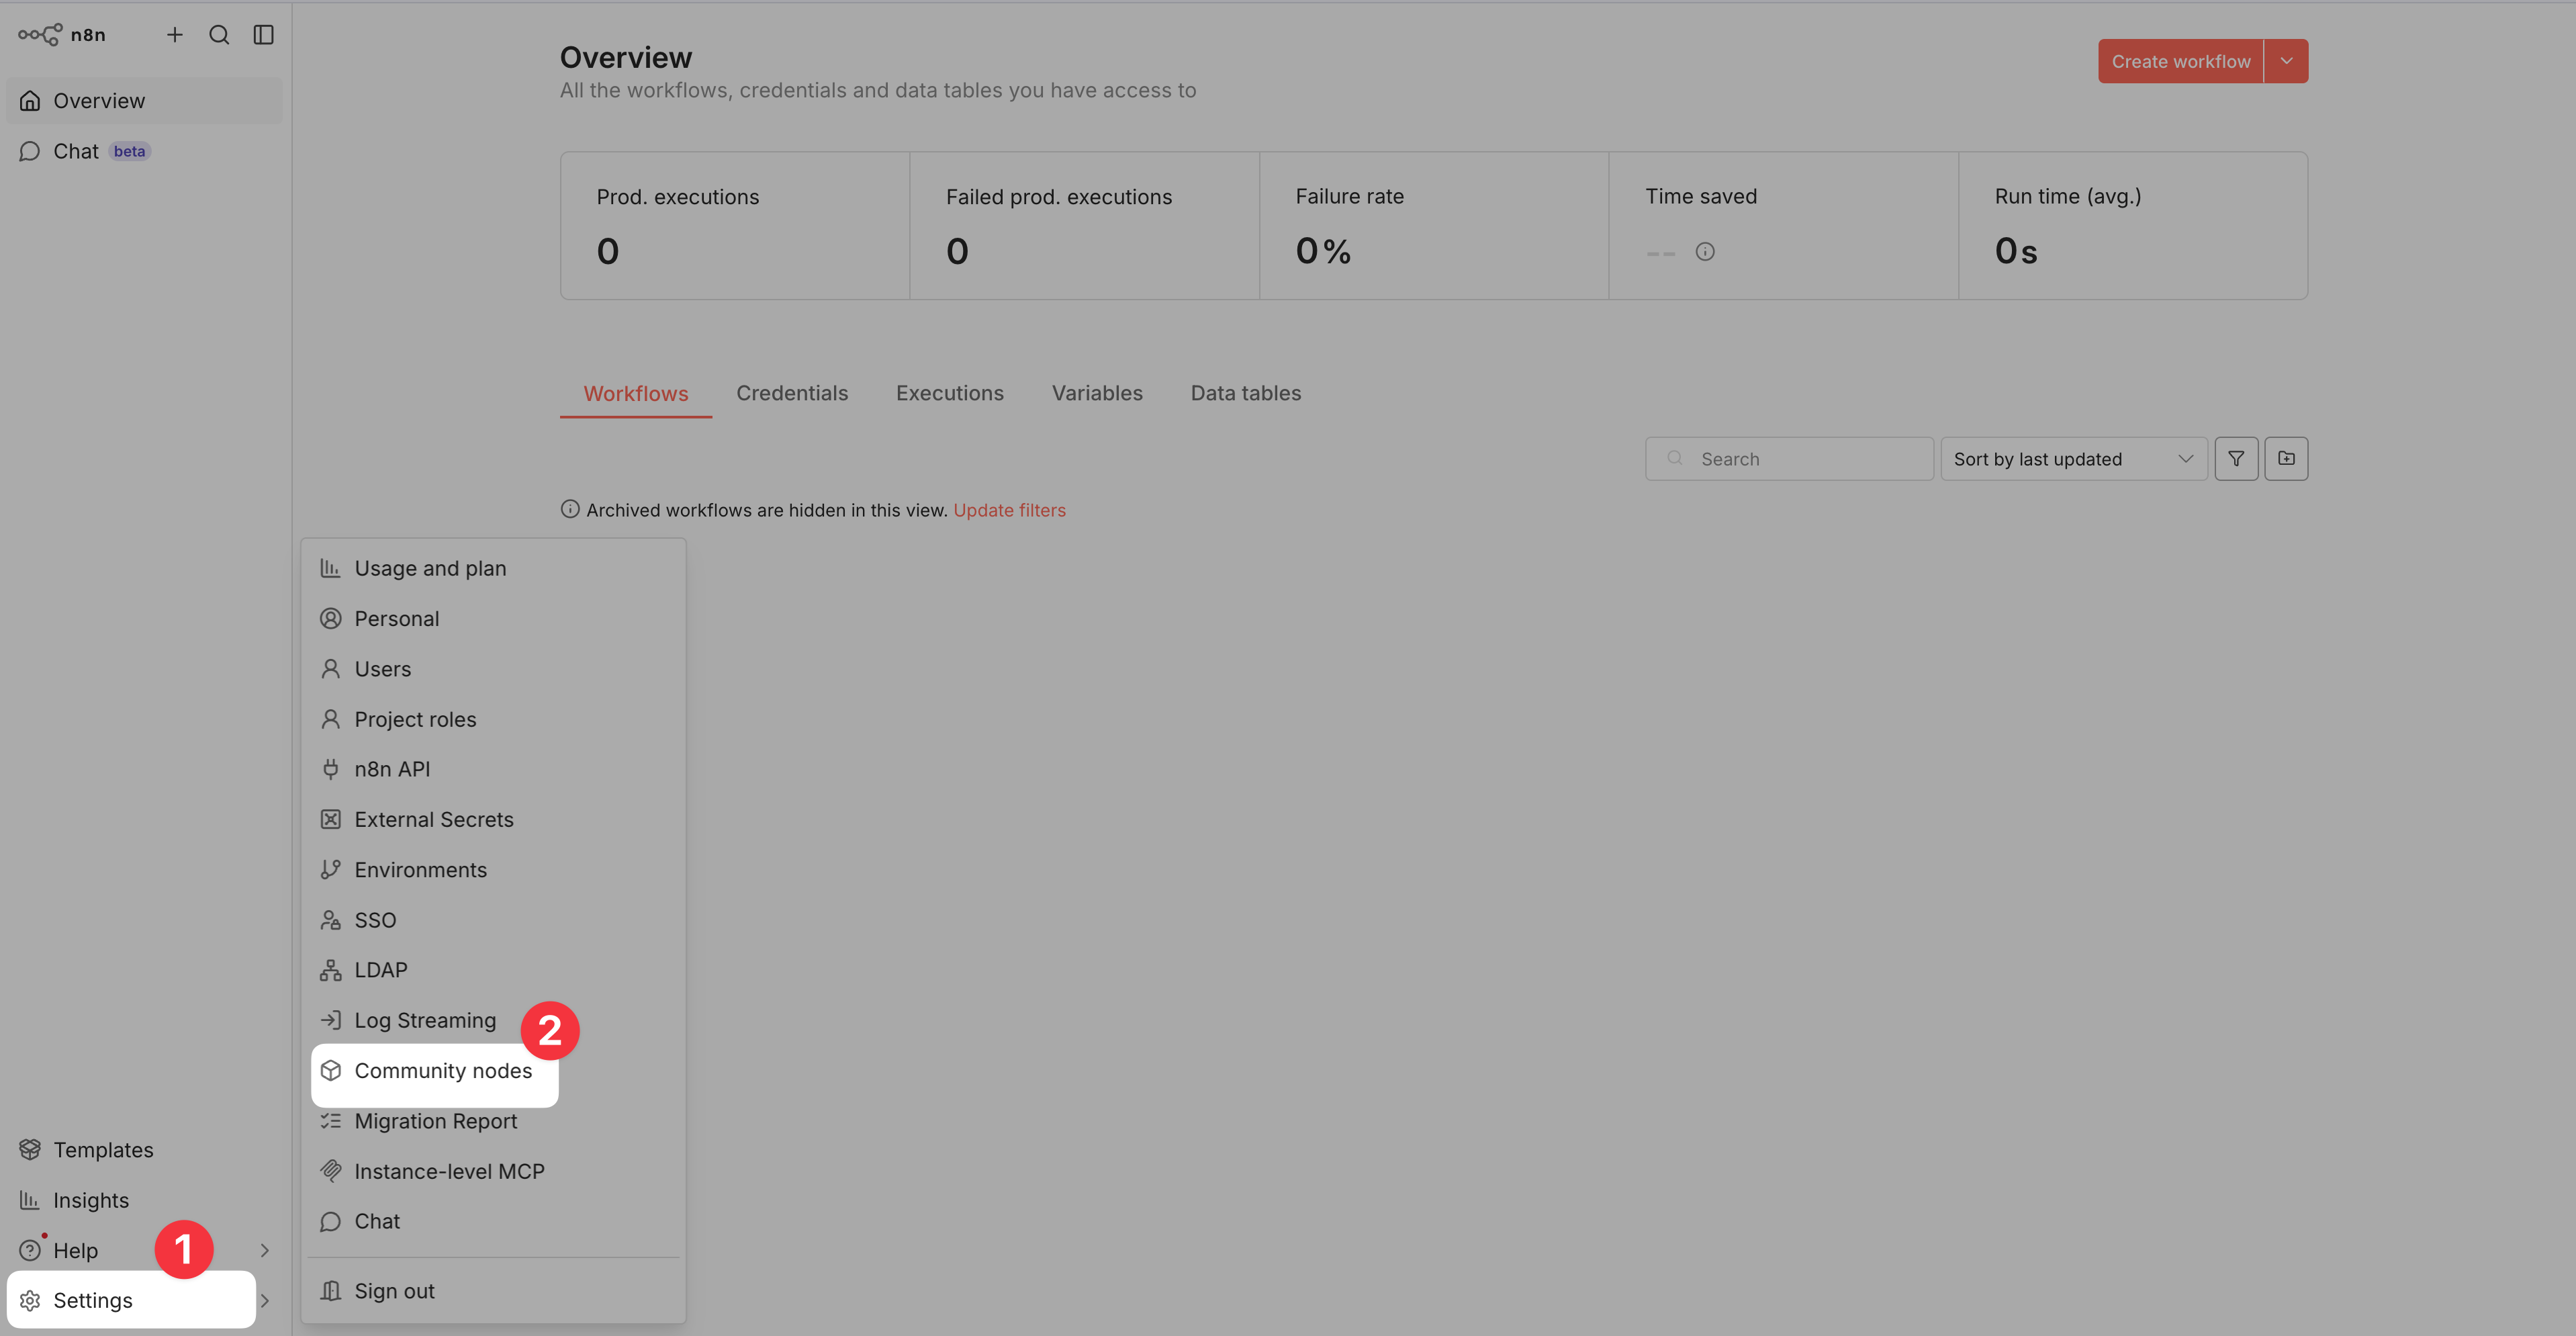
Click on Install a community node.
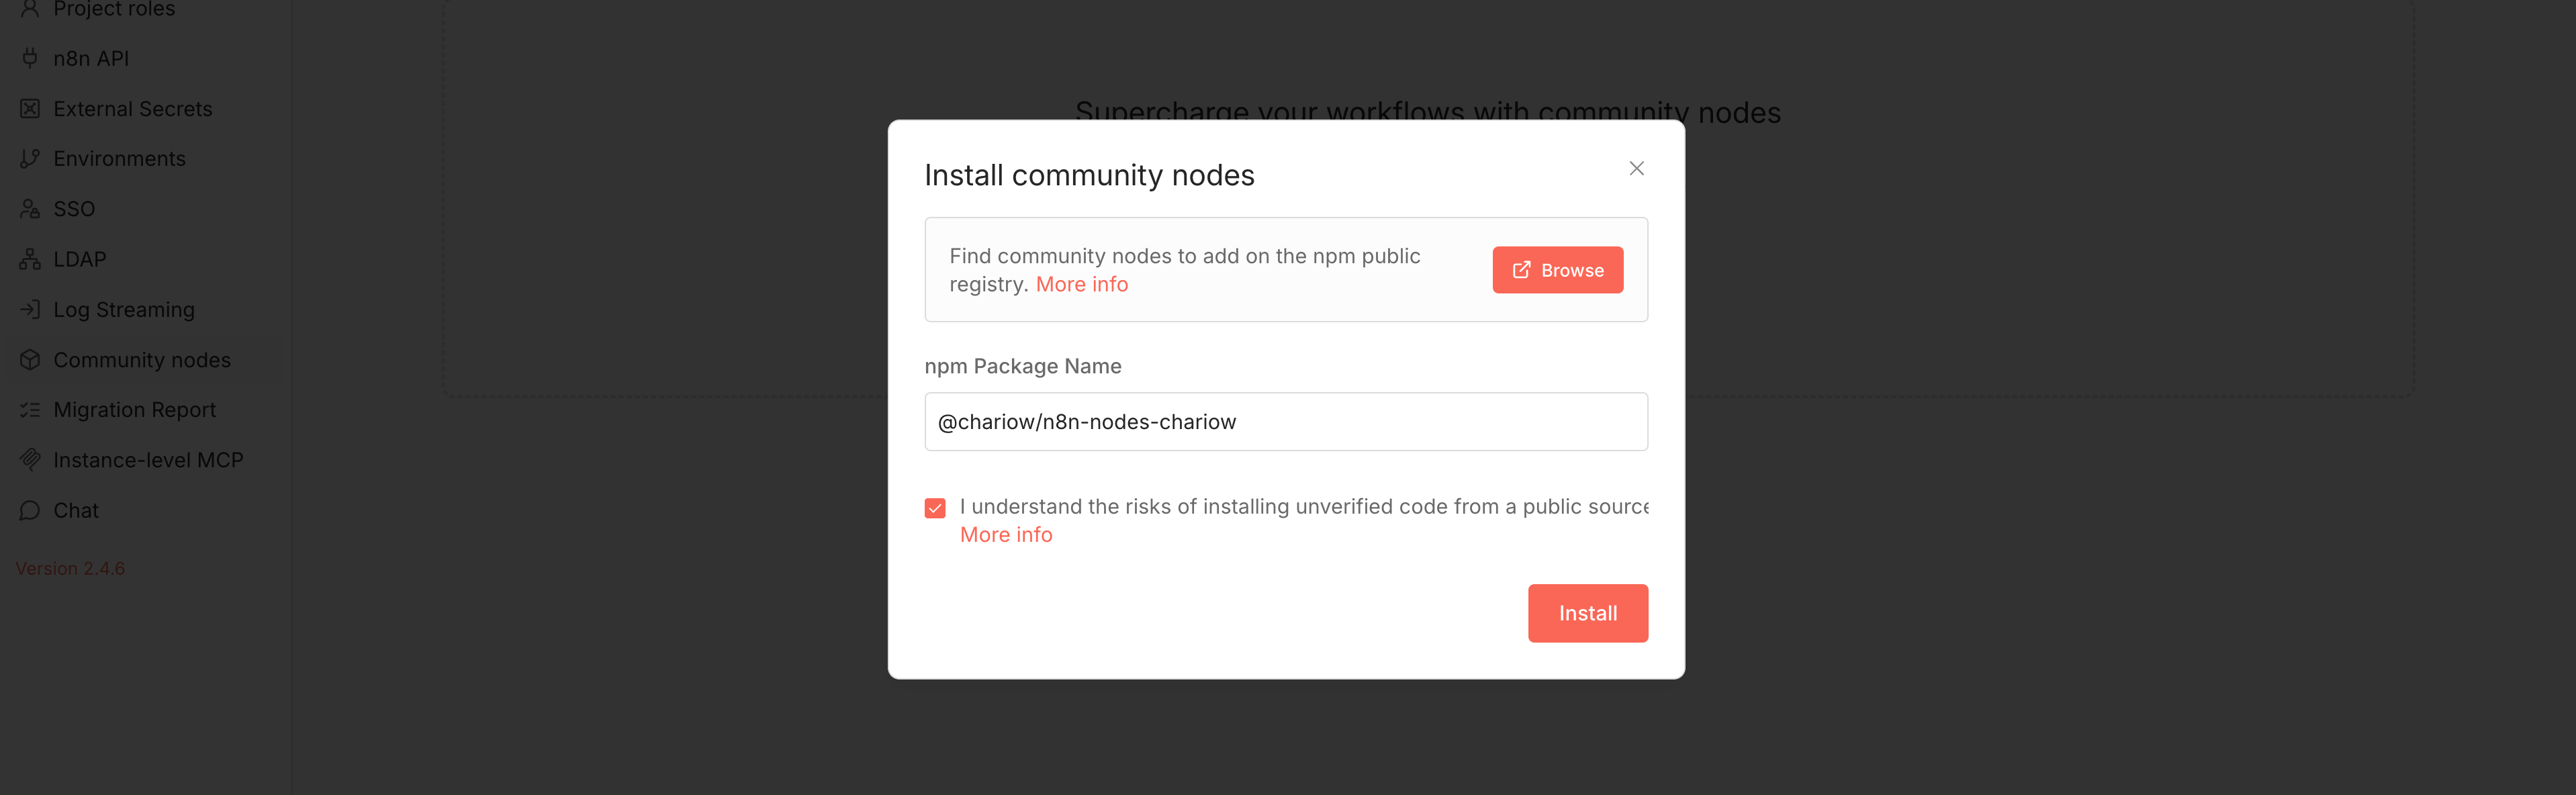
Enter the package name: @chariow/n8n-nodes-chariow
Accept the terms and click on Install.
If you manage your own server, run this command in your n8n working directory:
Bash
npm install @chariow/n8n-nodes-chariowIf n8n is running on Docker, use the following command to inject the node:
Bash
docker exec -it n8n npm install @chariow/n8n-nodes-chariow
To link n8n to your store:
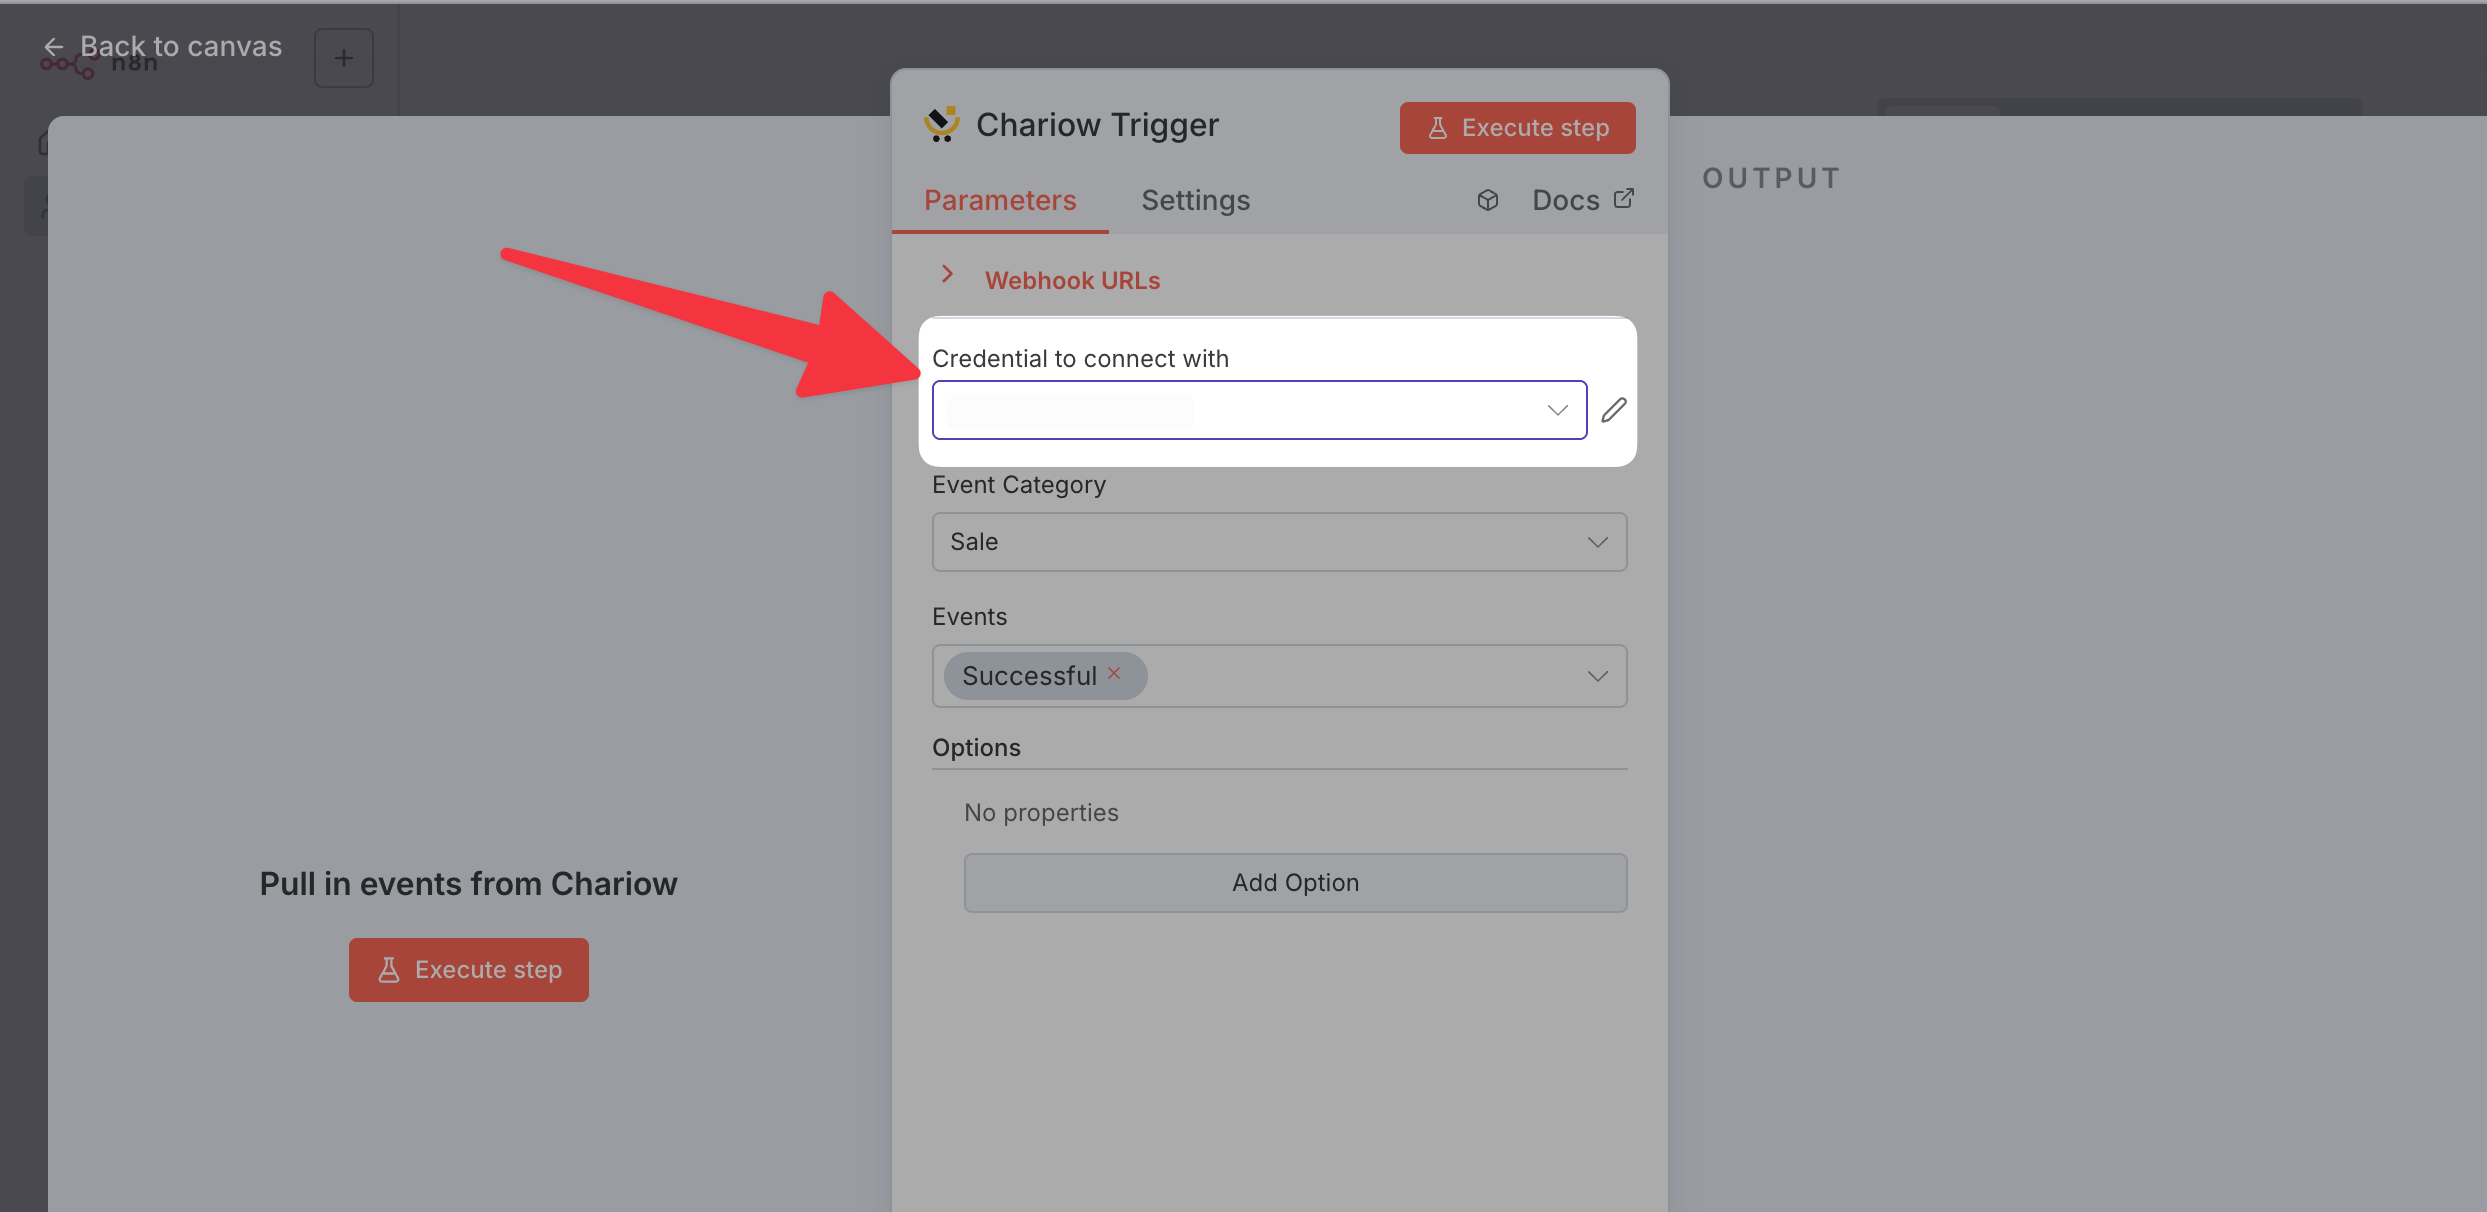
In your n8n workflow, add a Chariow node.
In the Credential to connect with section, click on Create New.
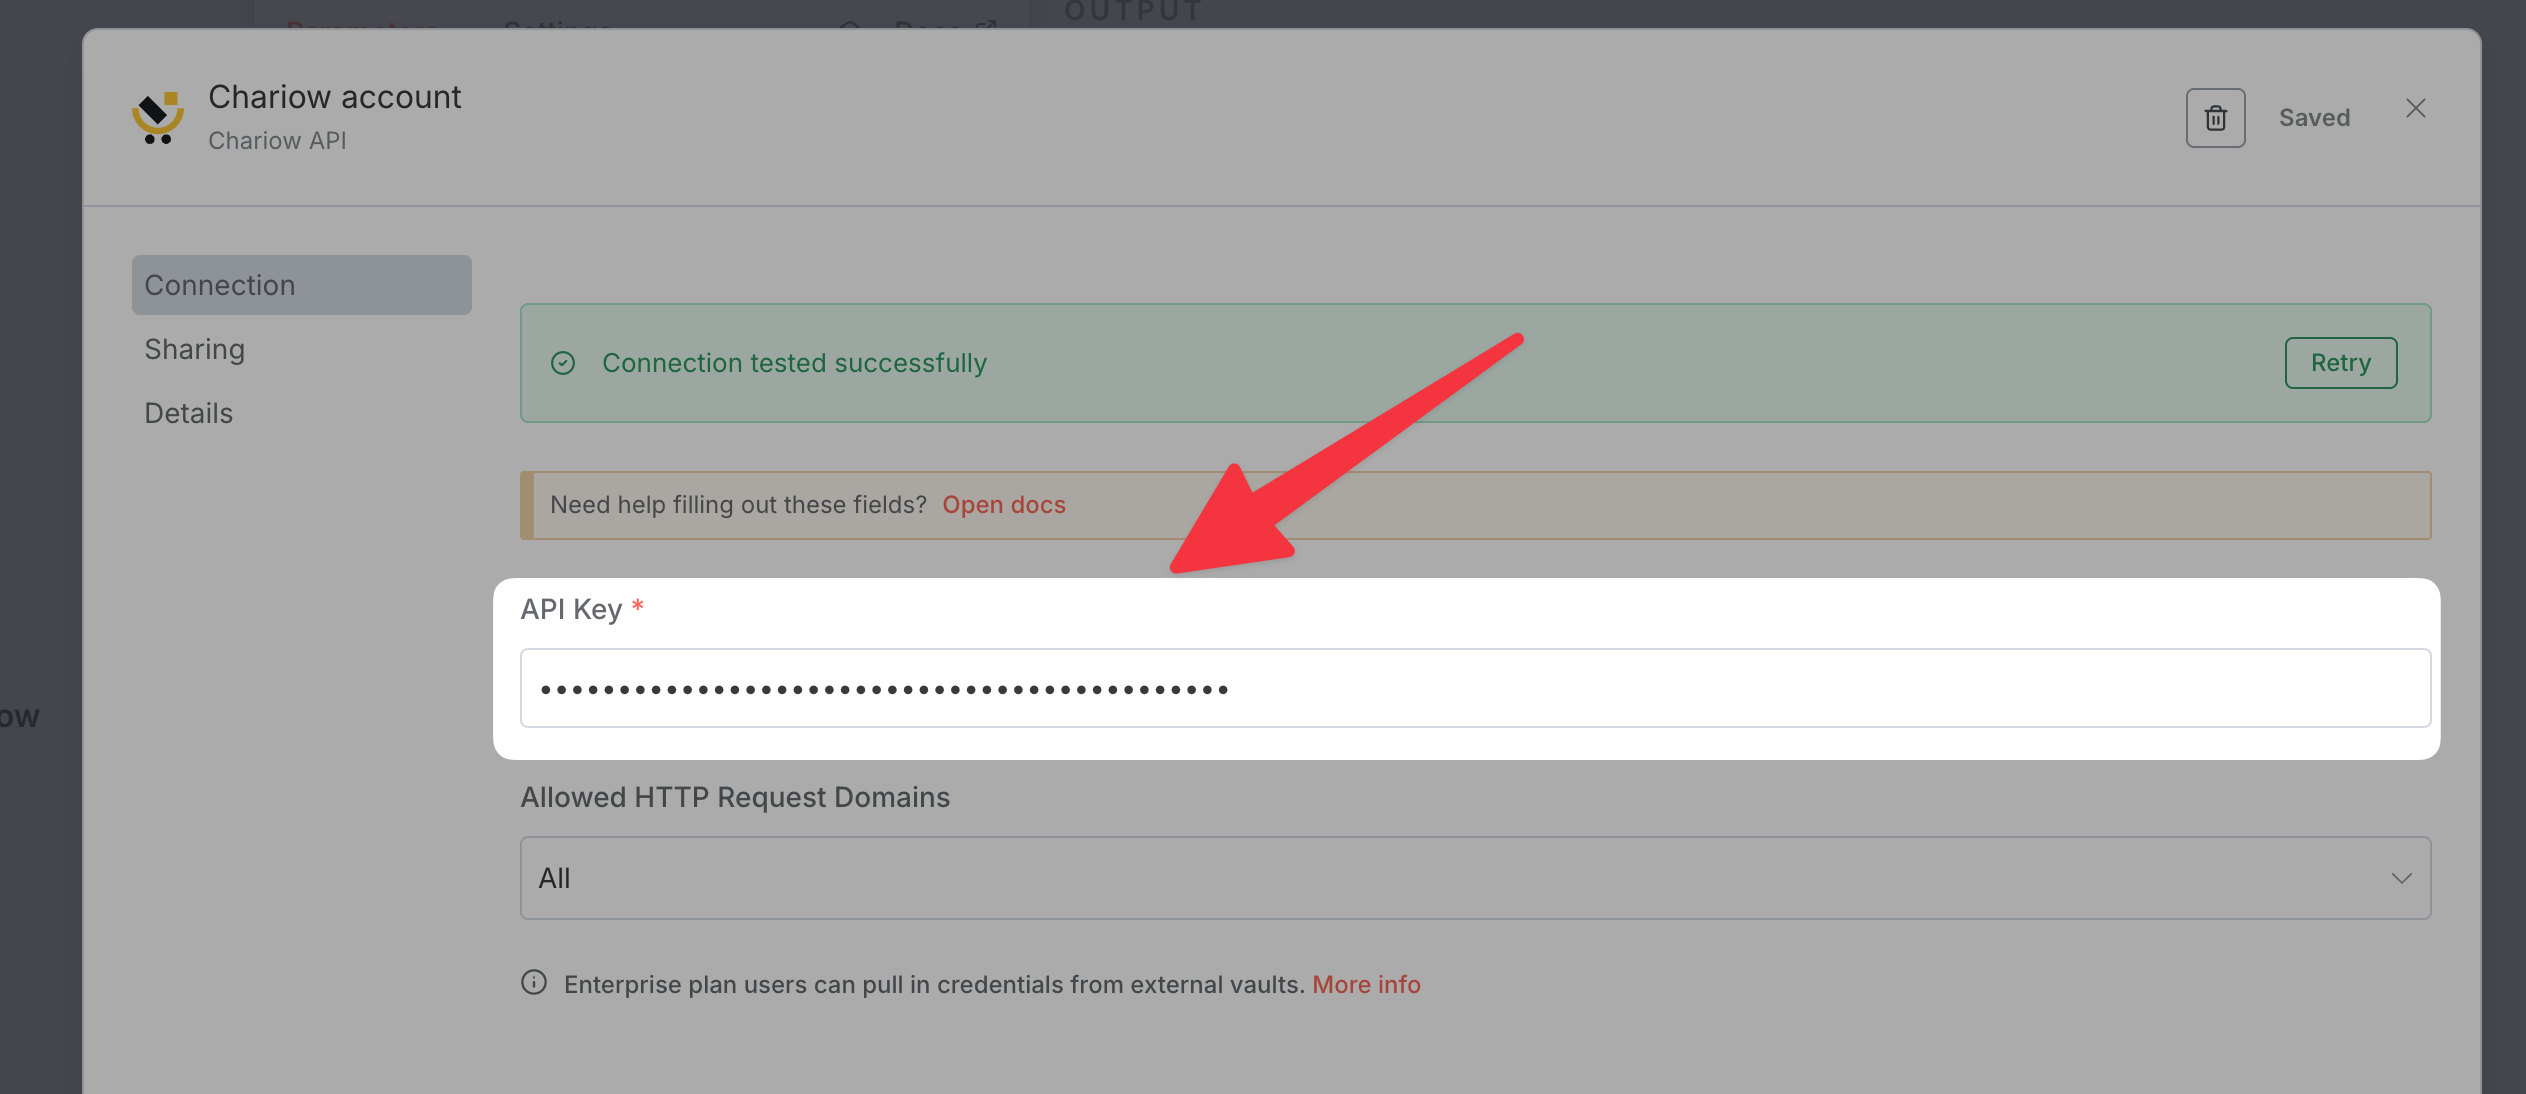
Enter your Chariow API Key.
Where to find it? Go to your Chariow dashboard, under the Settings > API Keys tab. (article link to guide you)
Create your key, copy and paste it into n8n, then save.
The integration lets you act on several key resources of your store.
The main node lets you act on your data:
Customers : Retrieve (Get) or list (Get Many) your customers.
Products : View the details and prices of your offers.
Sales : Track transactions and filter by status.
Licenses : Activate, revoke, or list the activations of a key.
Checkout : Dynamically create custom payment sessions.
Use the Chariow Trigger node to start workflows instantly:
Sales : successful.sale, abandoned.sale, failed.sale, refunded.sale.
Licenses : activated.licence, expired.licence, issued.licence, revoked.licence.
Chariow trigger : Receives the notification of a new order.
Google Sheets node : Automatically adds a row with the customer's name and the amount.
Need help? Contact our support via chat or at [email protected]