“Pulses” in Chariow are automatic triggers that send information to third-party tools whenever a specific event happens (like a new order). By using Zapier, you can capture this data via a Webhook and connect it to over 5,000 applications (Google Sheets, Slack, CRM, etc.) without writing a line of code.
Before you start, make sure you have:
A Zapier account (a premium plan is usually needed to use Webhooks).
Admin access to your Chariow interface.
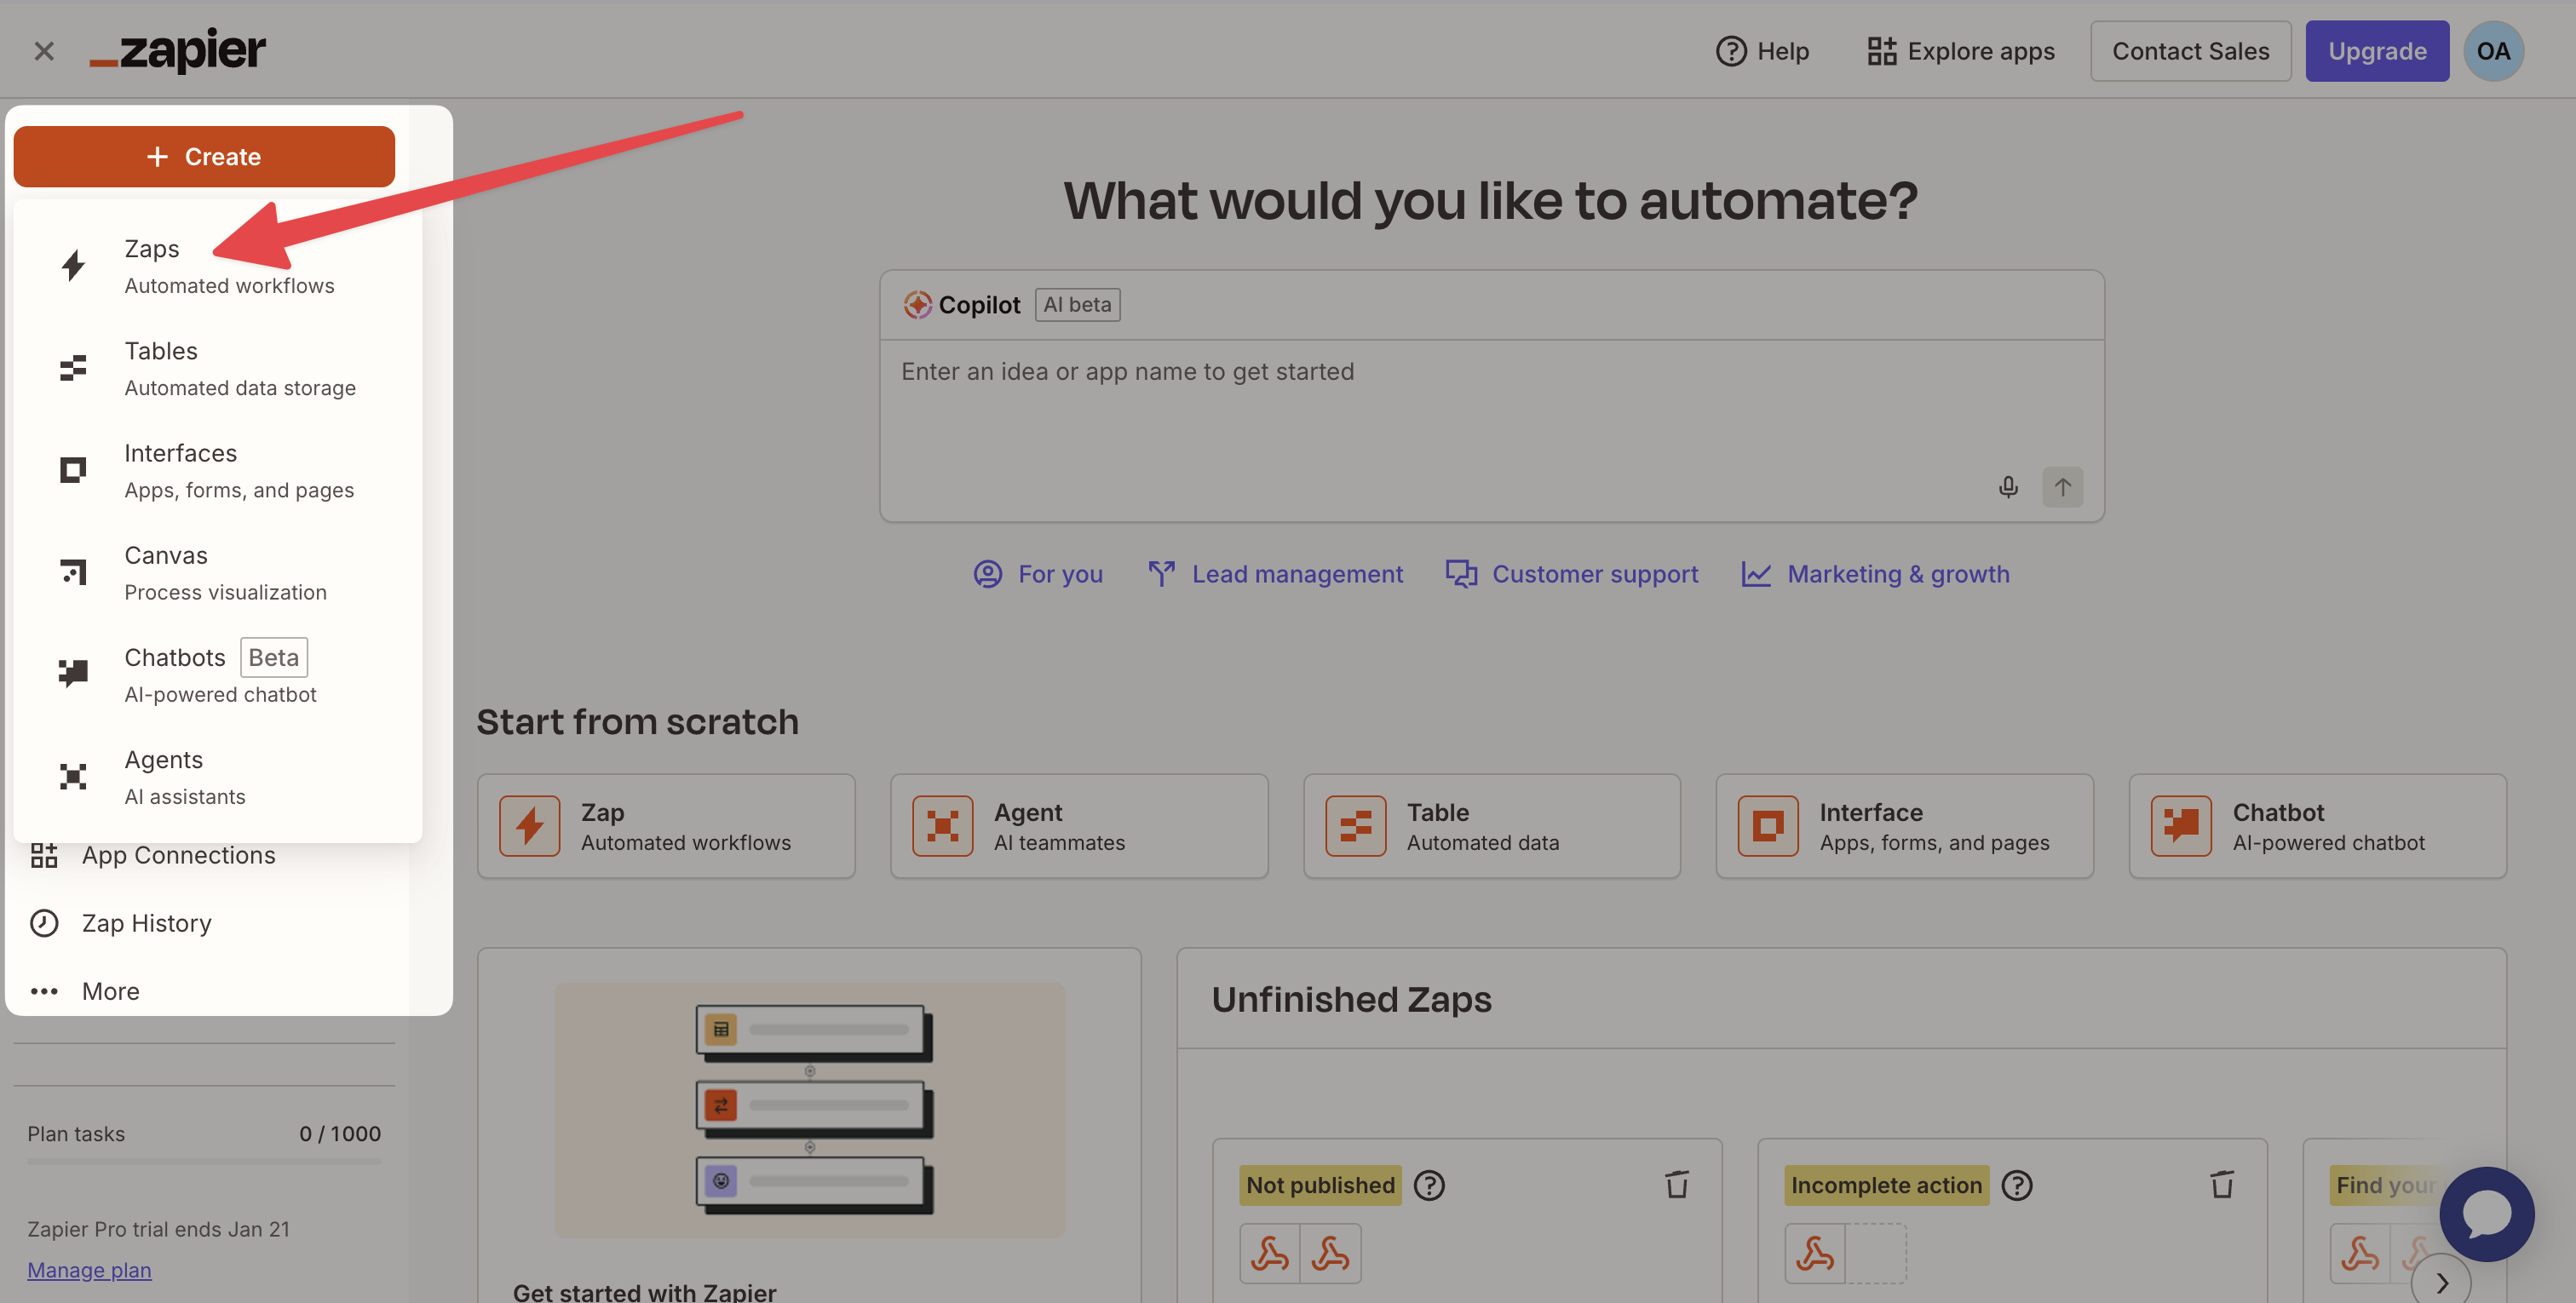
Log in to your Zapier account and click "Create Zap".
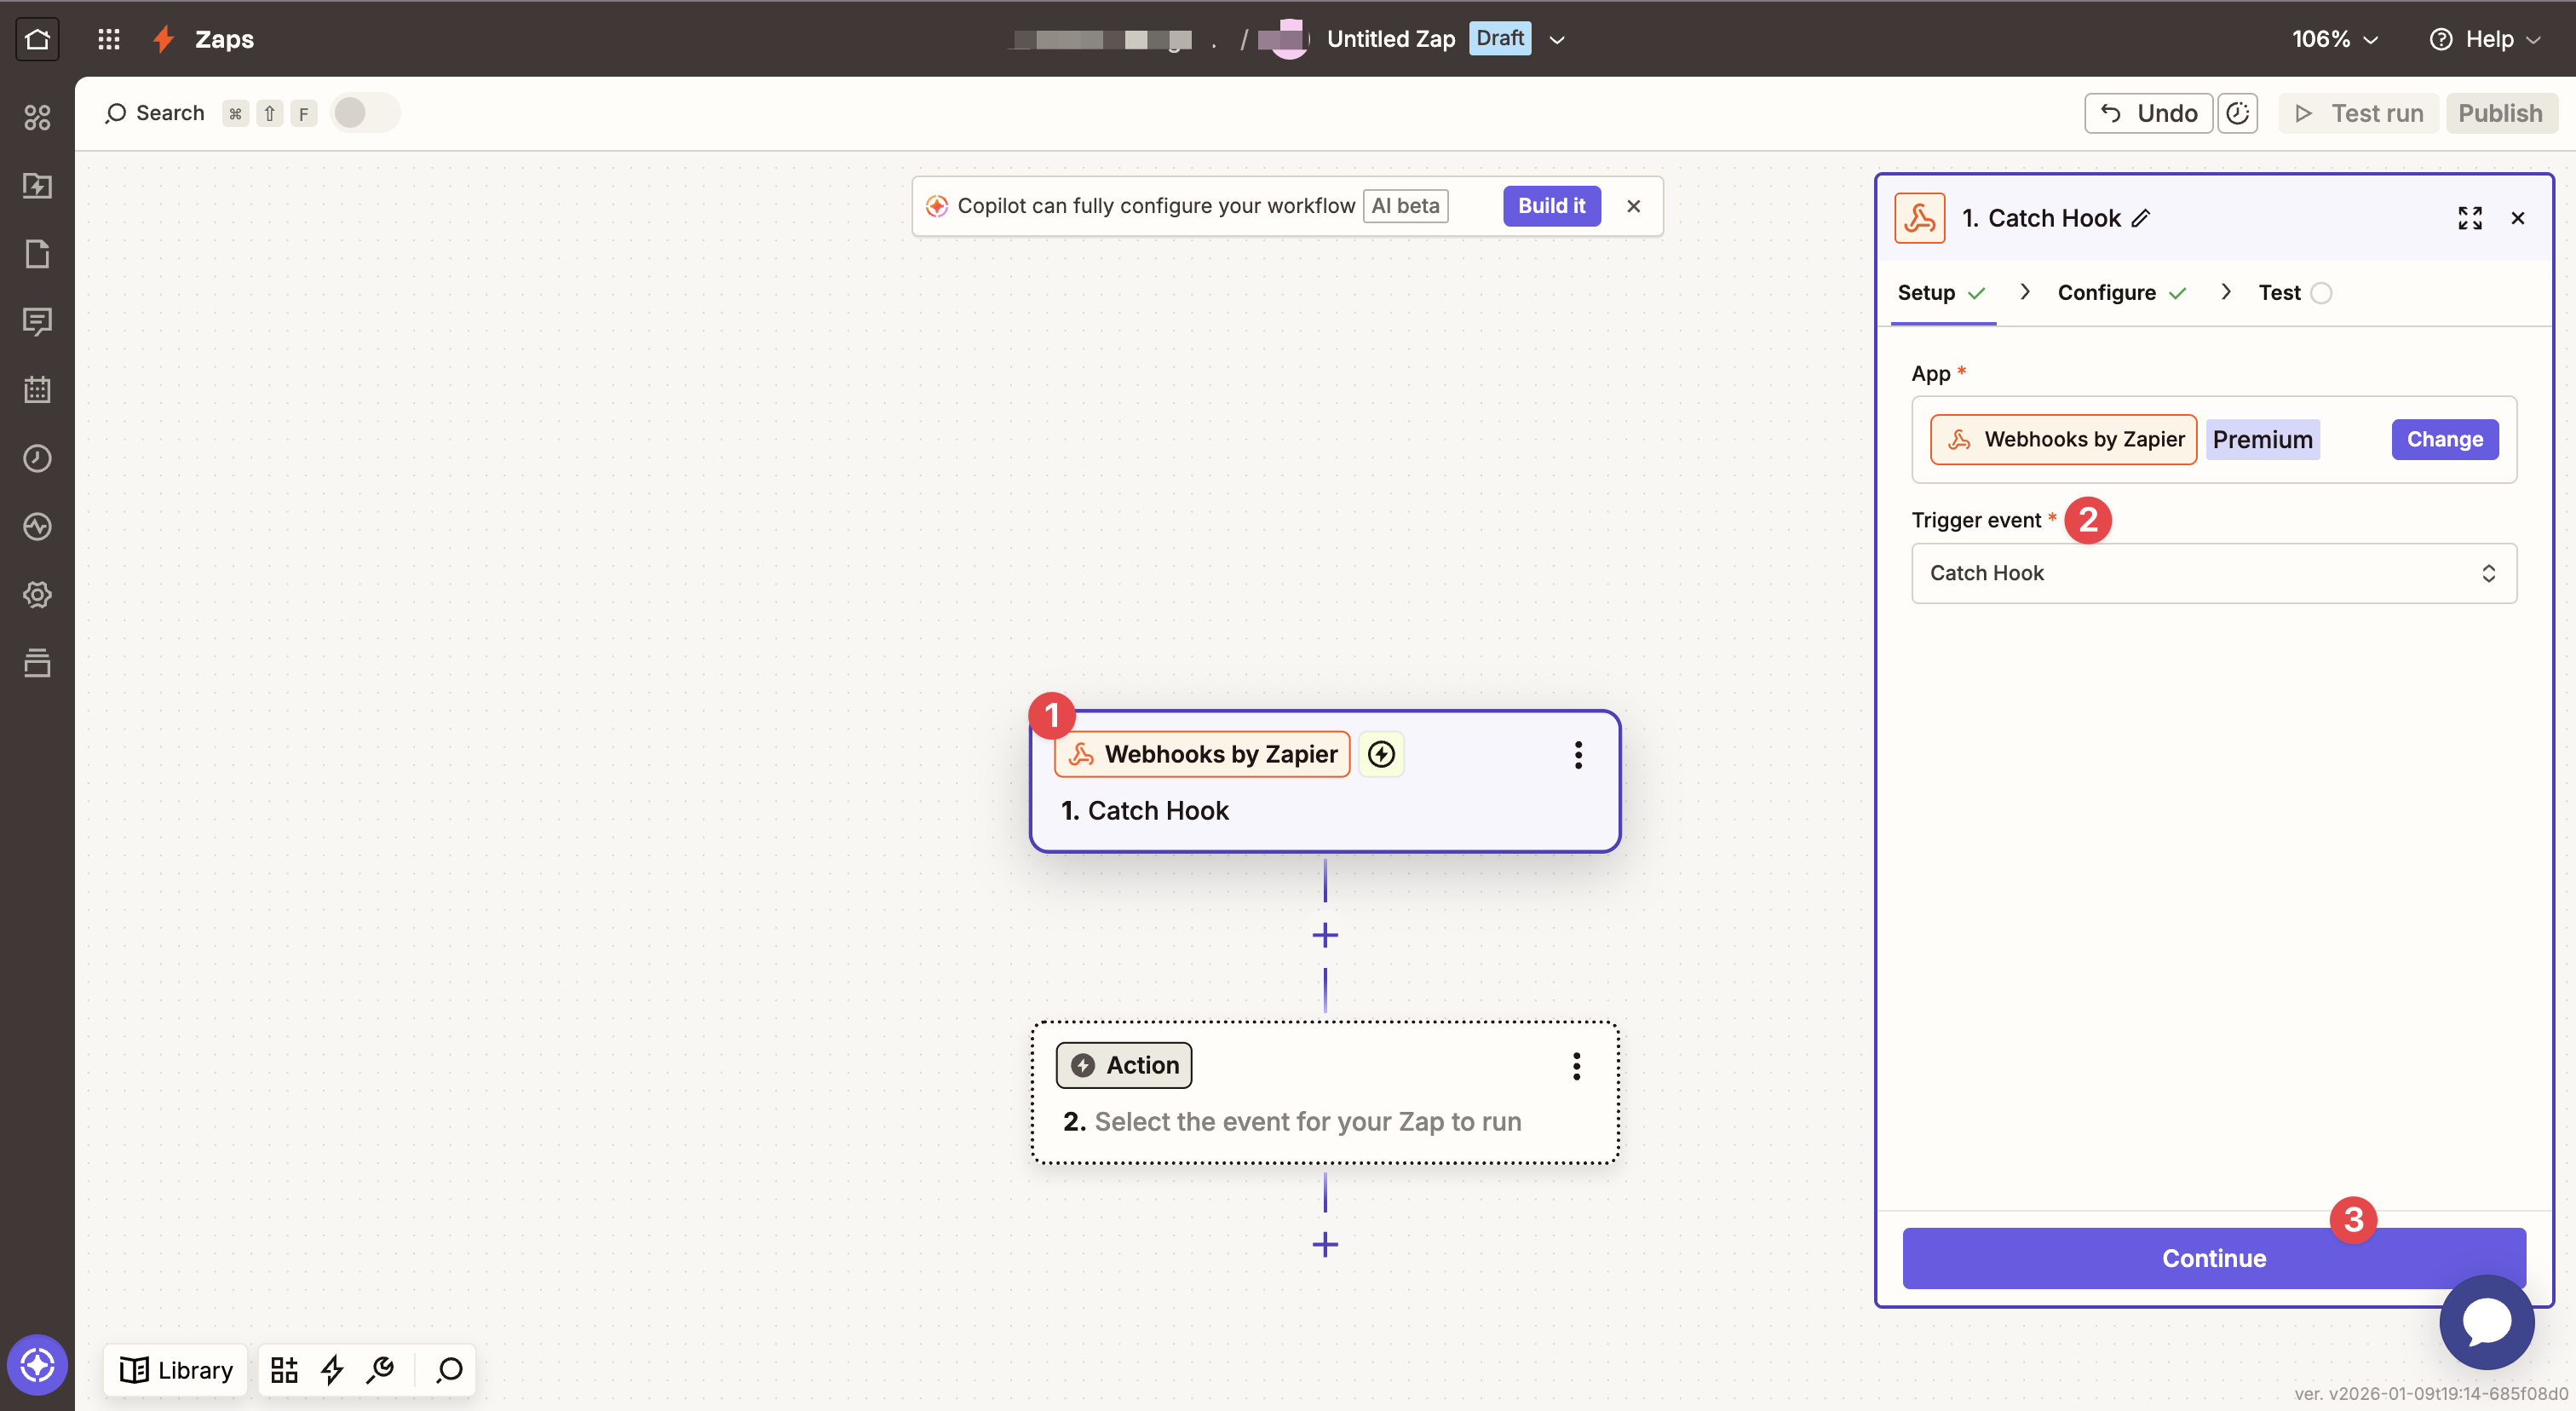
For the "Trigger" (Trigger), search for and select the app "Webhooks by Zapier".
In the "Trigger Event" field, choose "Catch Hook", then click "Continue".
Go straight to the "Test" tab in the setup.
Next, go straight to the Test step.
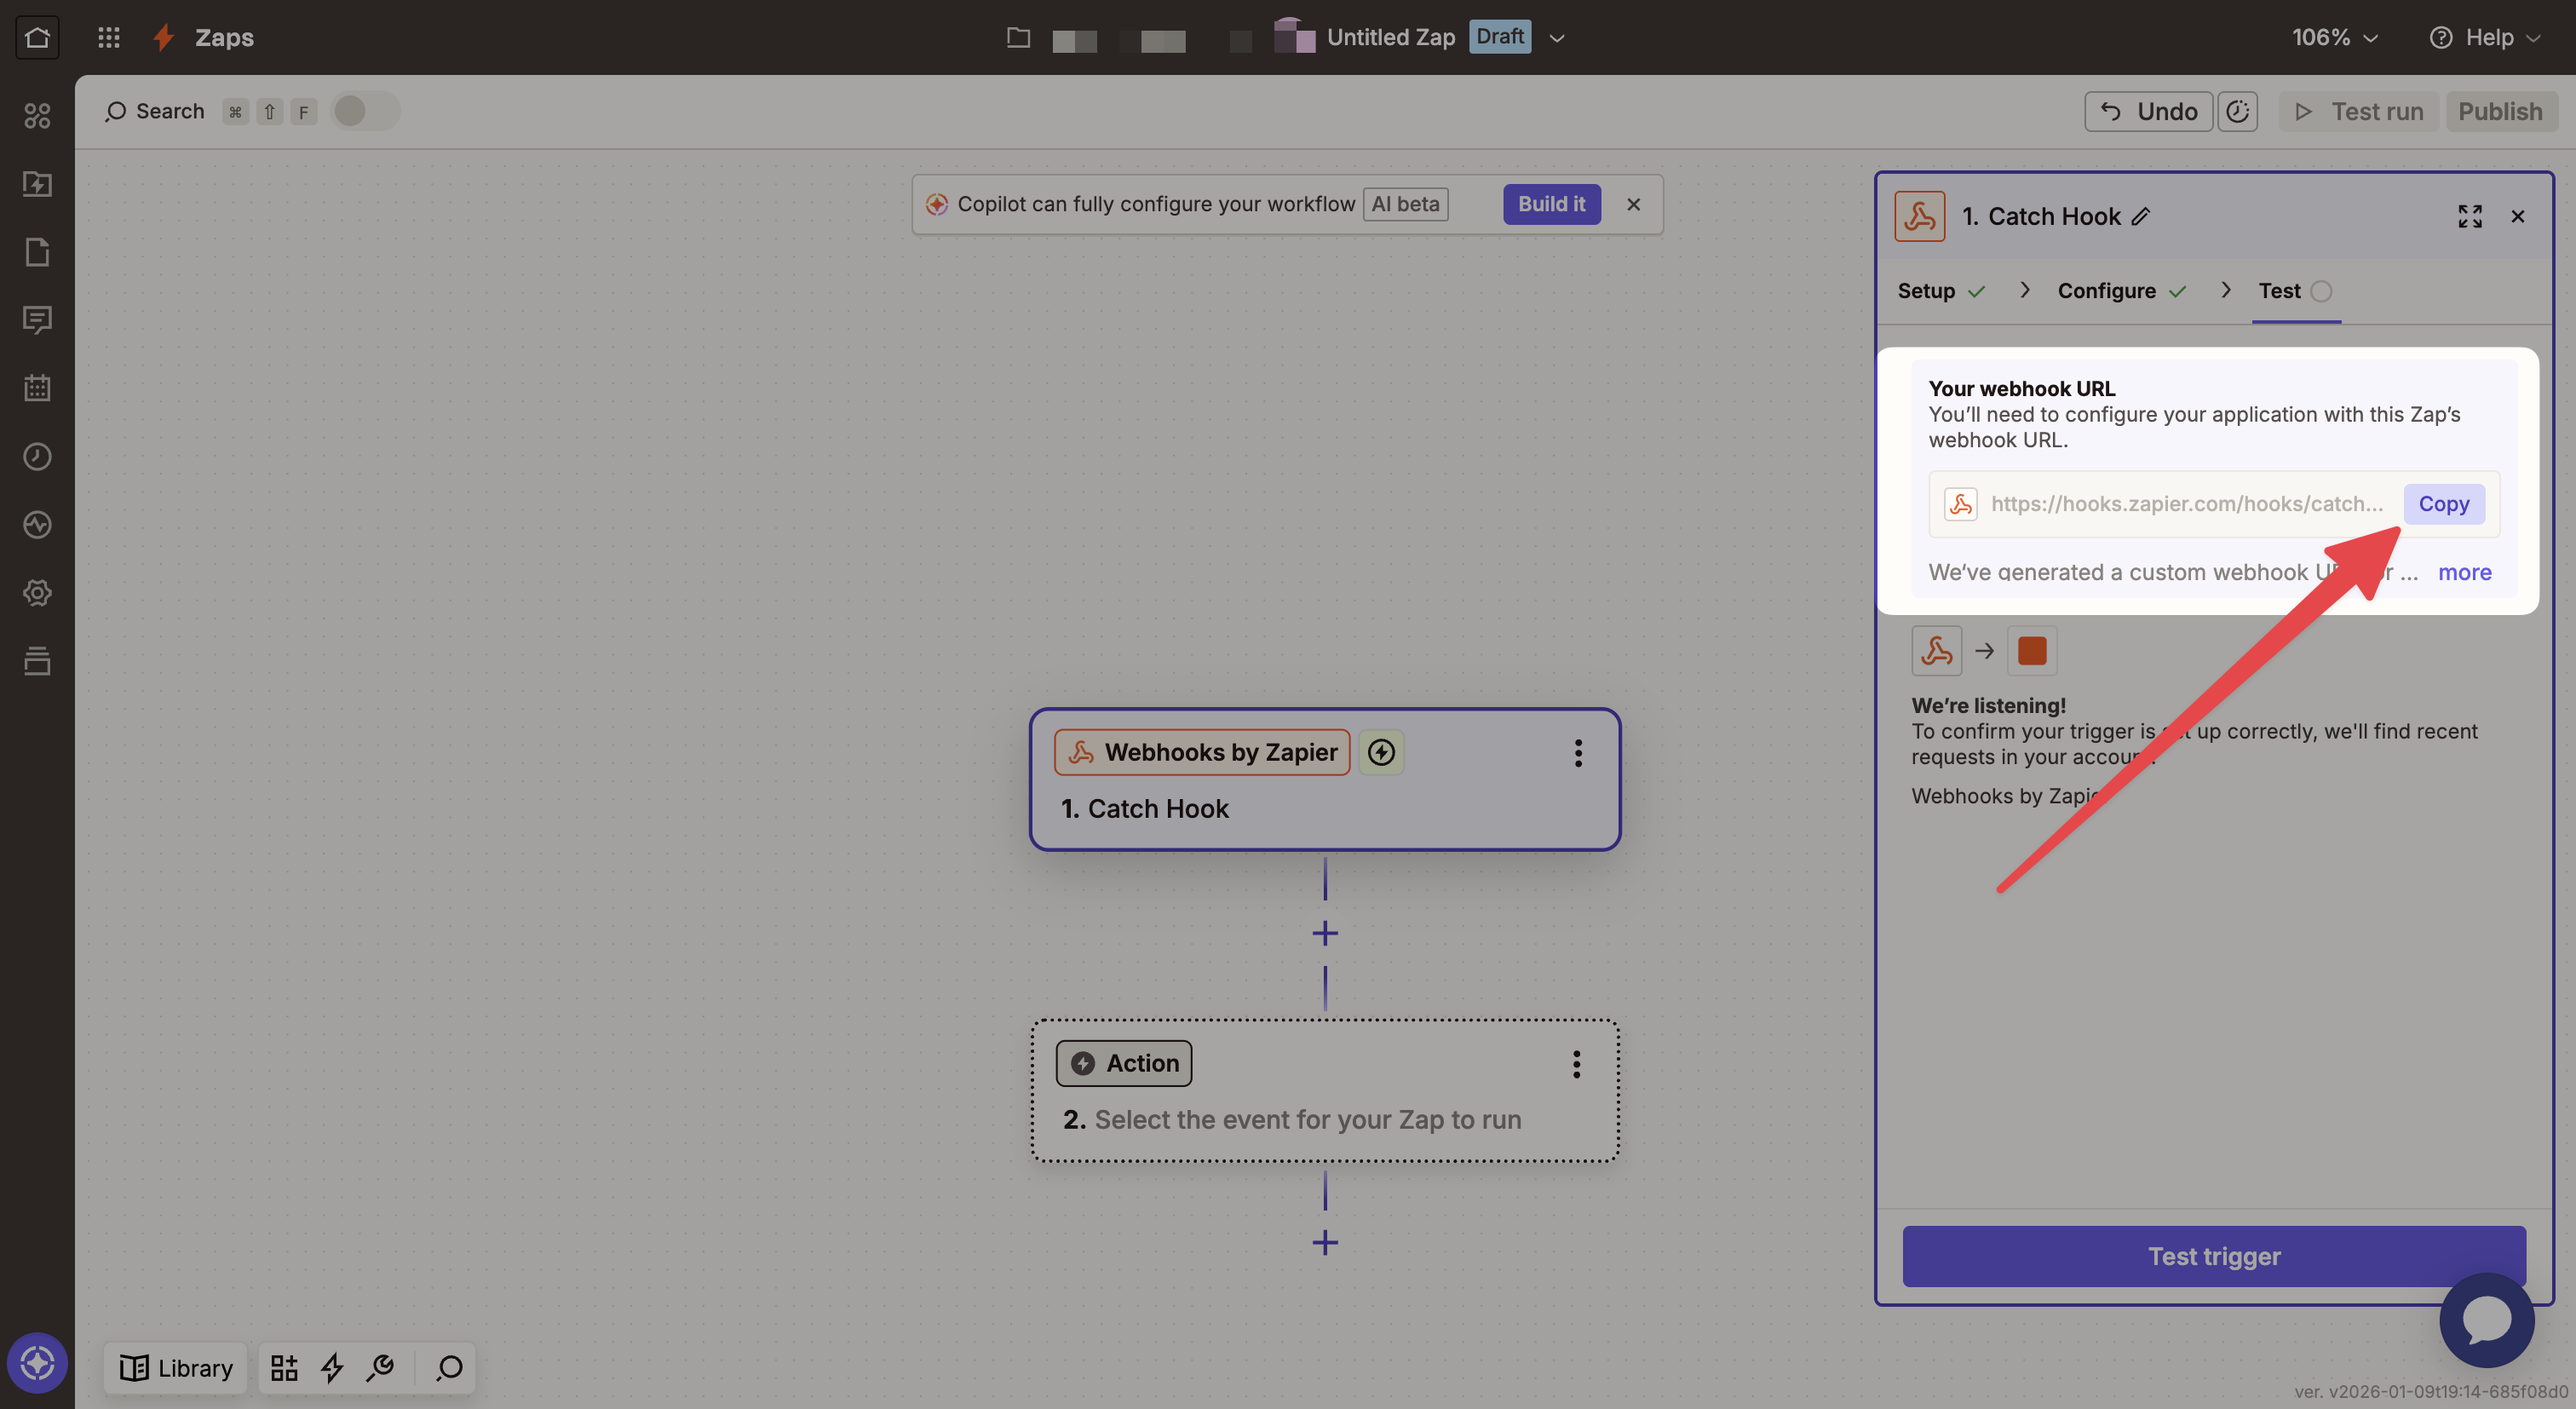
Zapier will then generate a "Webhook URL". Click the "Copy" button to copy this unique address. Keep this tab open.
Log in to your Chariow dashboard.
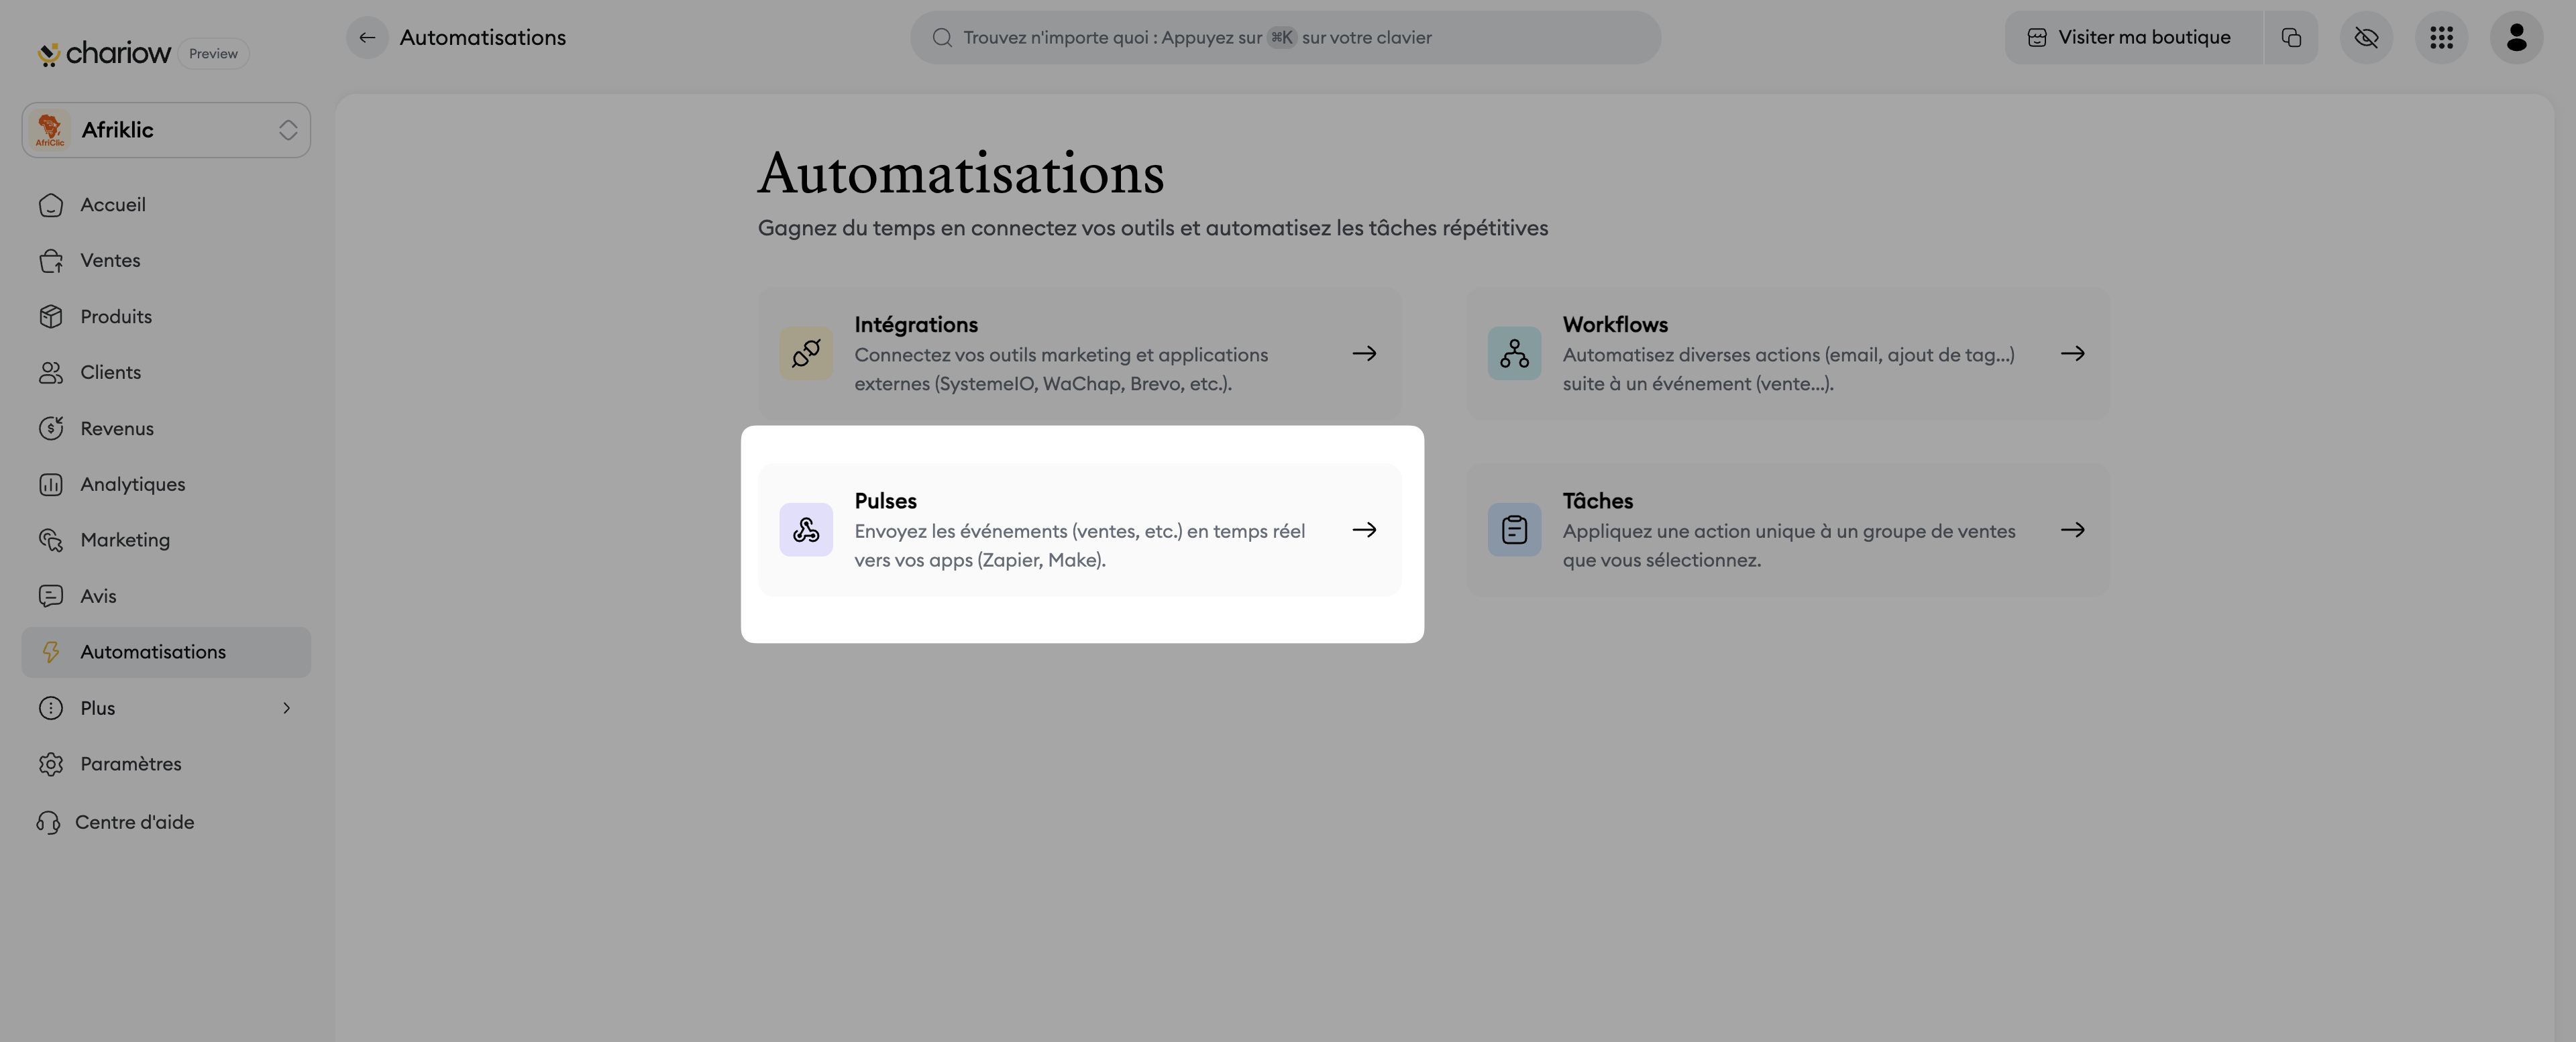
Go to the "Automation" tab and select the "Pulses" section.
Click the "Create a Pulse" button.
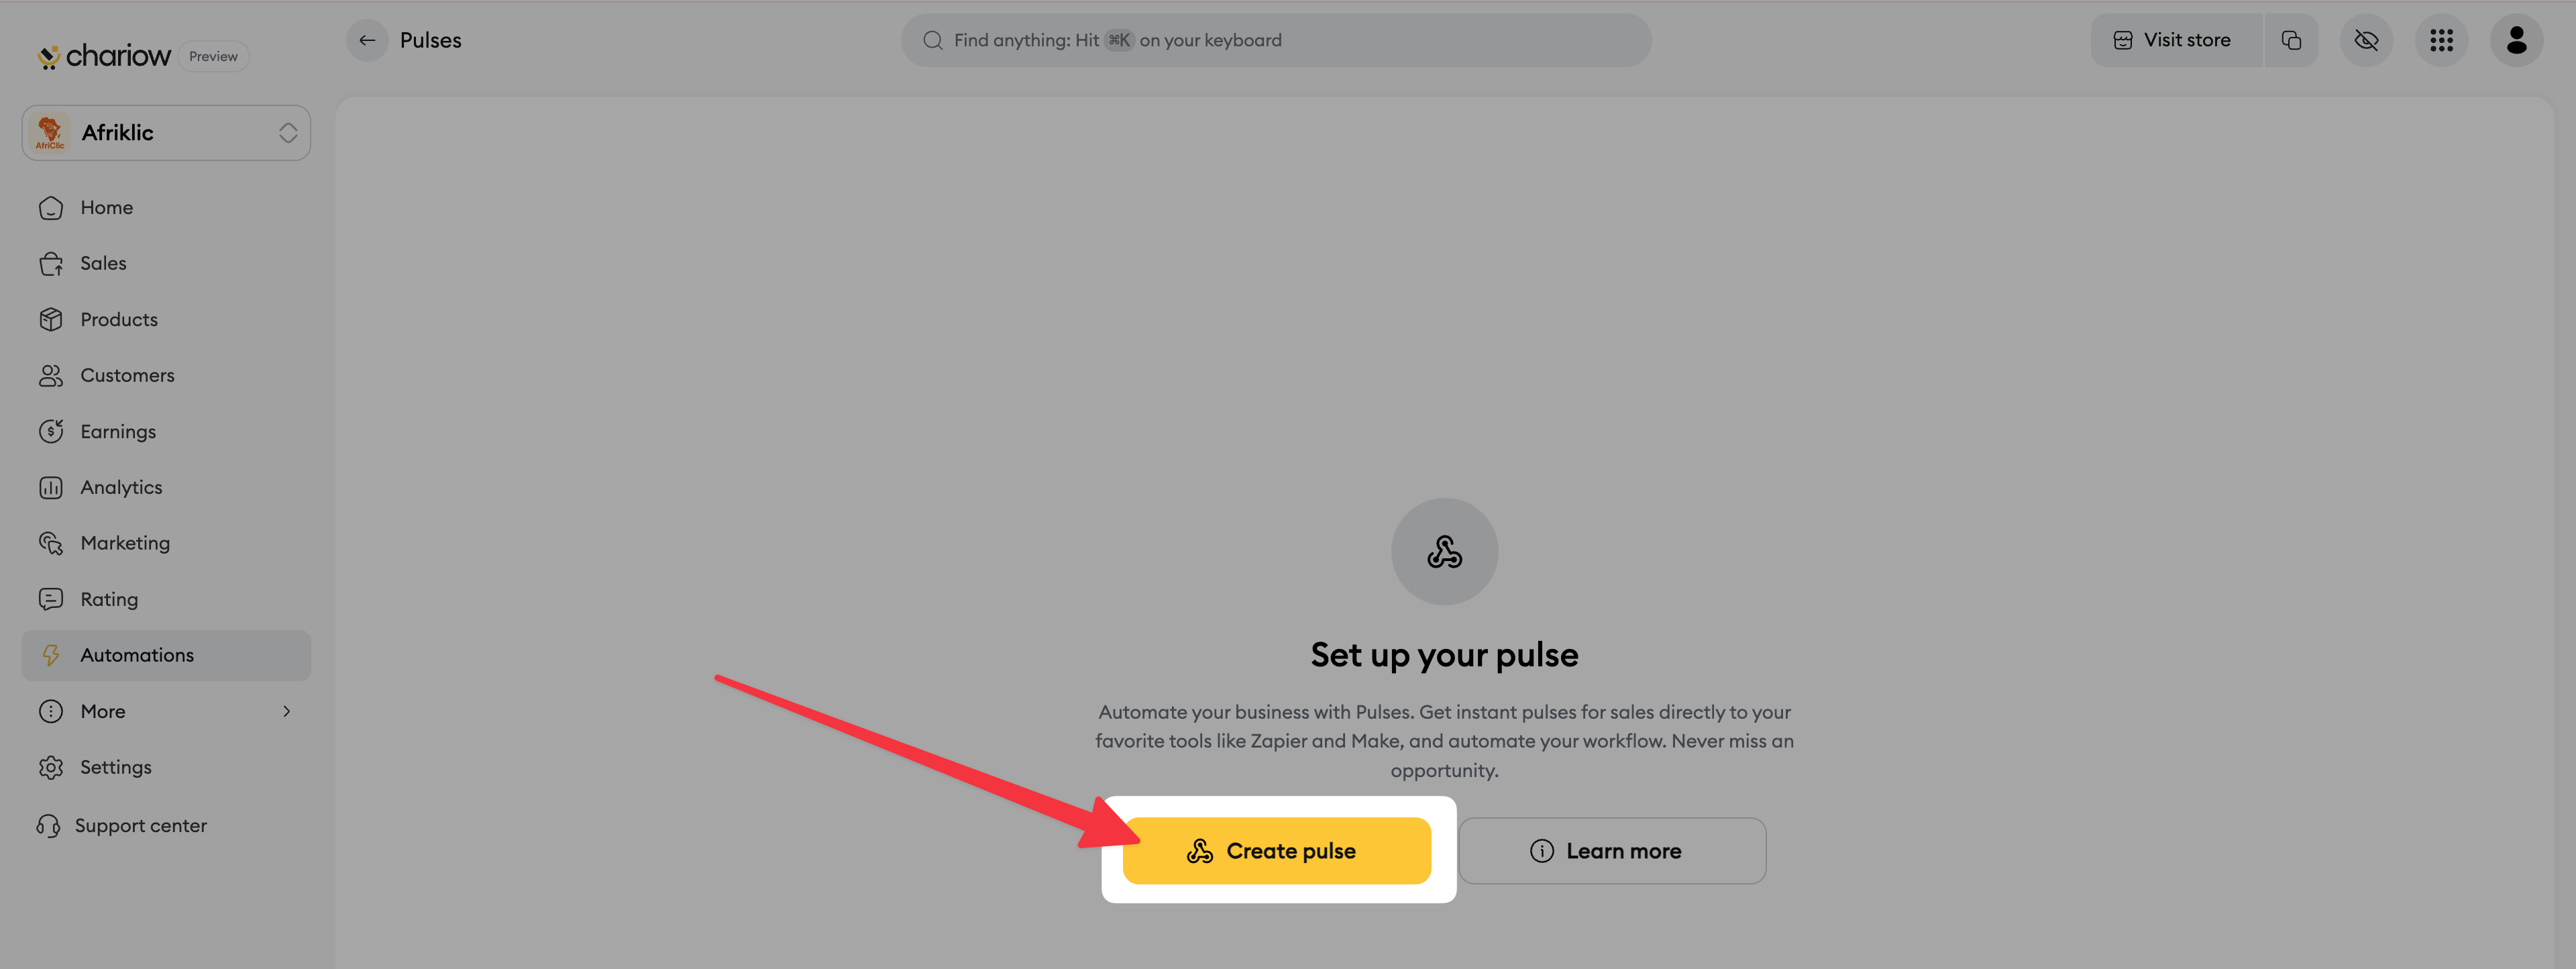
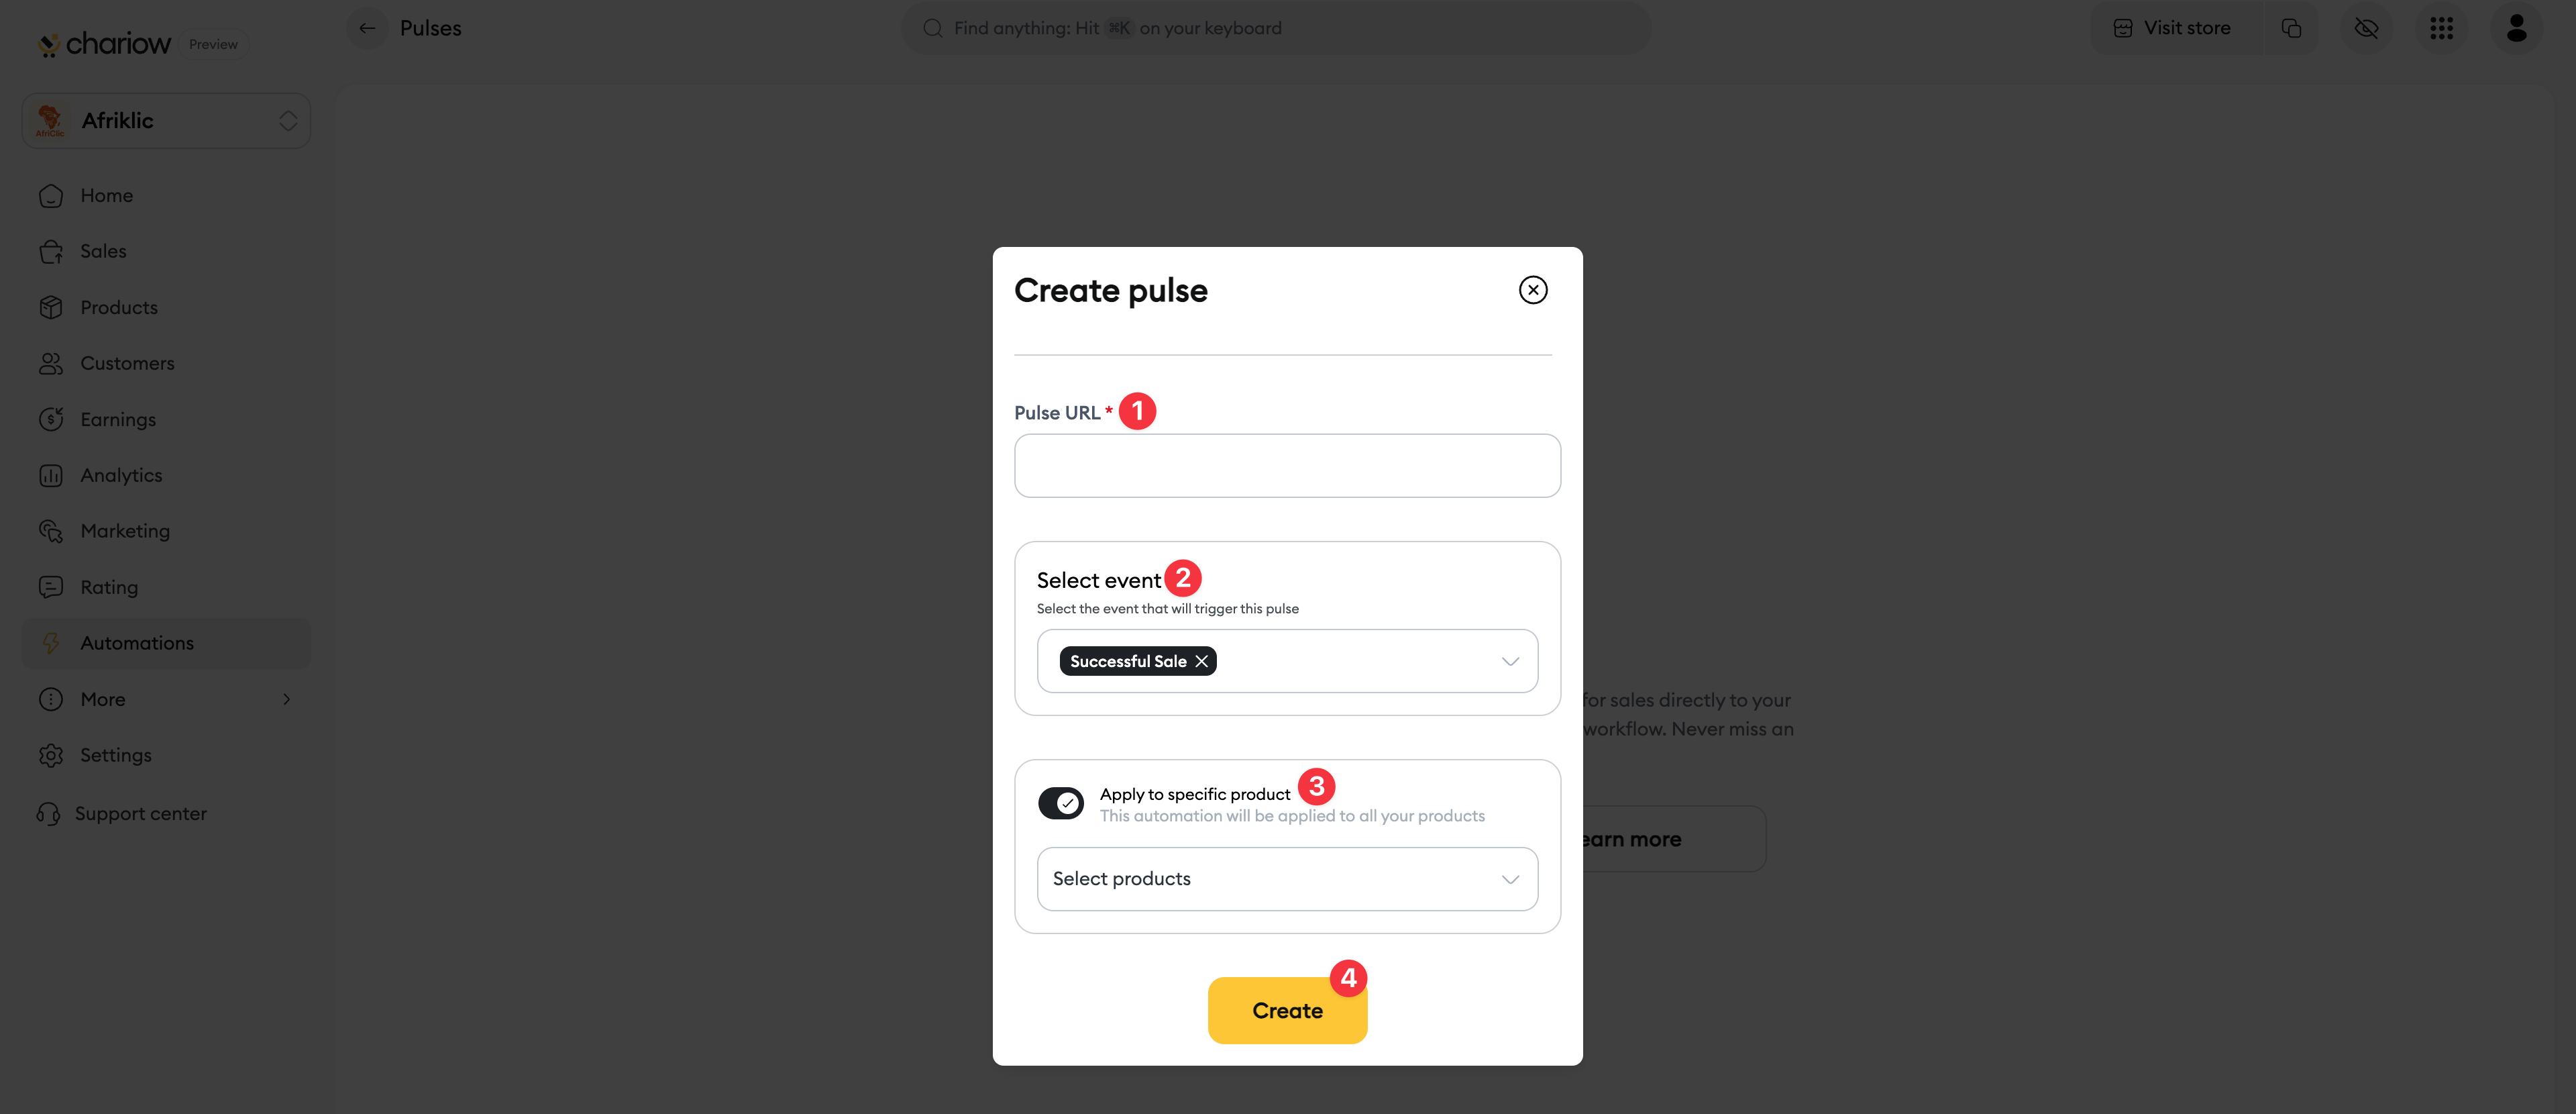
In the "Pulse URL" field, paste the URL you previously copied from Zapier.
Select the trigger event you want (e.g., "Successful sale", "Failed sale").
Optional: Turn on the "Apply to a specific product" option and pick the product or products if you want to filter the data that's sent.
Click "Create".
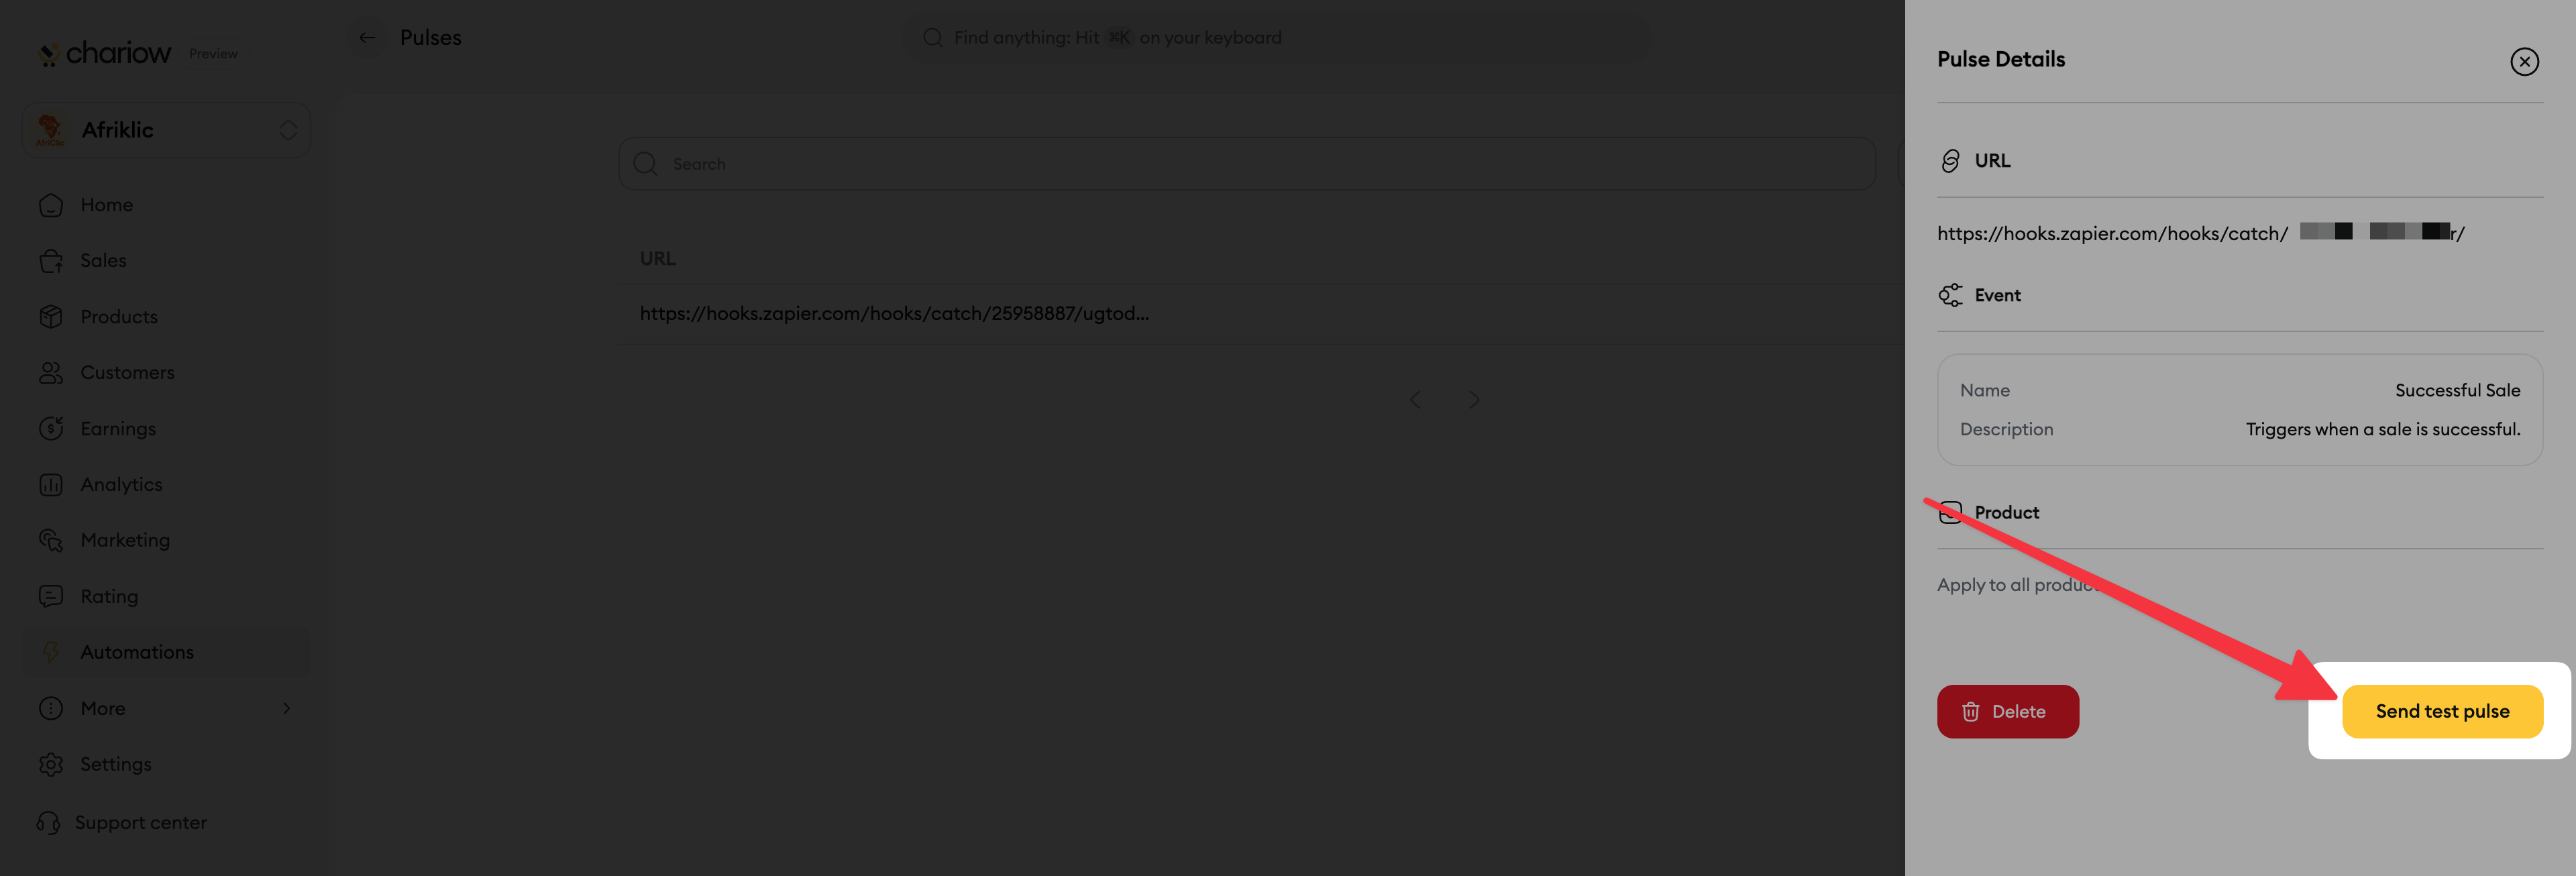
In your list of Pulses on Chariow, click on the pulse you just created.
In the window that pops up, click the test button to send a "Pulse Test".
Go straight back to Zapier and click on "Test trigger".
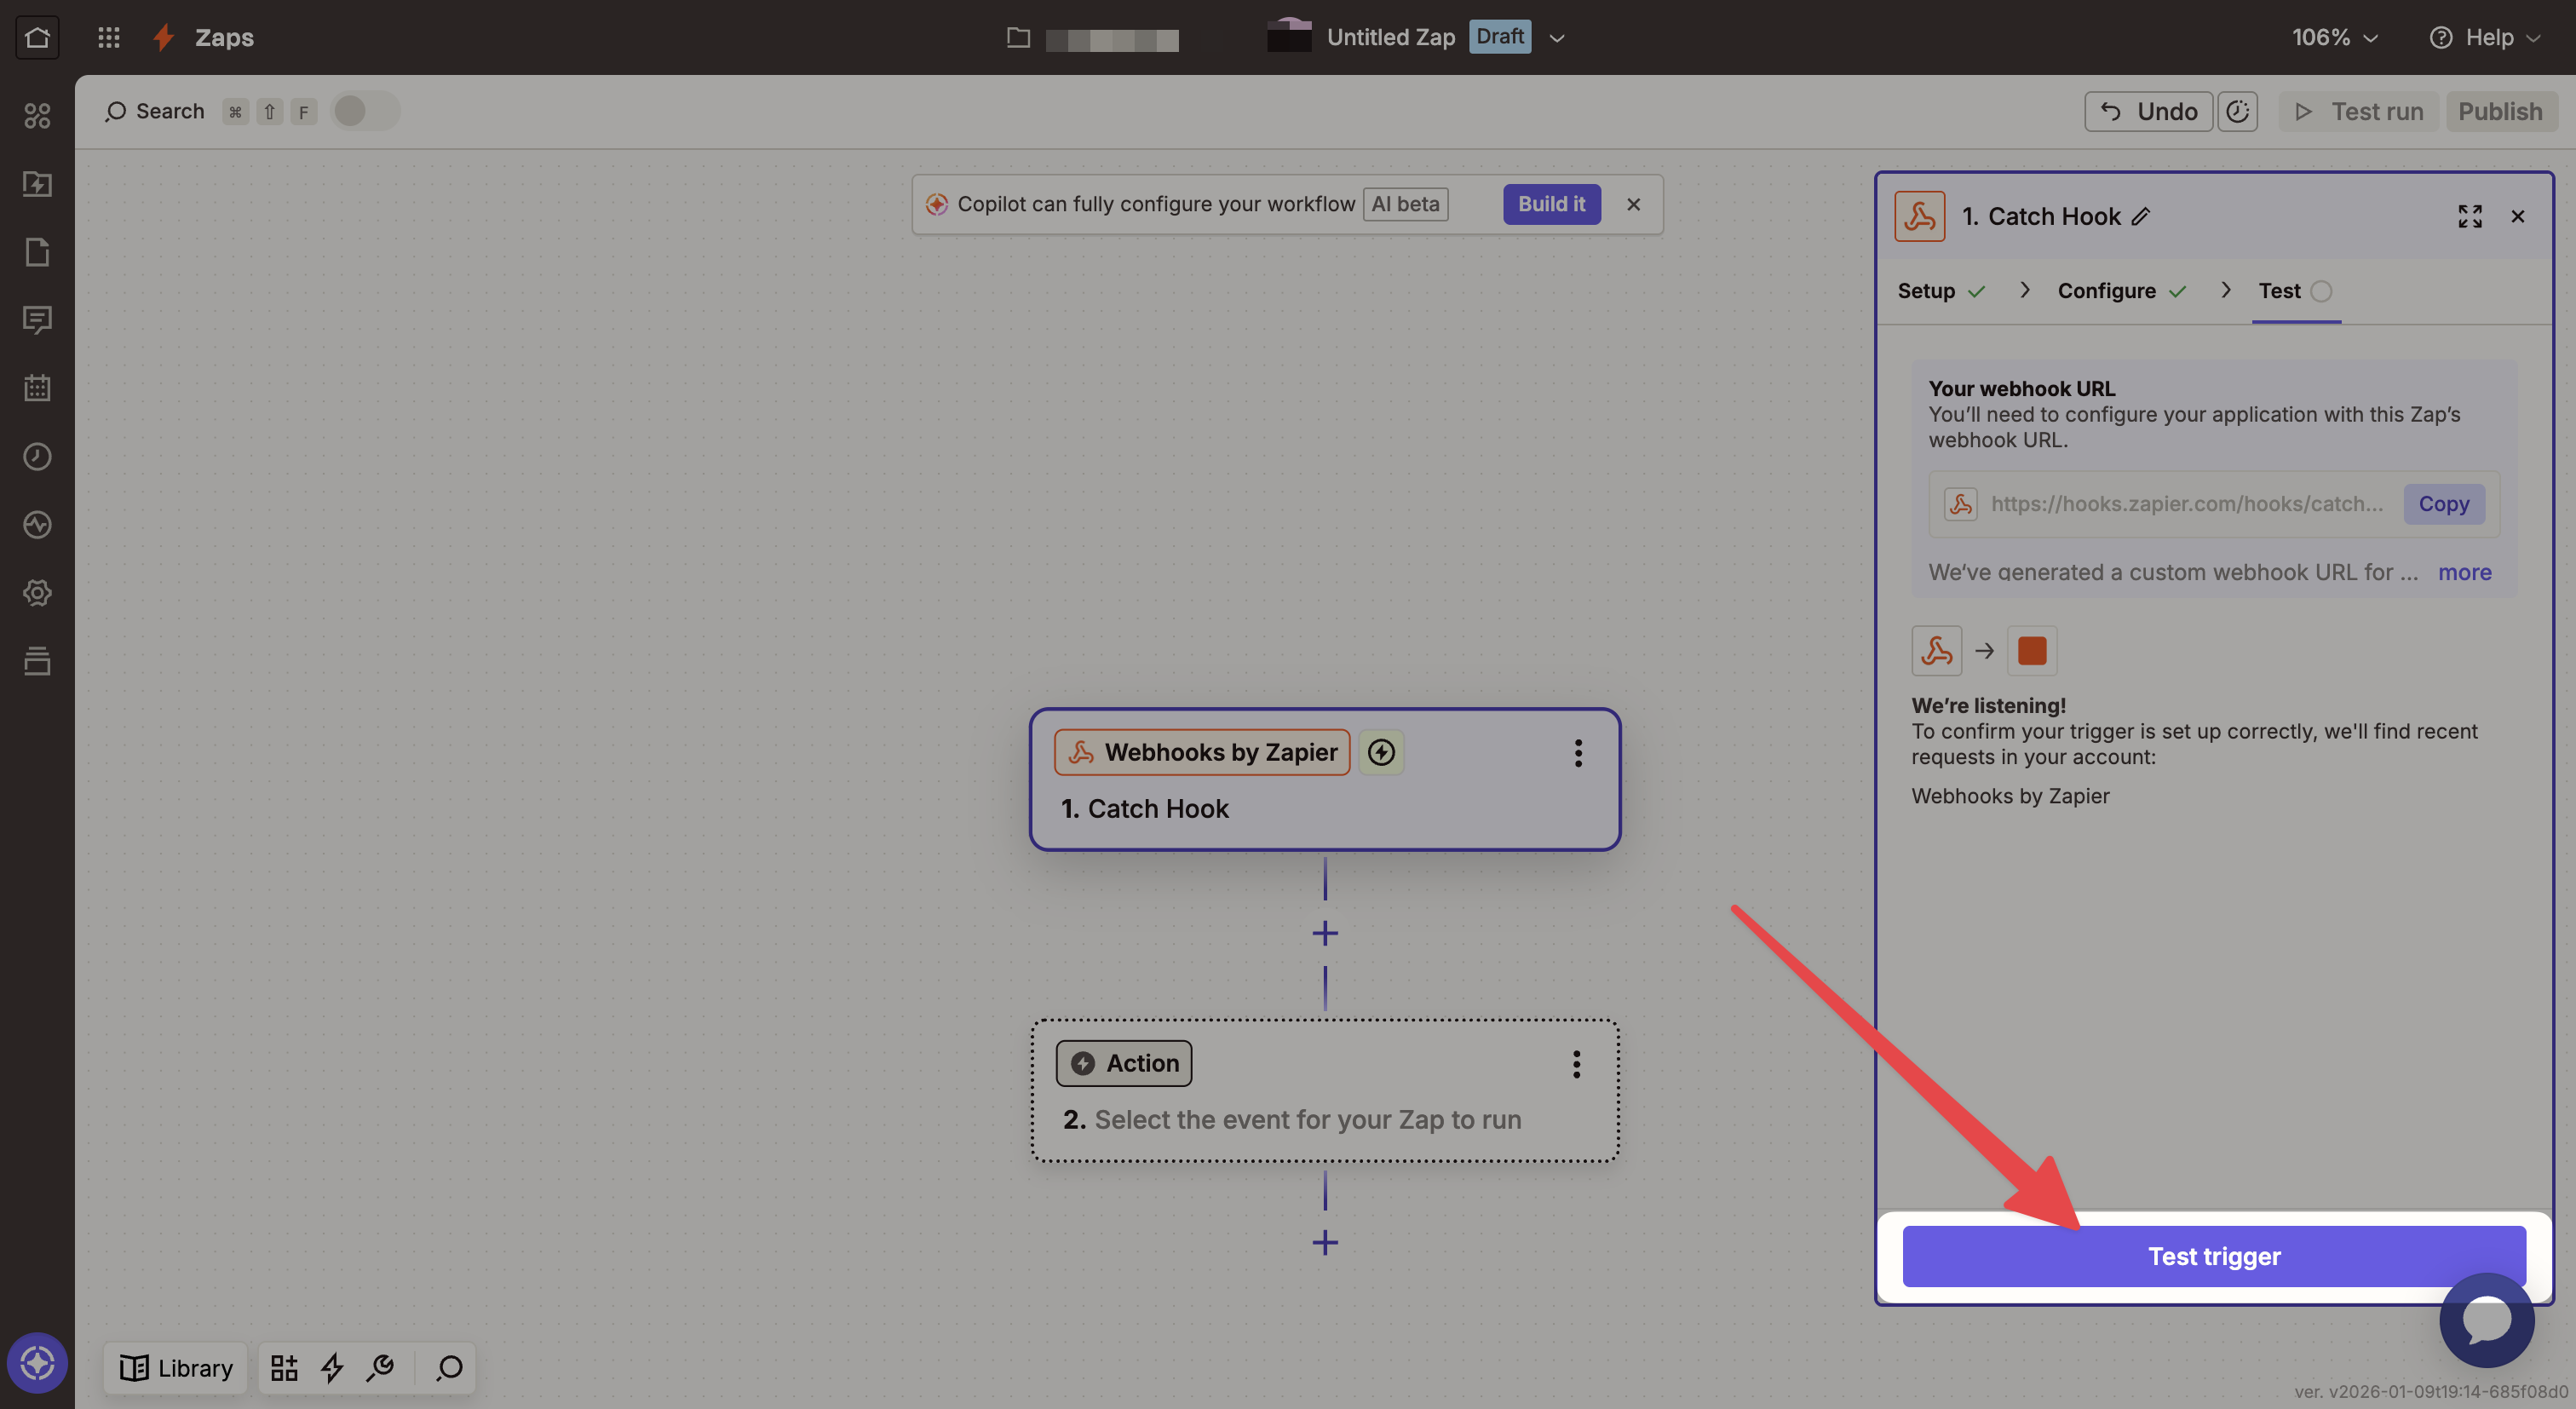
If everything is set up right, Zapier will show the data received from Chariow as a list.
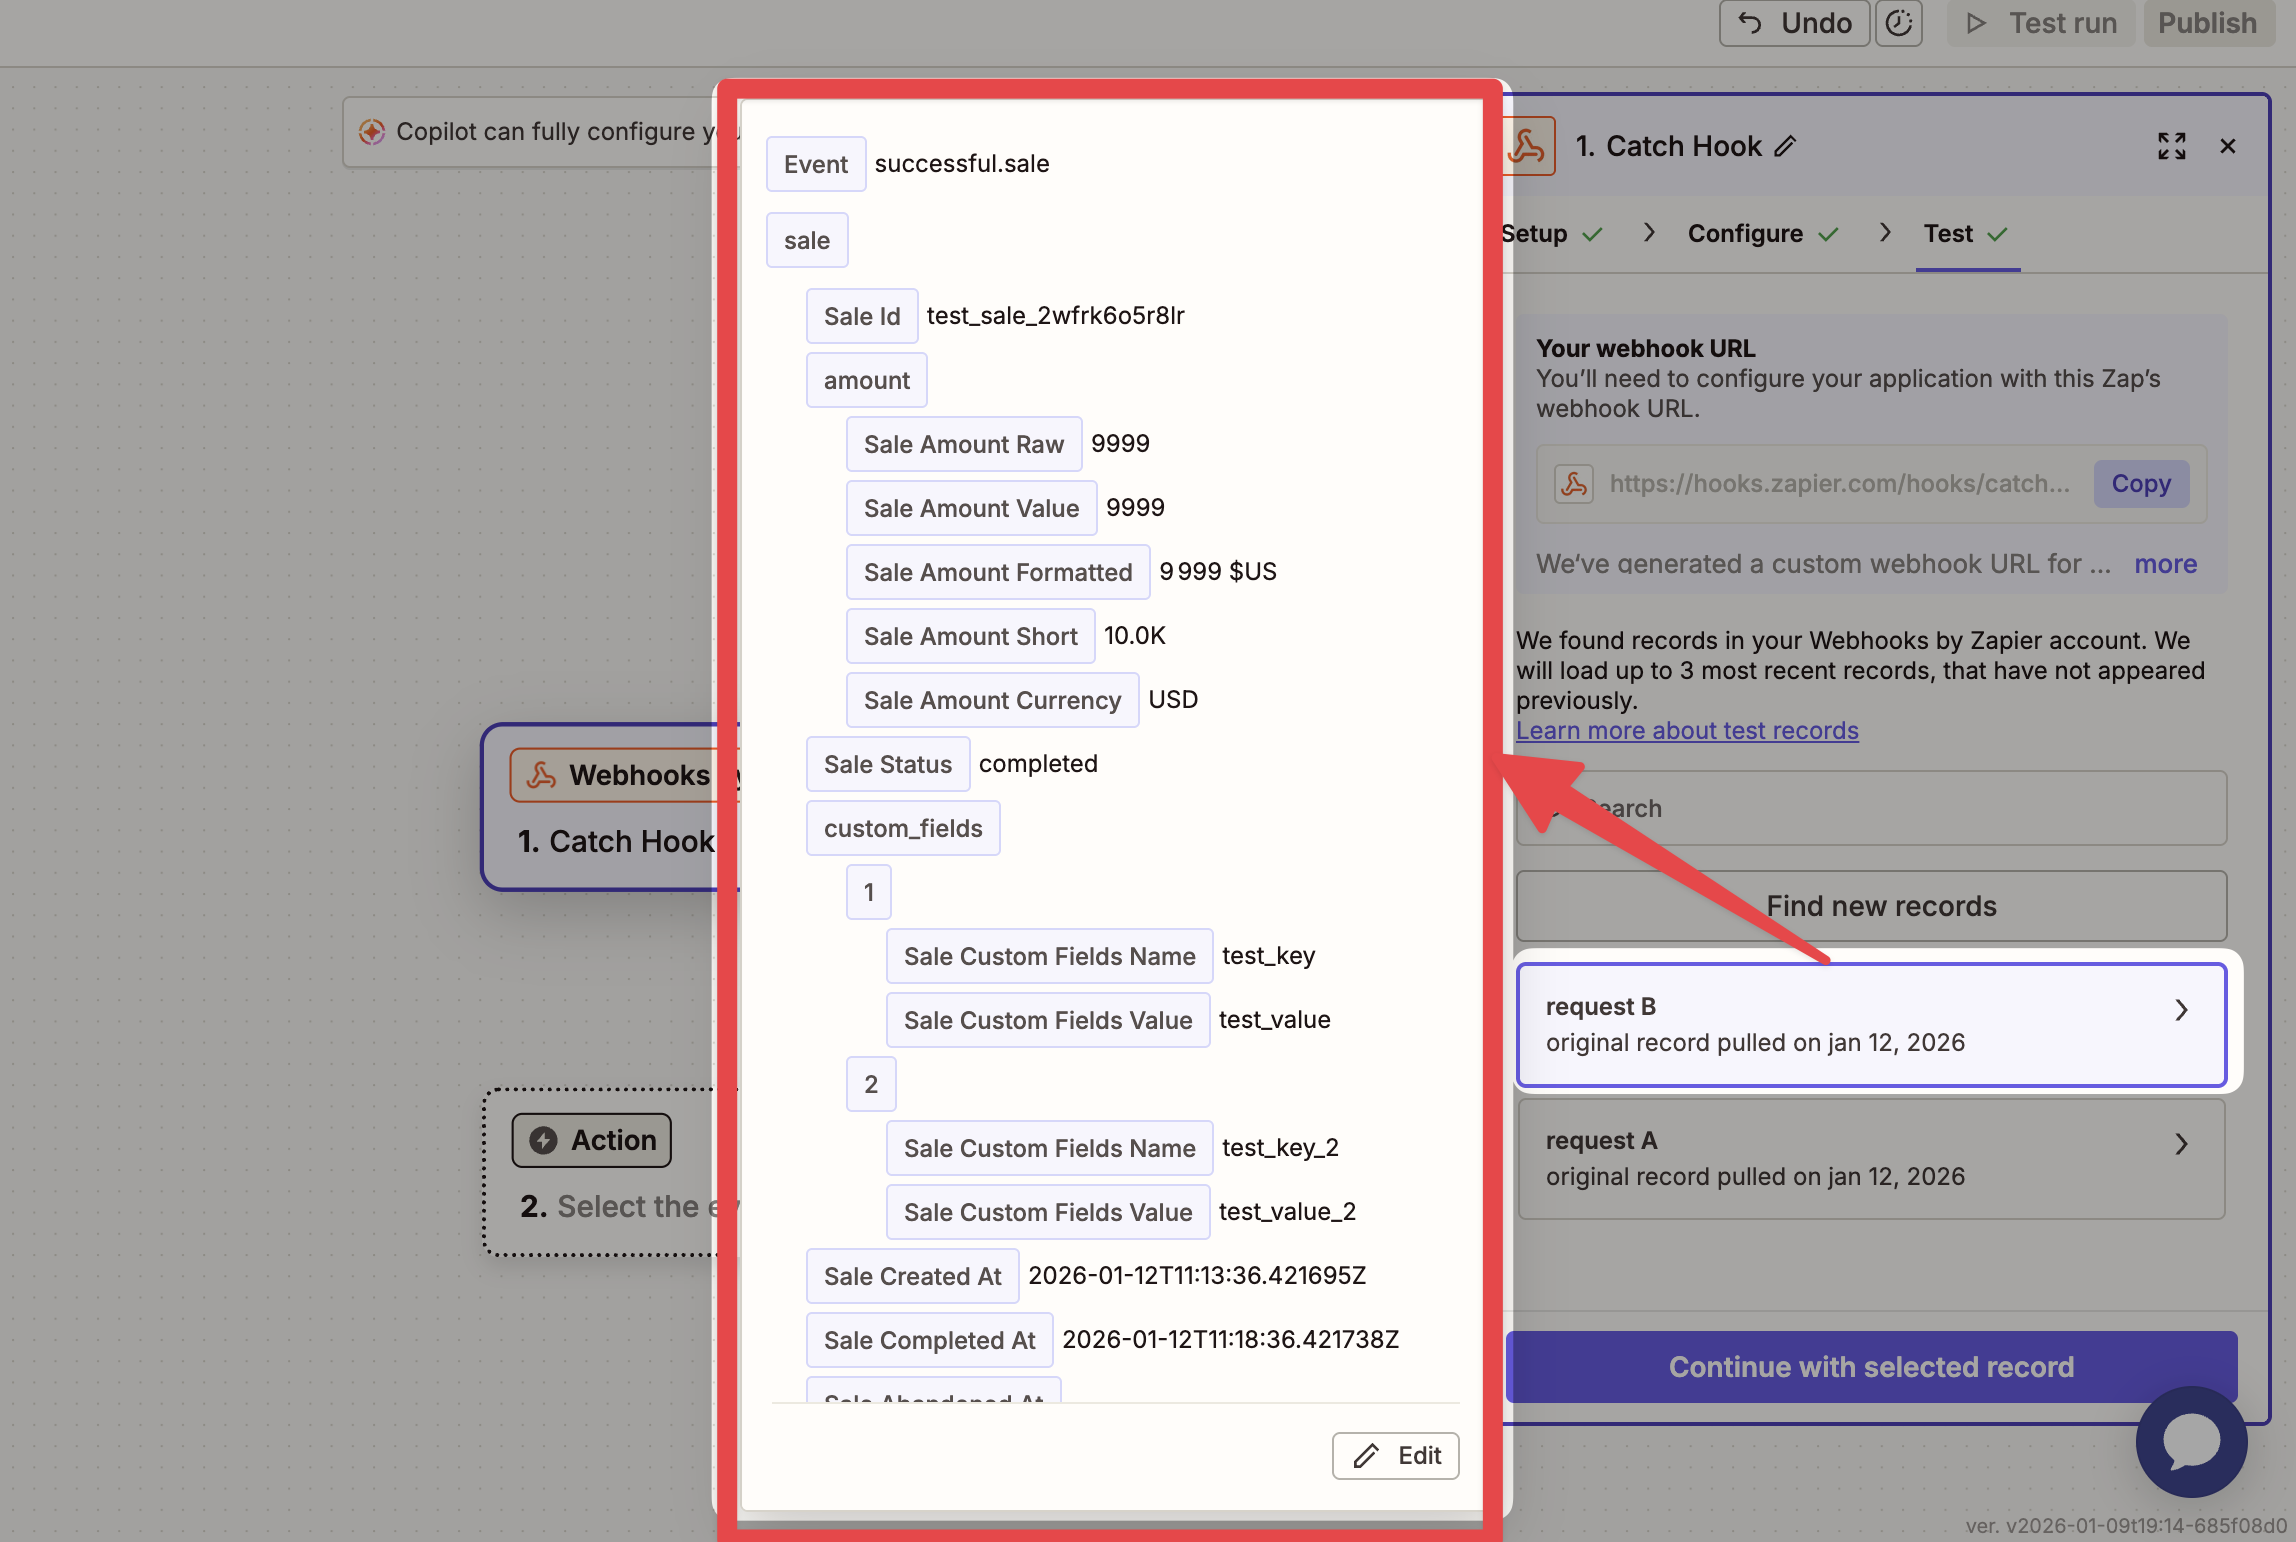
Click "Continue with selected record" to set the next action (the app that will receive this data).
Activation: Once Pulse is created, check that it’s activated in your Chariow dashboard so it can work in production.
Data format: The Pulse Test sends structured data that lets you easily map your fields in the next steps of your Zap.
Incorrect URL: Make sure there’s no space before or after the URL when you copy-paste into Chariow.
Unpublished Zap: Your automation won’t work until you click "Publish" in the upper right corner of the Zapier editor.
Firewall/Restrictions: If no test comes through, check that your network or security settings aren’t blocking outgoing requests to Zapier.
Need help? Contact our support via chat or at [email protected]