The "Settings" tab of your "Makeup" page lets you set internal info, SEO elements, and the specific product to feature. A good setup is key for tracking performance and making your page work well.
To get to your "Makeup" page settings:
Go to the "Marketing" section, then the "Makeups" space.
Click on the "Makeup" you want to open its detail page.
Click the "Settings" tab, right next to the "Analytics" tab.
The "Settings" tab offers several fields controlling how your page is viewed inside your team and outside:
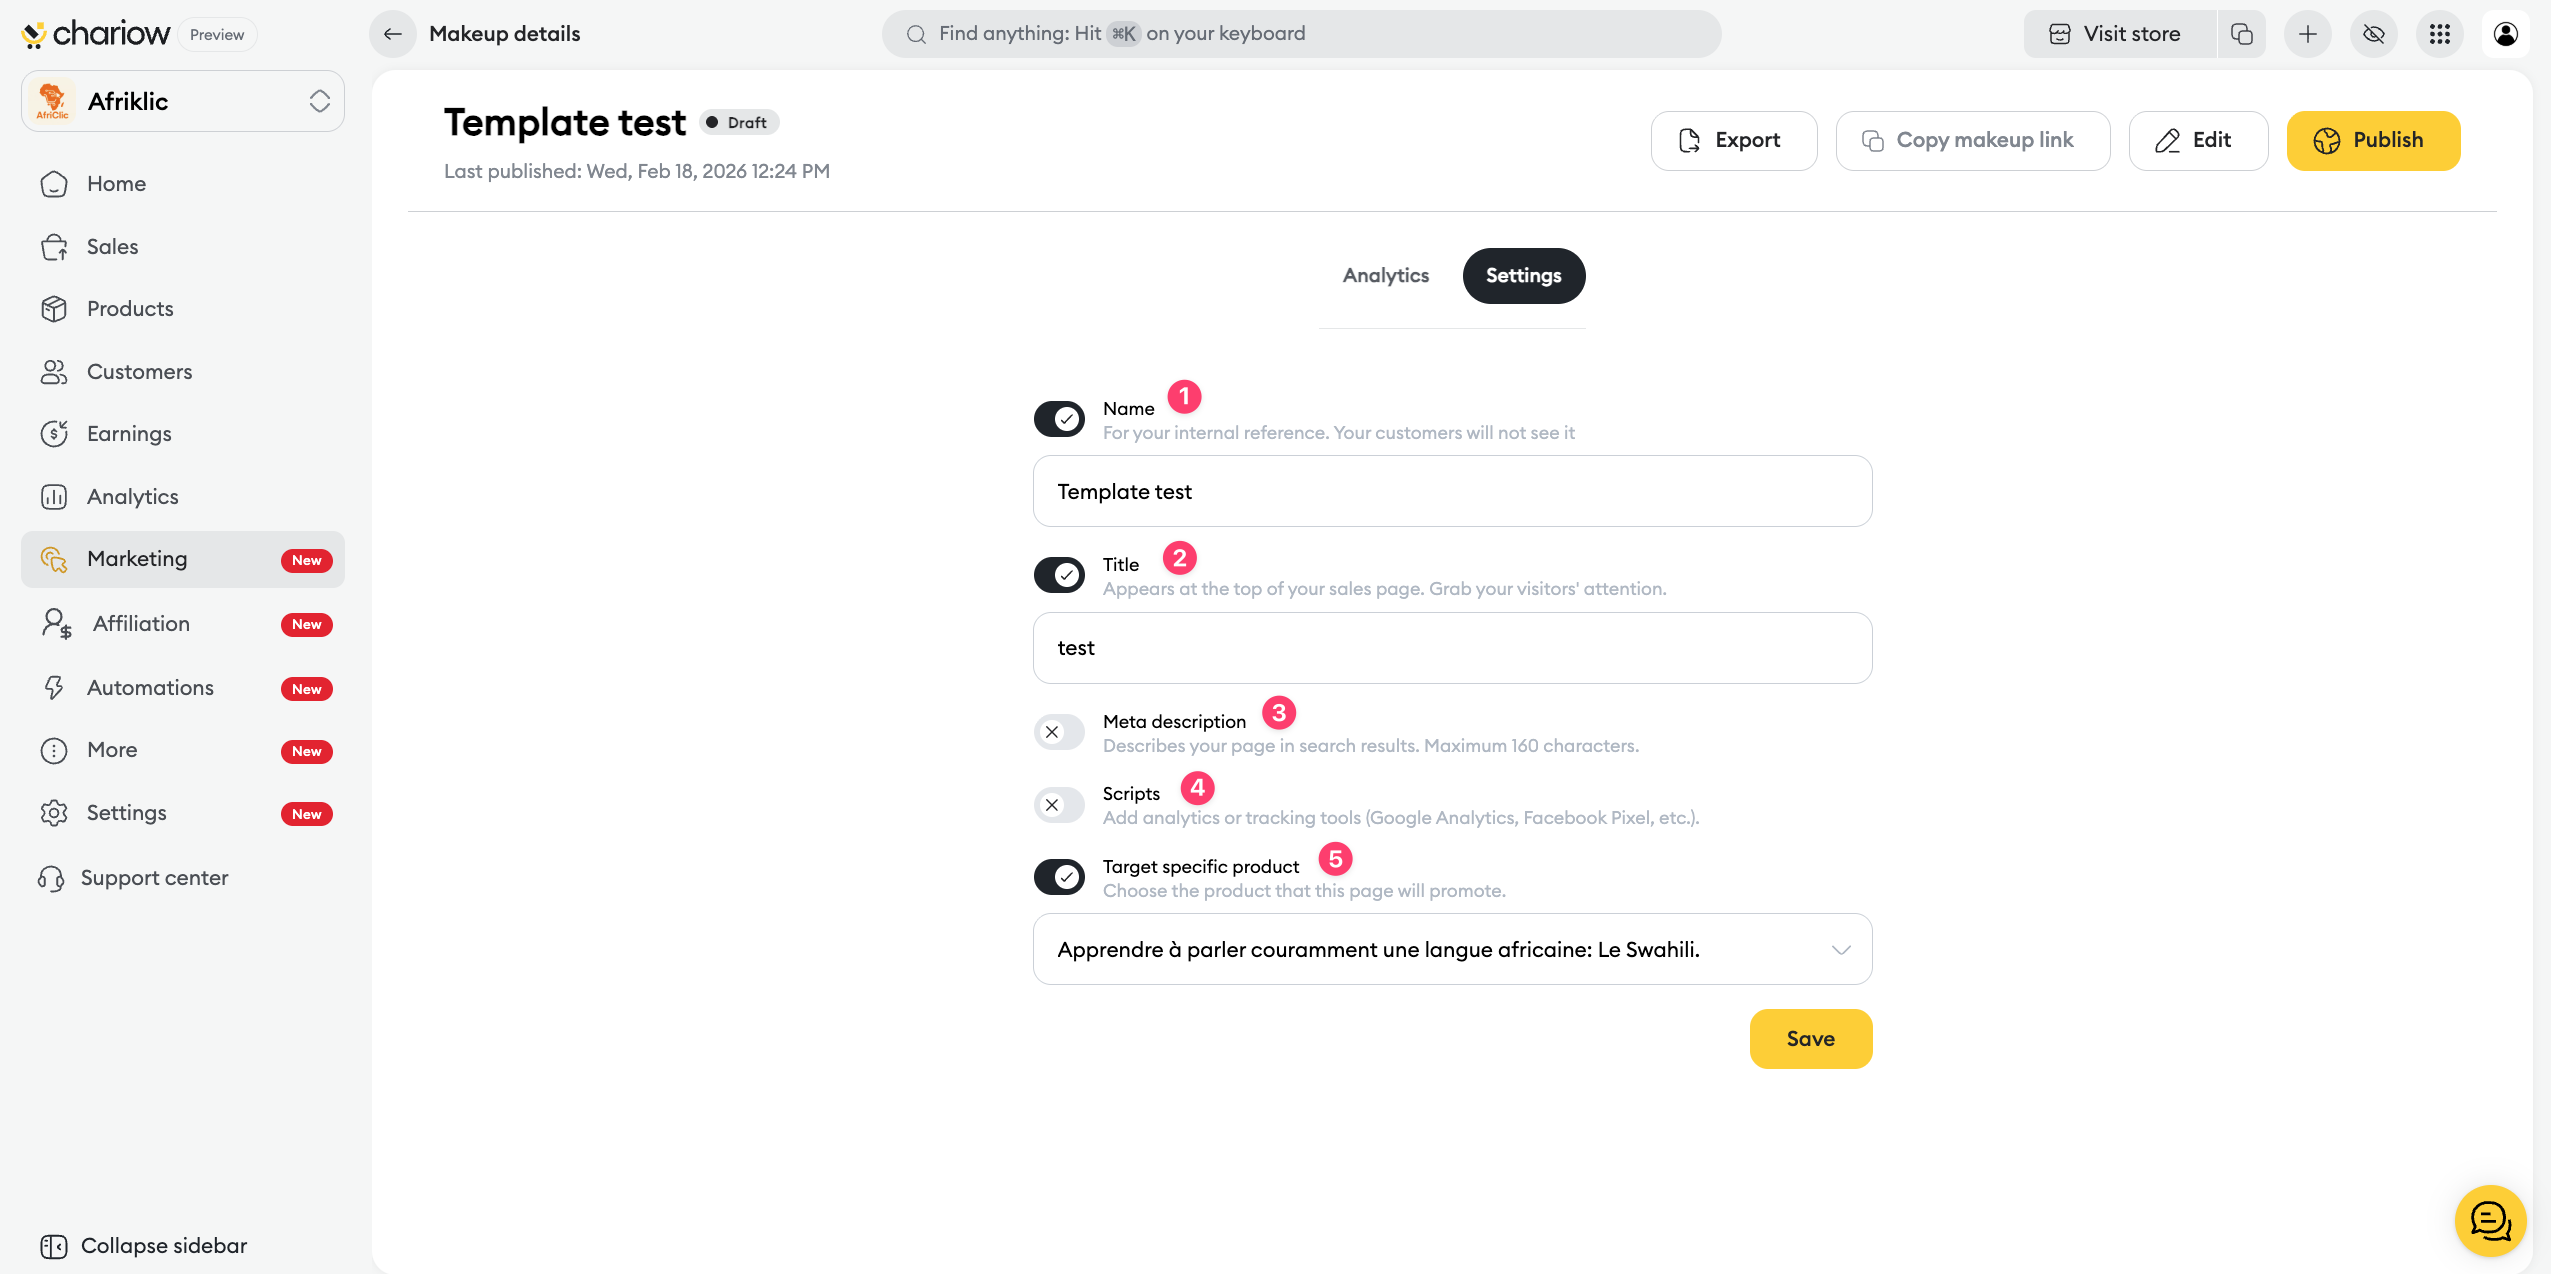
Role: This is for internal reference only. This name is not visible to your clients.
Purpose: It helps you quickly identify the "Makeup" page in your "Makeups" dashboard (e.g. "Sales Page").
Role: This is the title that appears at the top of your sales page and in the browser tab. It's crucial to grab your visitors' attention and get them to keep reading.
Tip: Write a catchy, clear title that instantly reflects your product's value proposition.
Role: This text describes your page in search engine results (Google, etc.). It's an important SEO factor that influences search click-through rate.
Constraint: The description must be concise, no more than 160 characters.
Role: This field is dedicated to adding analytics or tracking scripts.
Examples: You can paste tracking codes here like Google Analytics, or other tracking tools you need to measure your ad campaigns' success.
Role: This setting directly links the "Makeup" page to the product in your shop it's supposed to promote. It's a required setting if this page's goal is to sell a product and you've enabled the "Enable my product" option.
How-to: Use the dropdown menu to pick exactly which product this page will feature. This link is essential for the sales process to work smoothly.

Need help? Contact our support team through the chat or at [email protected].