Tasks Tasks are automations designed for batch actions, whether they’re immediate or scheduled. They let you interact with a specific customer base based on historical sales criteria, saving you valuable time on your marketing and operational processes.
To start setting up your automation:
Go to the "Automation" section in the side menu.
Click on the "Tasks" tab.
Click the "Create a task" button to open the editor.
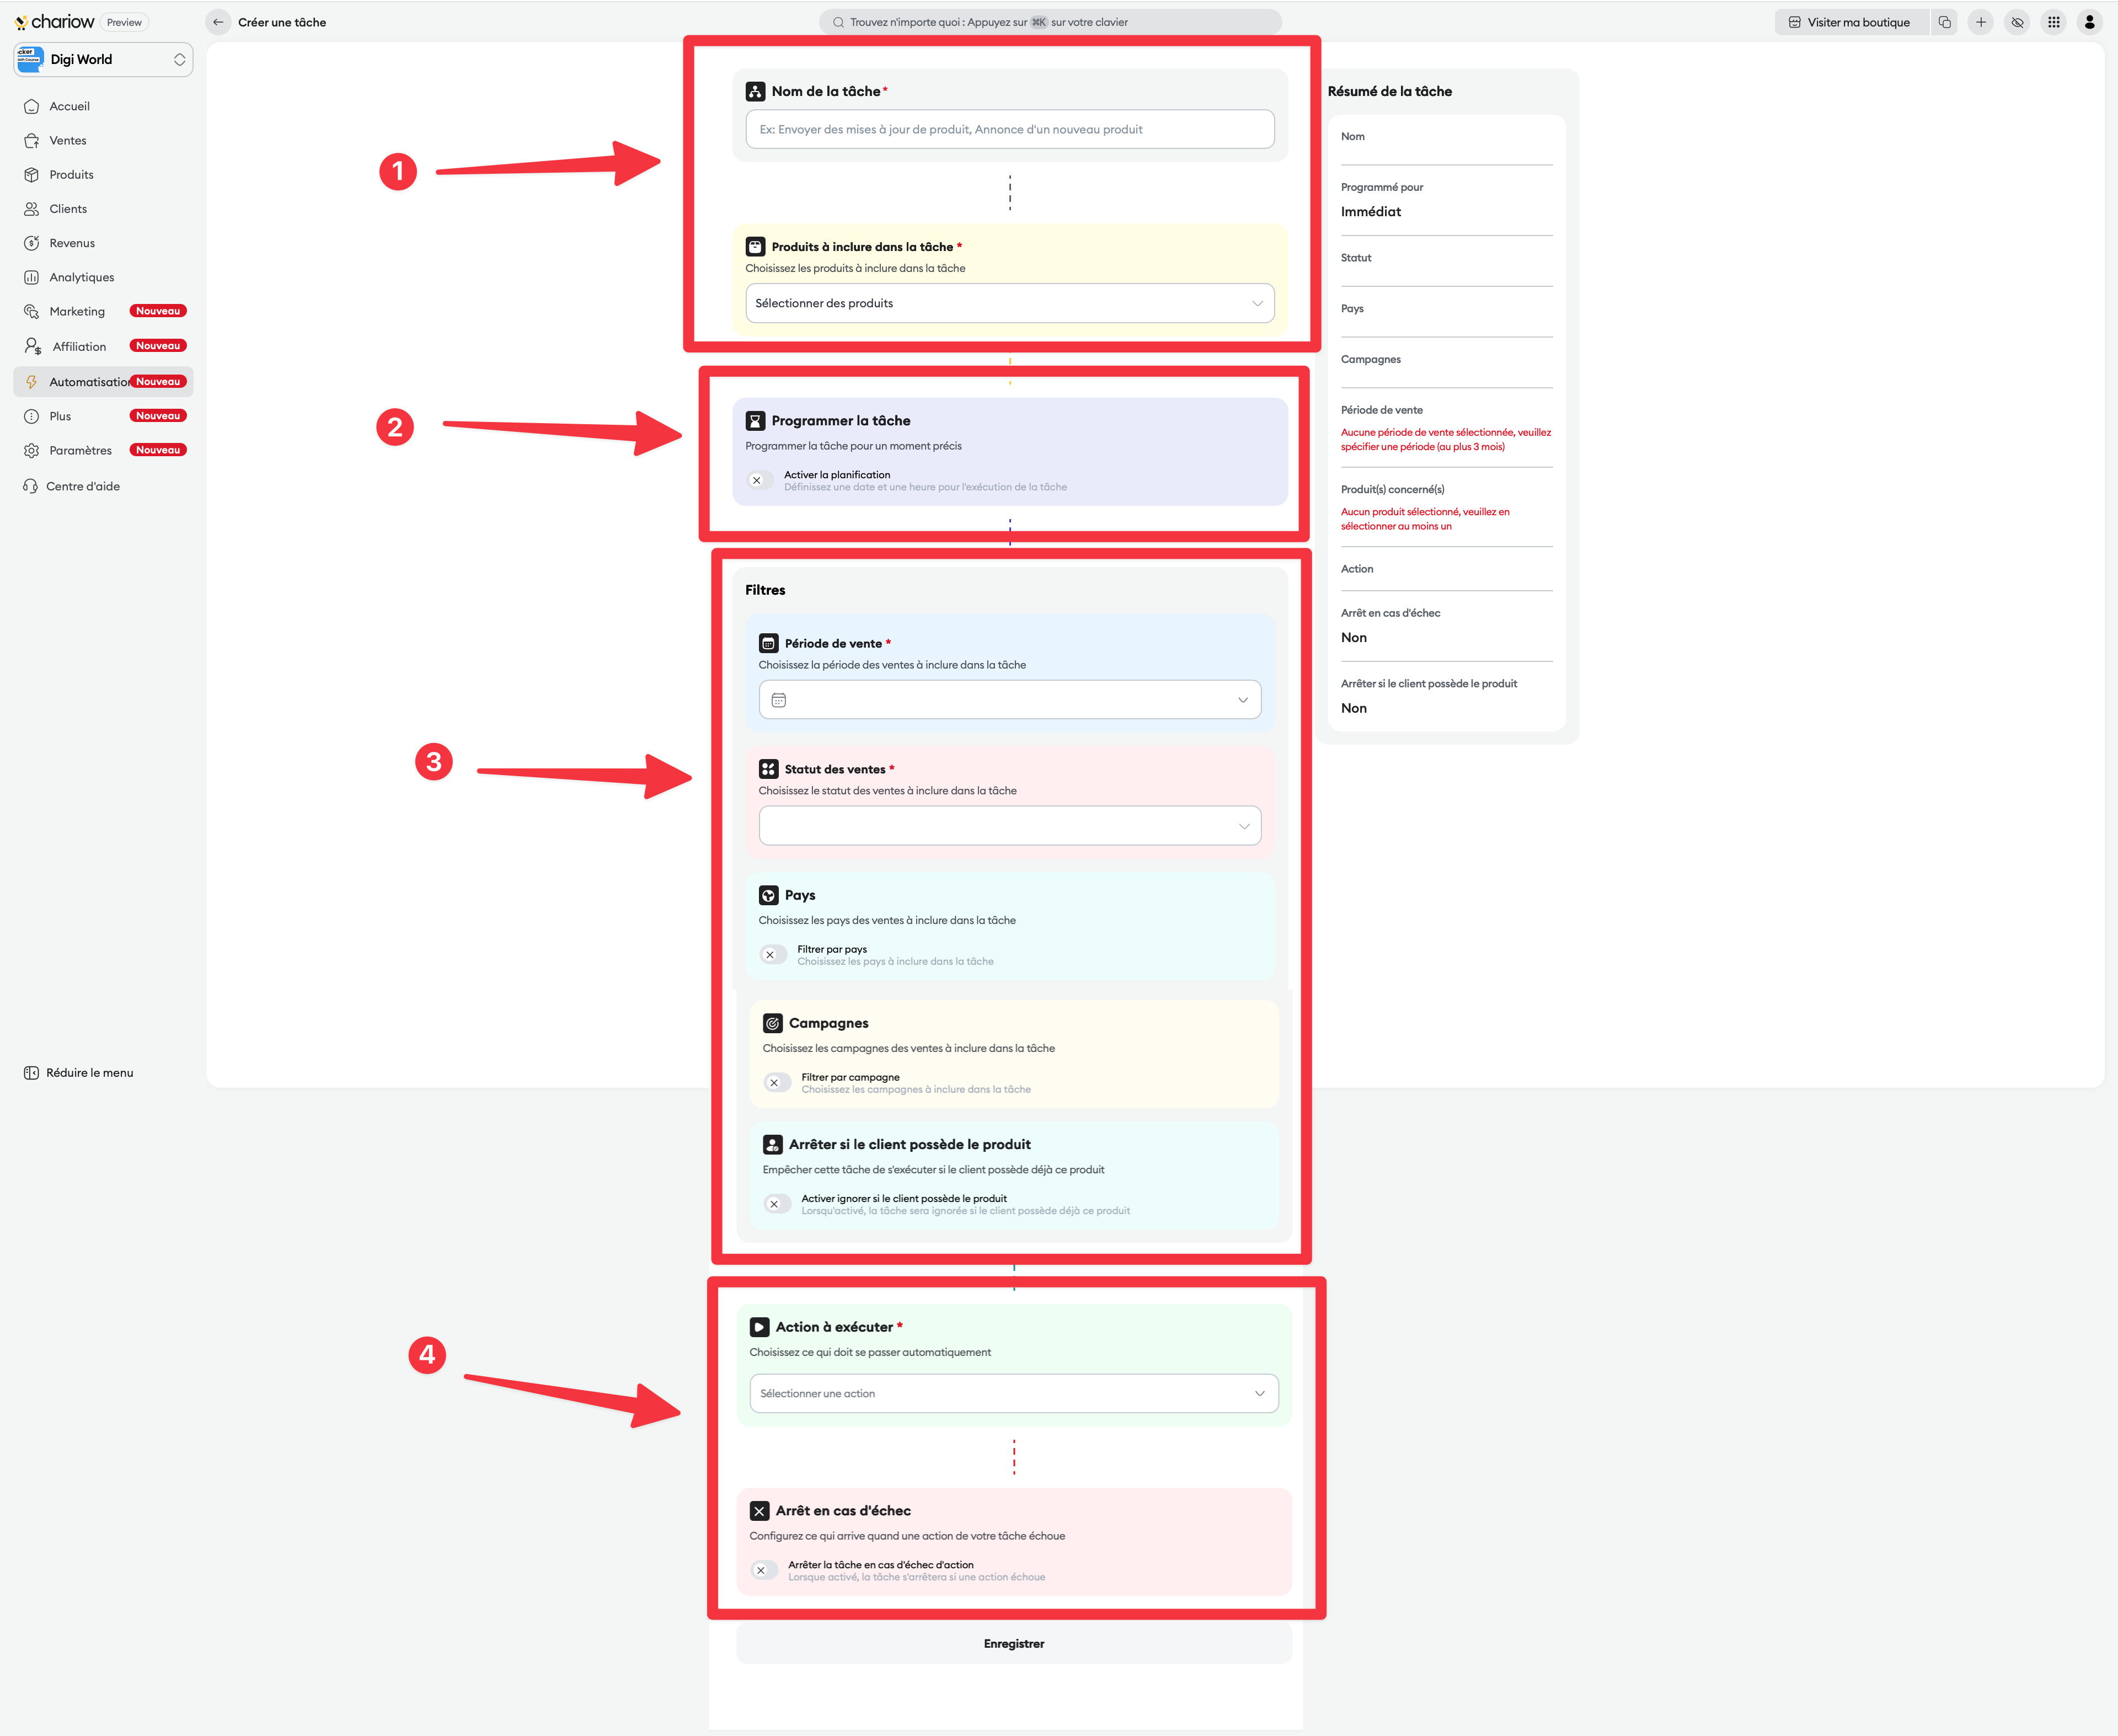
Task name : Give a clear title to your operation (e.g.: "New product announcement").
Products to include : Specifically select the products whose buyers will be the target of this task.
Enable scheduling : By default, the task runs right after saving. By enabling this option, you can set a specific date and time for it to run later.
Use filters to refine your audience and contact only the relevant customers:
Sales period : Target customers who made a purchase during a specific date range.
Sales status : Filter by order status (e.g.: Successful, Failed).
Country : Target specific geographic areas.
Campaigns : Filter buyers coming from specific marketing campaigns.
Stop if the customer owns the product : Turn on this option to skip customers who already own the product you're promoting.
Action to perform : Choose what should happen automatically (e.g.: "Send an email" or "Send a WhatsApp message").
Stop on failure : If enabled, the task will stop completely if even a single action runs into an error.
Once the setup is done, click on "Save" to start or schedule the task.
From the main task list, you can filter the view by status: In progress, Completed, Failed or Canceled.
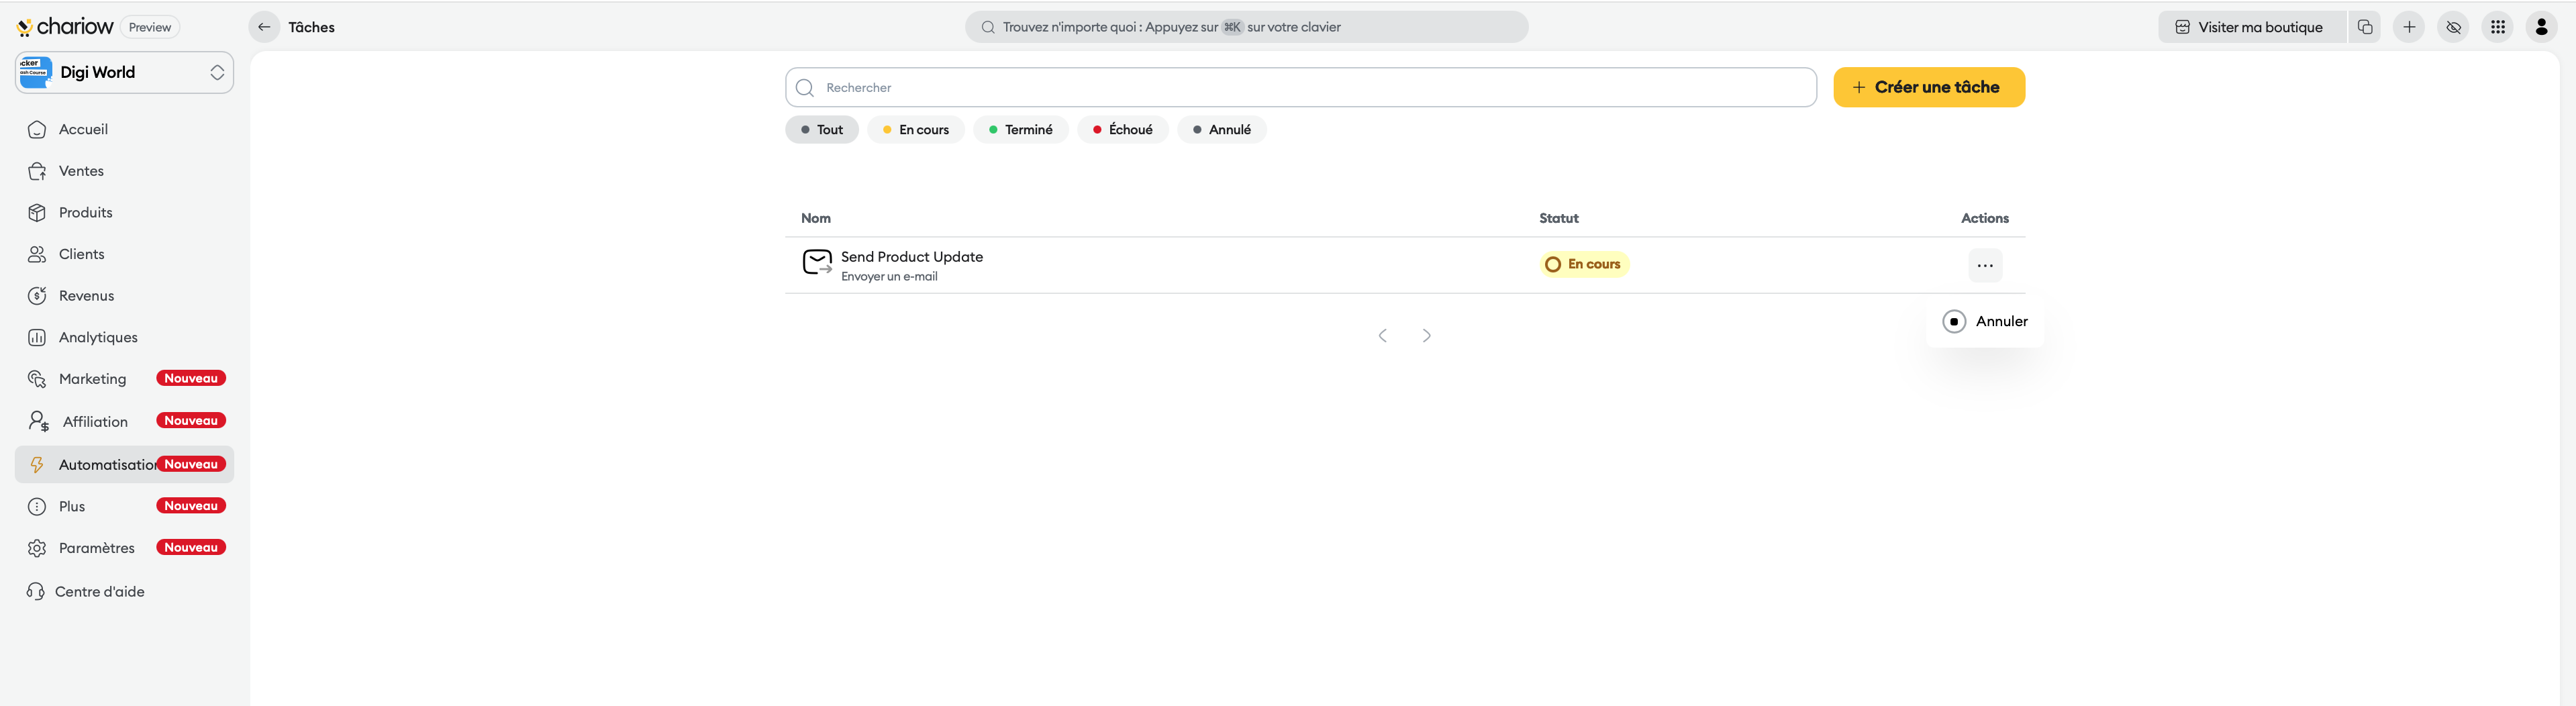
Cancel a task: For a pending or in-progress task, click the three dots (...) in the Actions column, then select "Cancel".
By clicking on a task, a detail panel opens on the right:
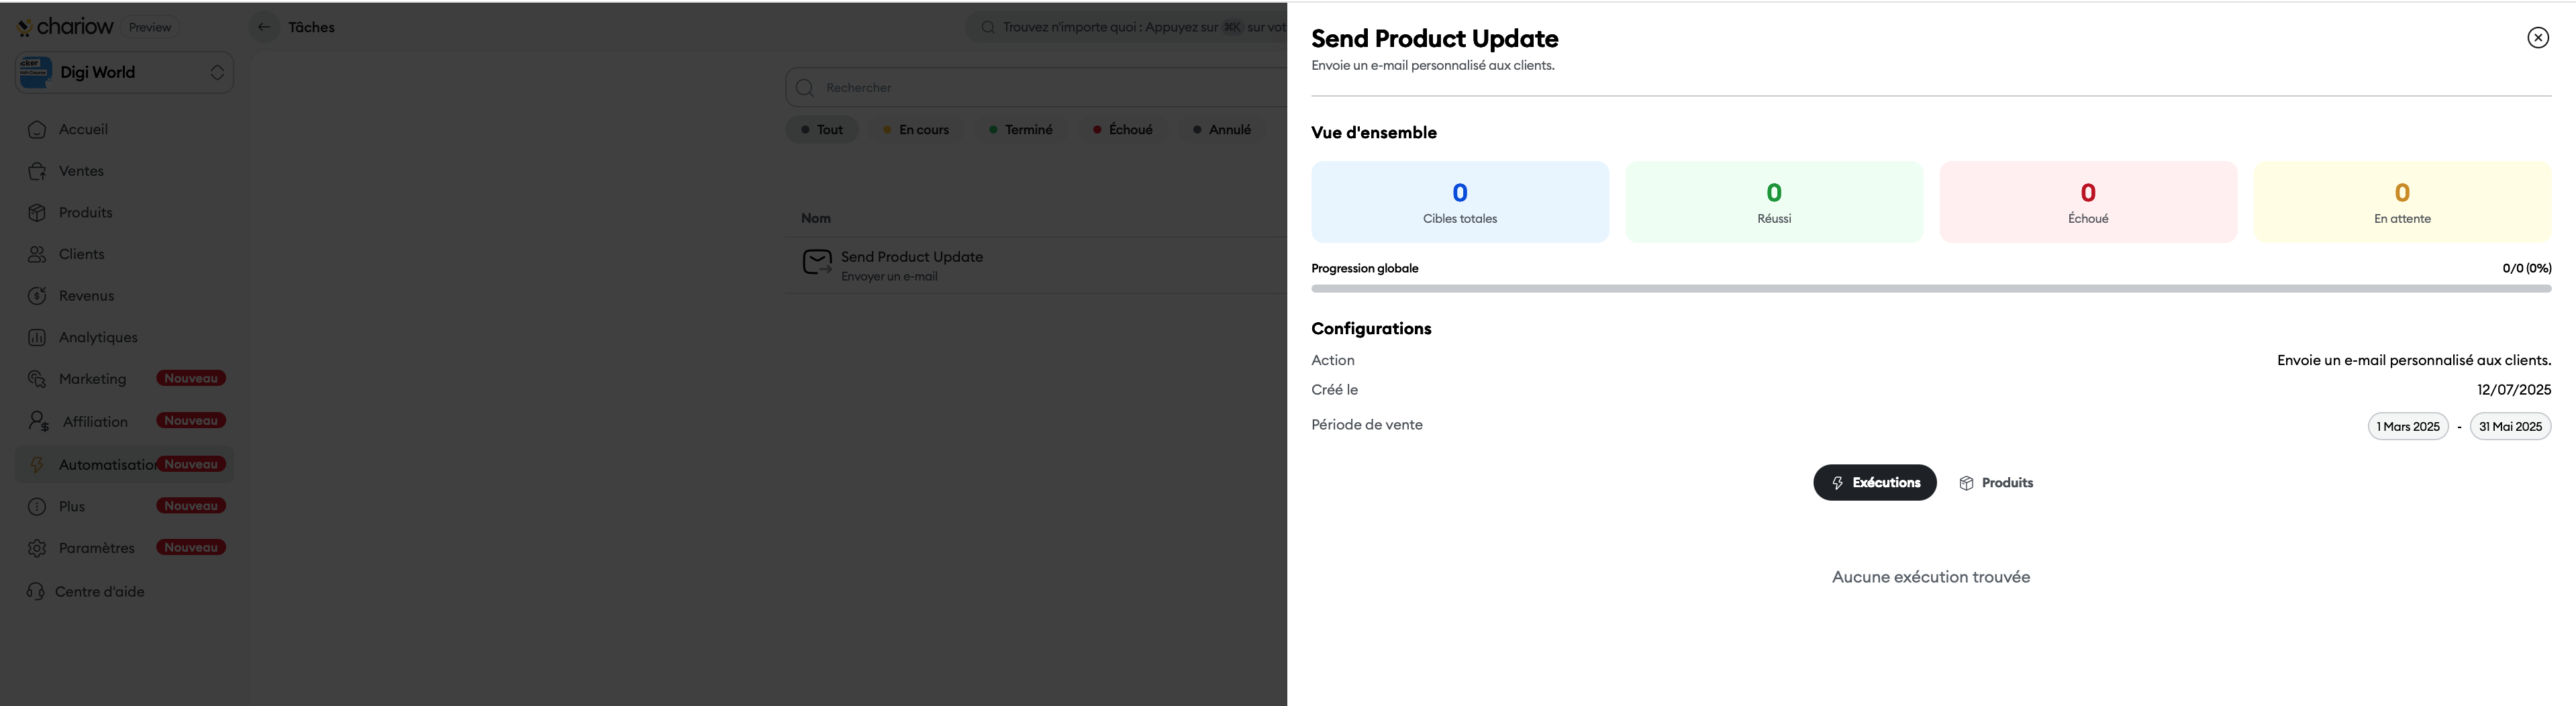
Summary: Check the total number of runs, as well as the number of successes and failures.
Run history: See the status of each message sent individually (e.g. "Pending", "Failed") with the exact time of the action.
Need help? Contact our support via chat or at [email protected]