After you’ve created your banner design, the next step is to set up how it behaves. A good setup makes sure your message reaches the right visitor at the right time. Chariow gives you several options to boost your banner’s visibility.
From your dashboard, go to Marketing, then Banners.
Click on the banner you want to set up.
Go to the Settings tab to see all the options.
The settings section lets you control when and how your banner shows up on your store.
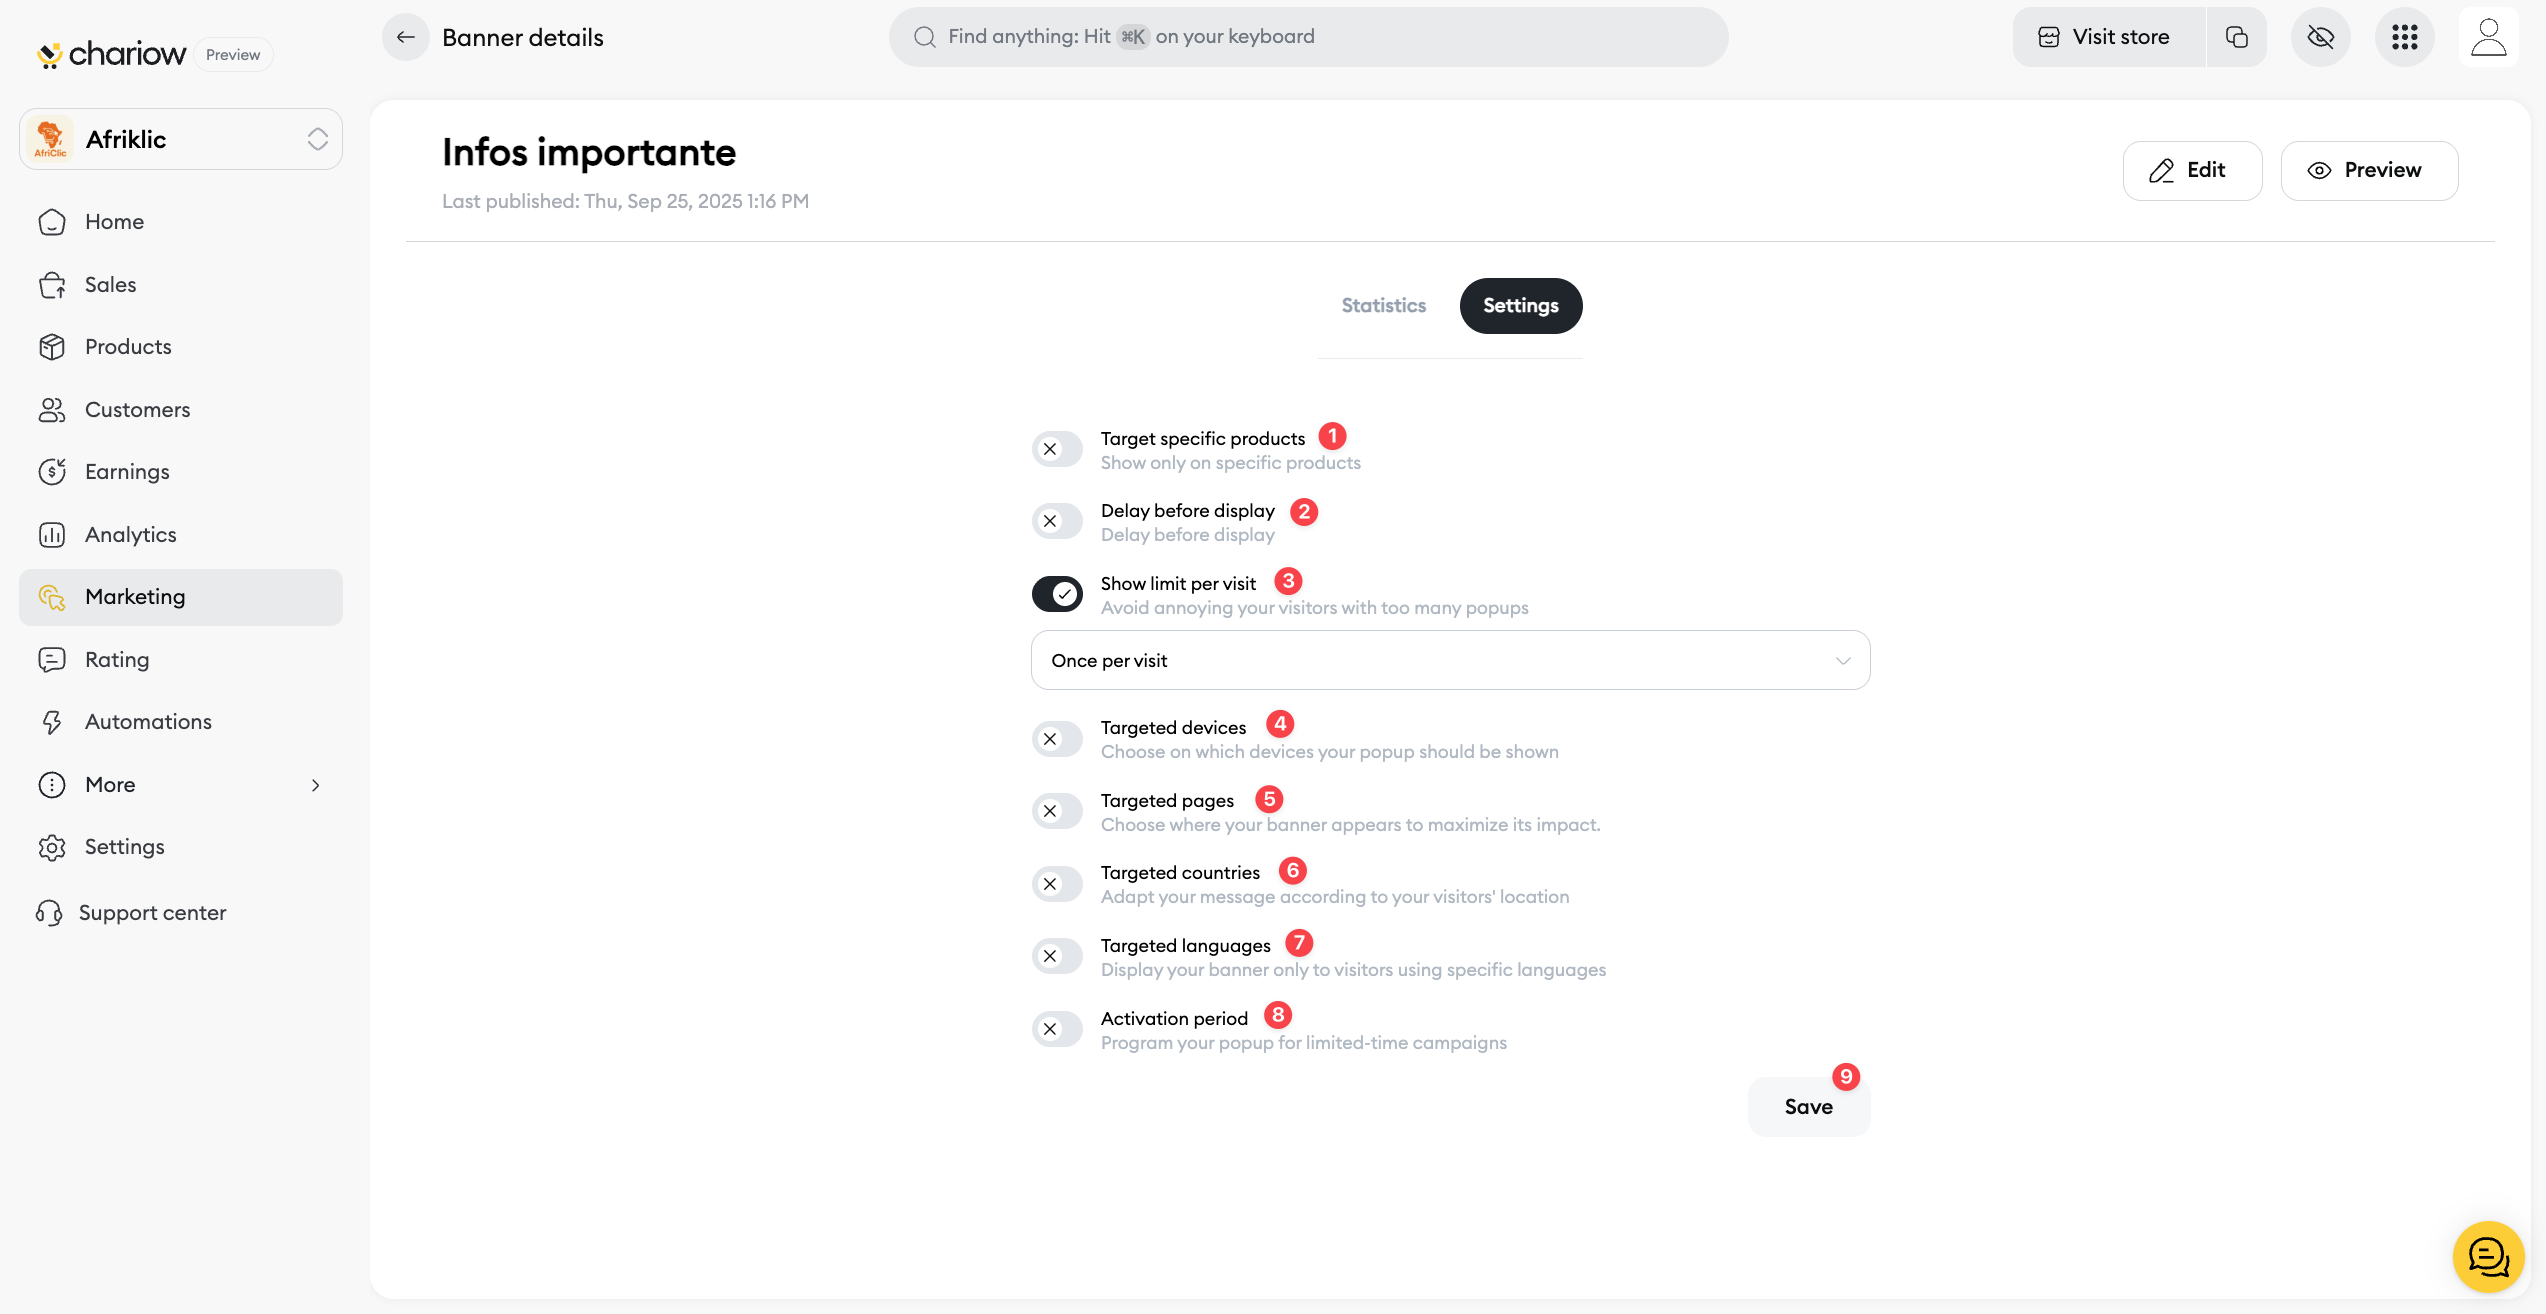
Delay before display (2): Set a delay in seconds after which the banner will show up.
Show limit per visit (3): Choose how often the banner shows for the same visitor to avoid annoying them.
Precise targeting makes sure your banner reaches the right visitors, which boosts its impact.
Target specific products (1): Show your banner only when visitors are viewing a particular product page.
Targeted pages (5): Choose the pages on your site where the banner should be displayed.
Targeted devices (4): Show the banner only on desktops, mobile devices or both.
Targeted countries (6): Tailor your message to your visitor's location. Perfect for promotions in a specific region.
Targeted languages (7): Show your banner only to visitors browsing your site in certain languages.
Activation period (8): Schedule your banner to show up for a limited time only. It's perfect for sale campaigns.
Once you've set up all the settings, click on Save (9). Your banner is now ready to be published and can engage your visitors according to your new rules.
Need help? Contact our support via chat or at [email protected]