Exporting your sales data is key to tracking your shop's performance. You can export this info in the format you prefer to use for your analytics, accounting, or to create custom reports.
From your dashboard, click More in the sidebar menu.
Select Exports.
Click on the Create Export button (1) at the top right.
A pop-up window will open, letting you set up your export.
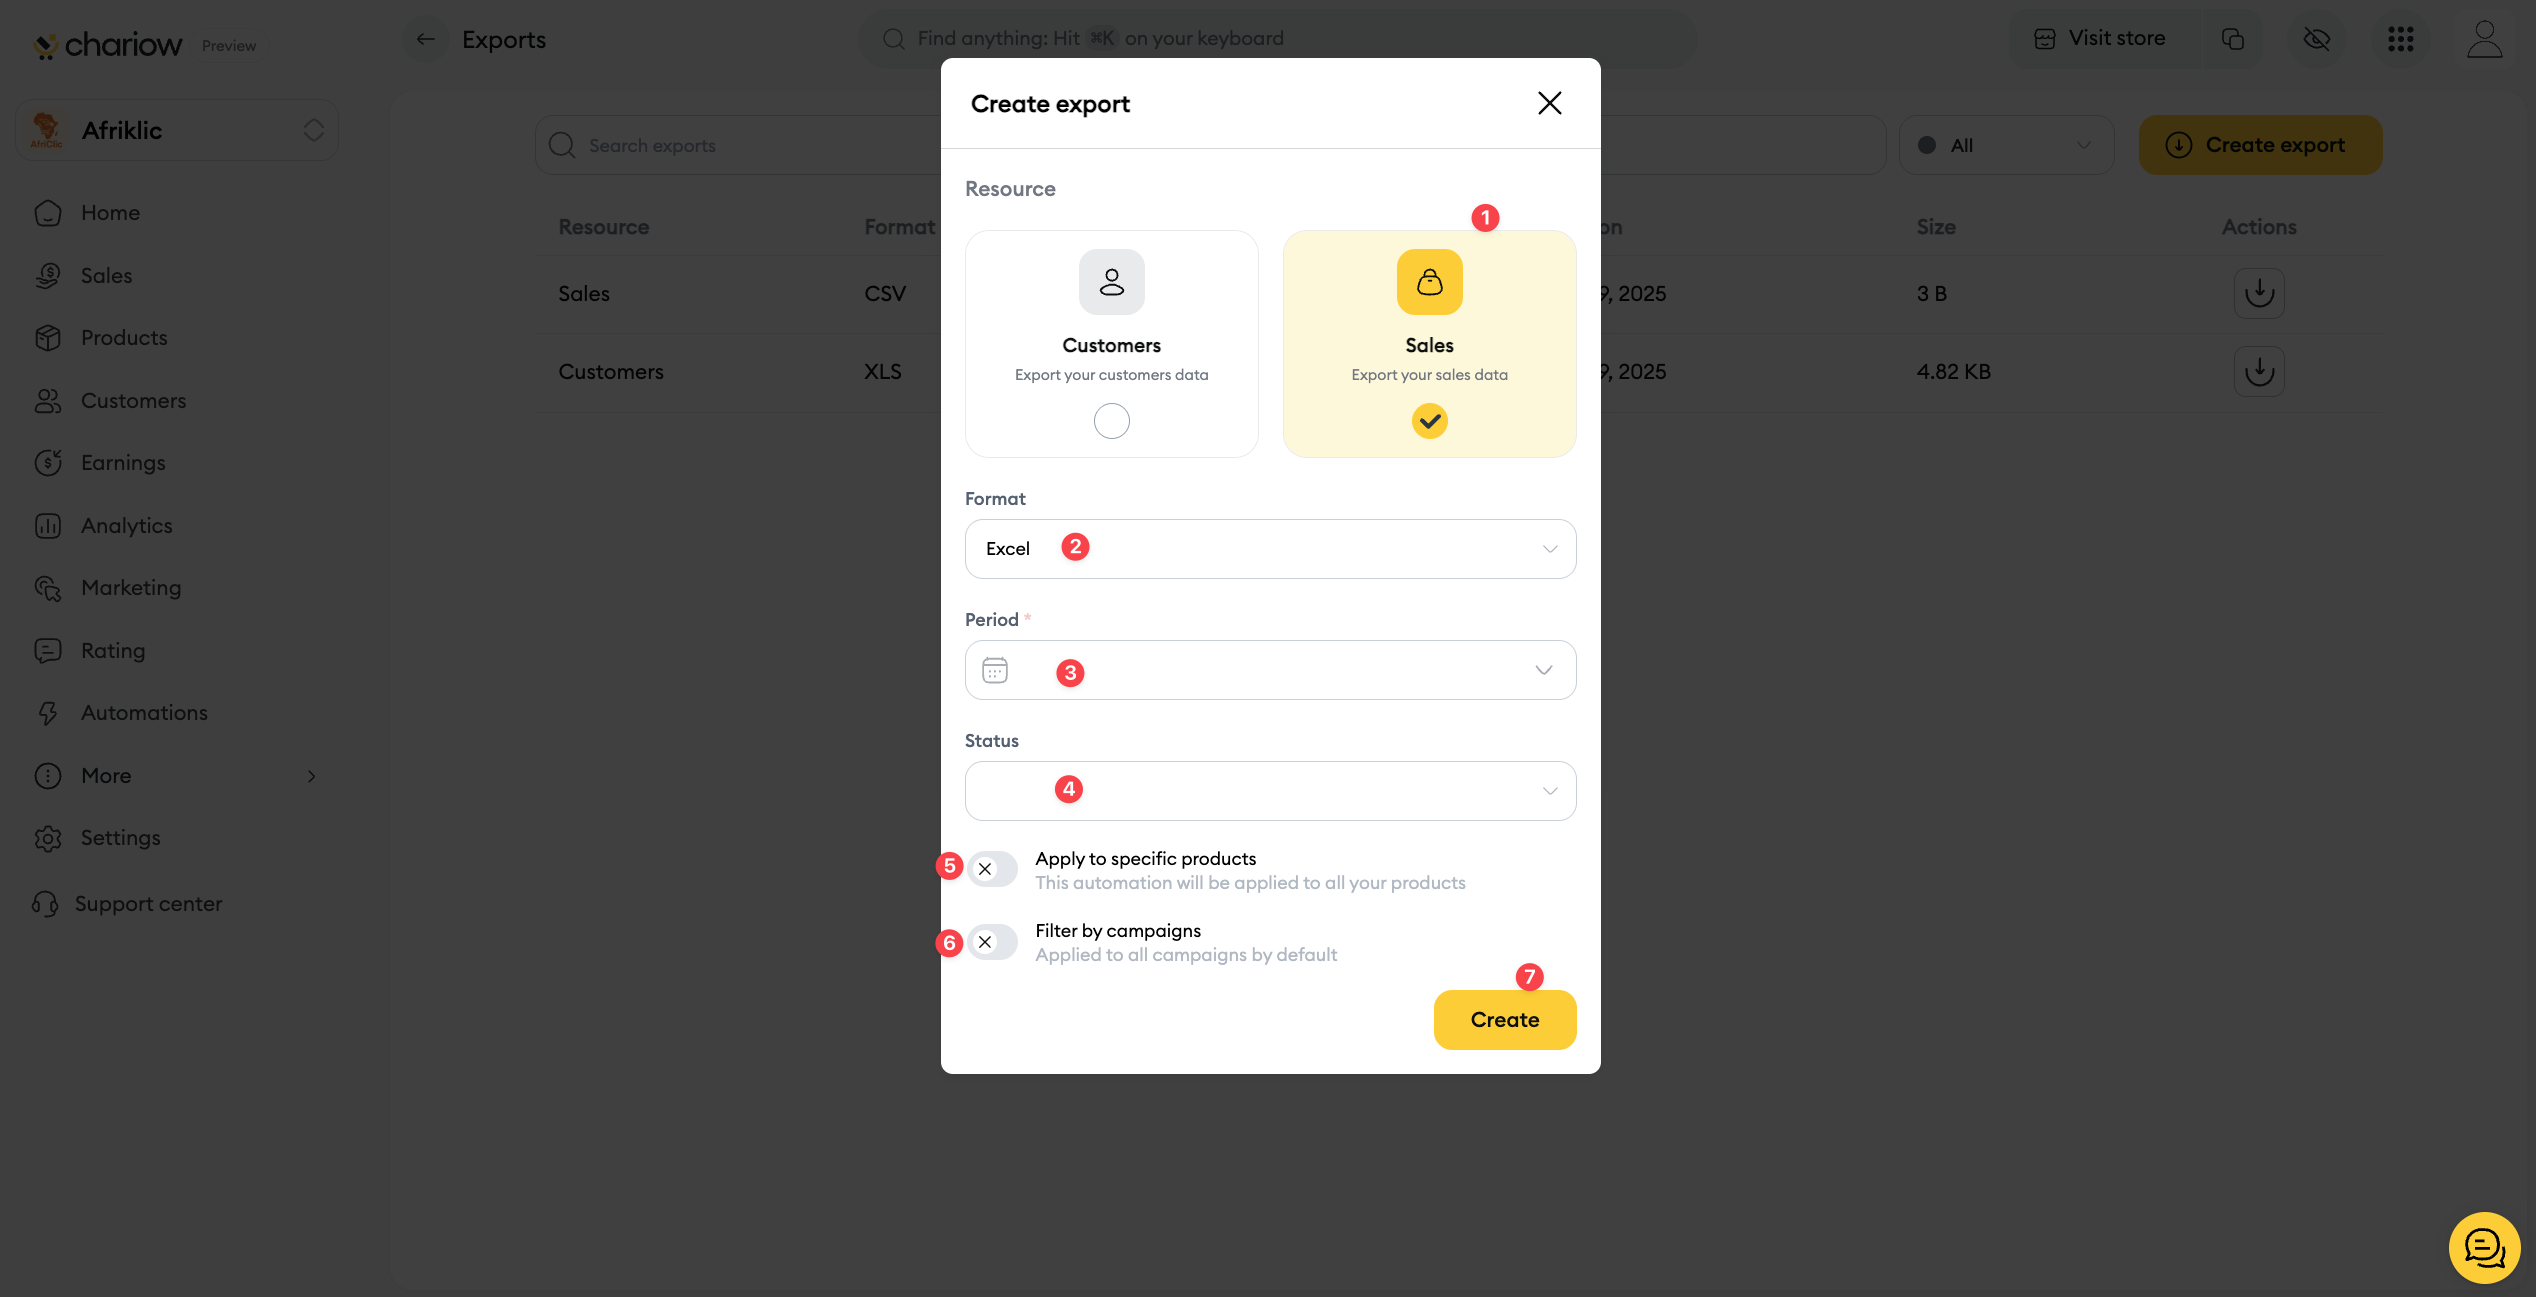
Resource (1): Make sure the Sales option is selected. This means you want to export data related to sales.
Format (2): Pick the export file format (for example, Excel).
Period (3): Set the sales period you want to include in the export.
Status (4): Use the Status dropdown menu to filter sales by status (for example: successful, failed, pending).
Filters: To refine your data, you can use the Apply to specifics products (5) and Filter by campaigns (6) filters.
Create (7): Once you’ve set all your options, just hit the Create button.
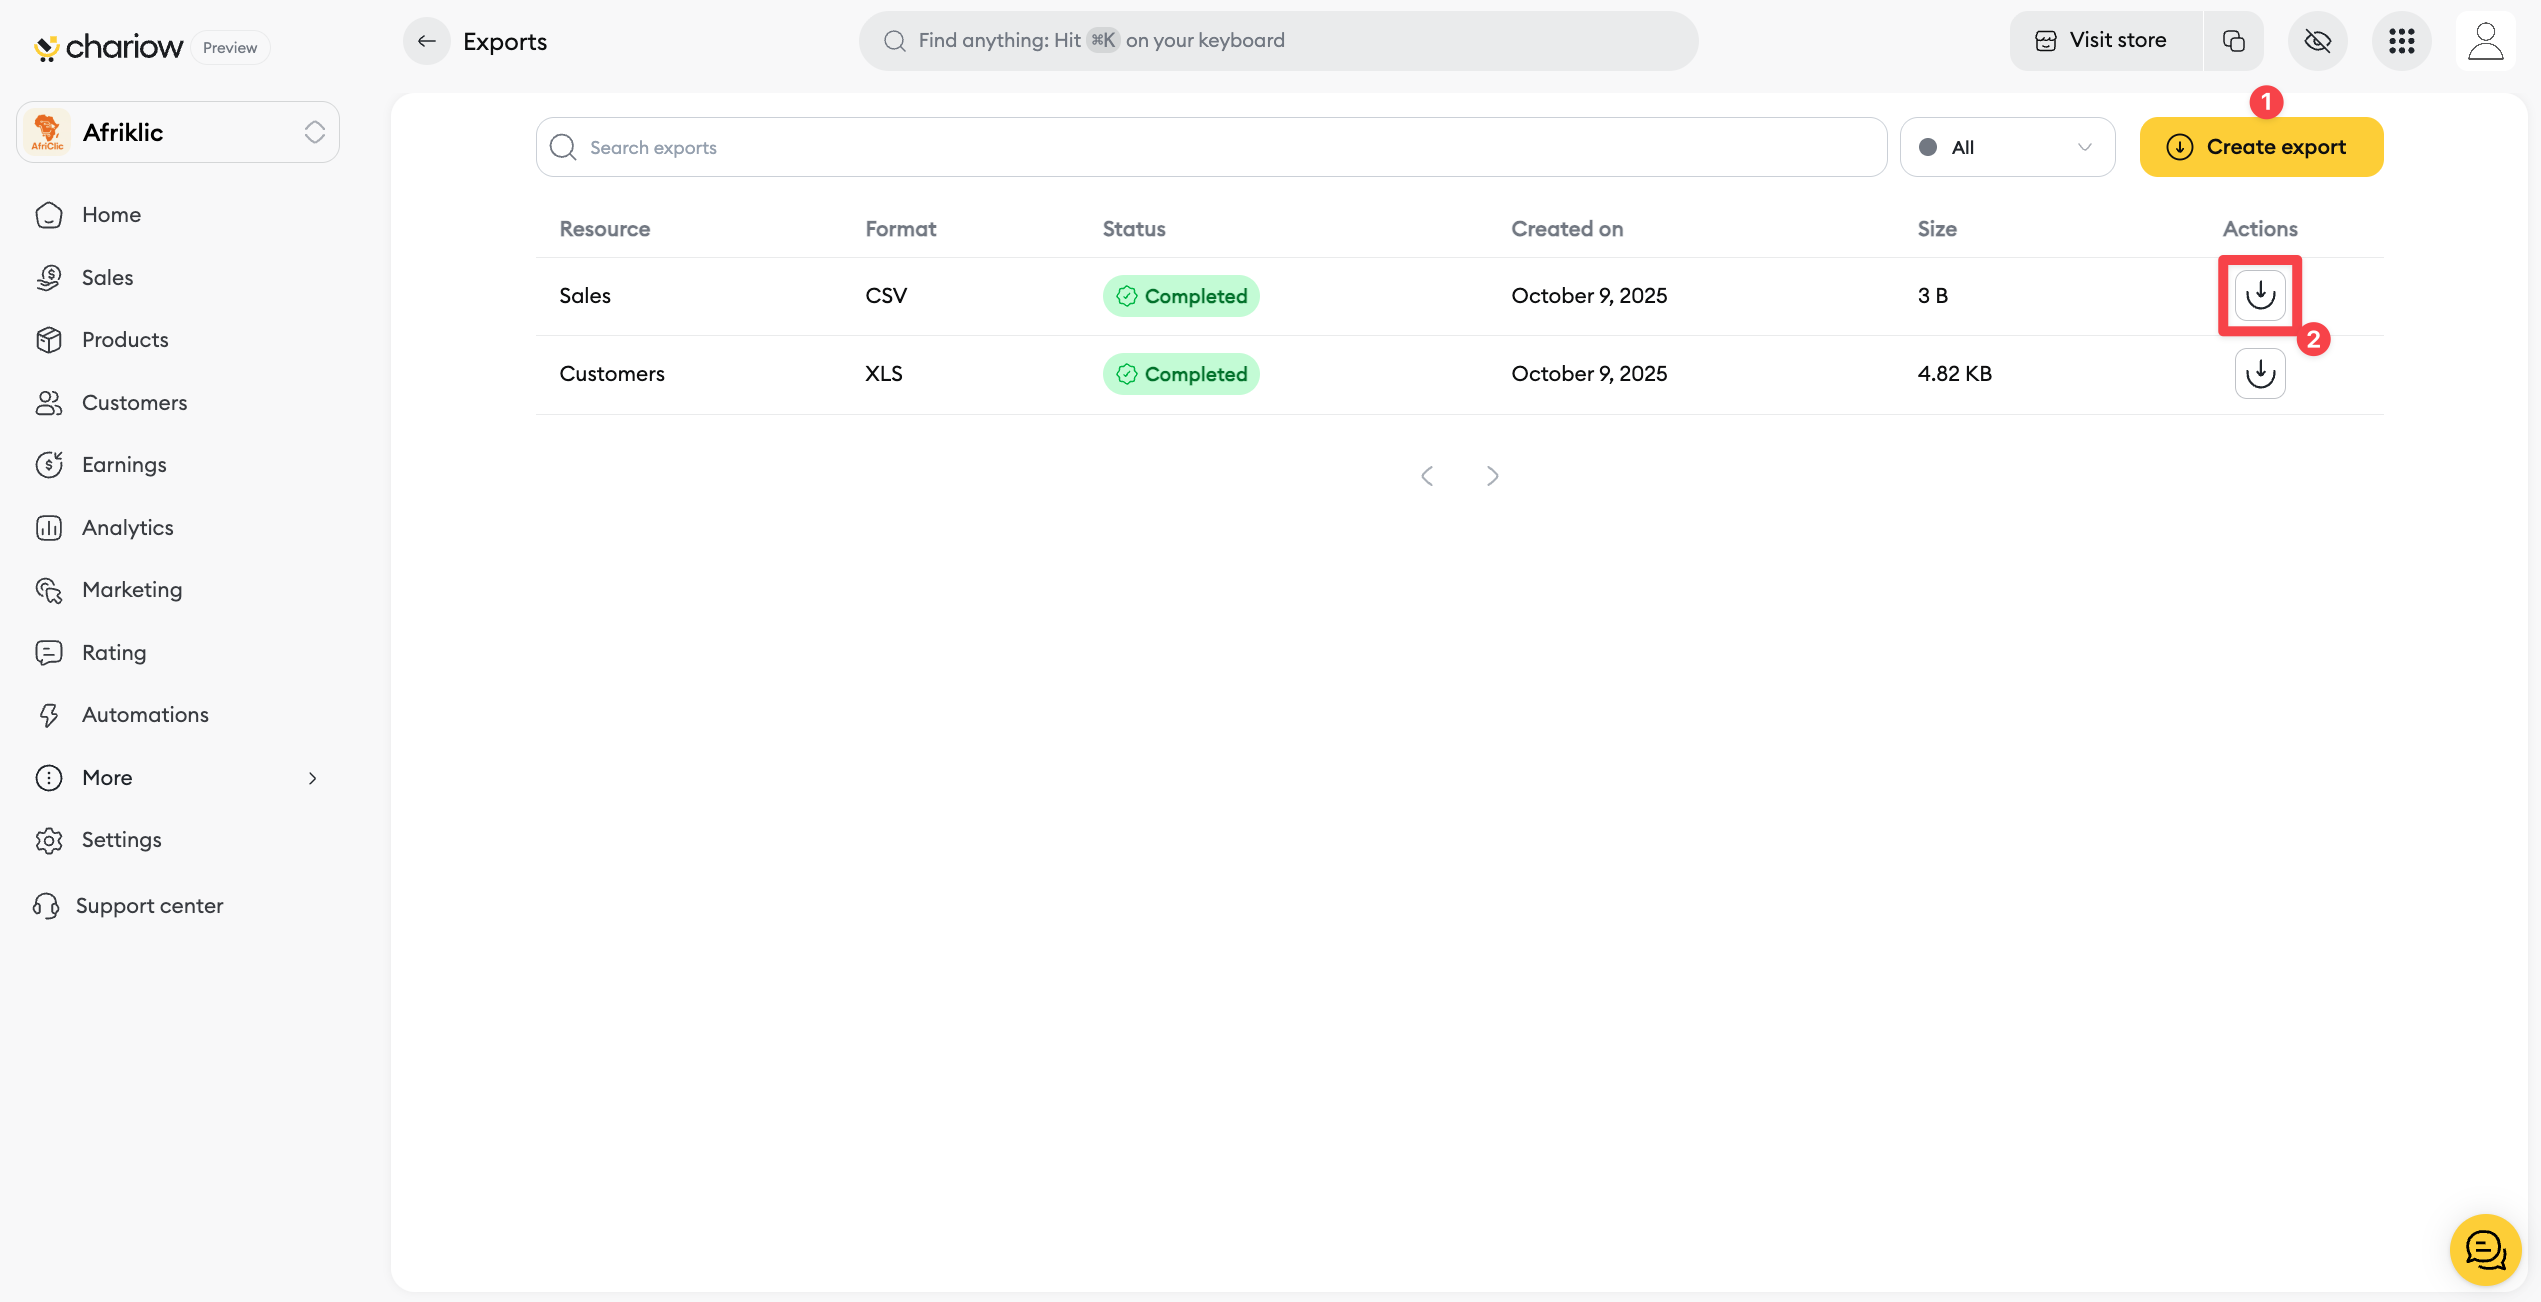
Once the export has started, you’ll find it in the exports list. This might take a moment. The status Pending means the process is ongoing.
When your export status shows as Completed, you can download your file. Just click the download icon (2) in the Actions column.
Need help? Reach out to our support via chat or at [email protected]